

This project isn’t on the boat at all but it can make getting the boat on and off the water faster and easier for the trailer sailor. I’ve used trailers for most of my adult life, so I’m pretty good at backing them up. But getting the hitch ball right under a coupler on the first try is next to impossible without some kind of aid, either human or otherwise. I’ve tried the antenna ball gizmos but they’re not accurate enough if you have a really heavy trailer that you can’t muscle into place. And bless her heart, the first mate tries to line me up right but it doesn’t work out most of the time, which means one or both of us can easily get frustrated. Not a good way to start or end a great cruise.
If you’re fortunate enough to own a late model tow vehicle, it might already have a backup camera installed as original equipment. If you’re not that fortunate, one way to fight new car or truck envy is to install an aftermarket backup camera on your existing vehicle. If you’re familiar with installing electrical accessories on a car, it isn’t difficult. And with the flood of electronics coming from China, it’s affordable too.
A backup camera system comprises a camera and a monitor. Backup camera systems come as complete kits or you can do like I did and purchase the components a la carte. The components are available with traditional wire connections between them or with wireless radio transmitters and receivers. The system that I chose was a license plate-mounted camera wired directly to a visor-mounted monitor. I purchased them on eBay but the same and similar components are available from other online retailers like Amazon, Crutchfield, and others.
Like having an eye in the back of your head
The backup camera is small and available in two basic technology types: the lower quality, less expensive CMOS (complimentary metal oxide semiconductor) type and the higher quality, more expensive CCD (charge-coupled device) type. Within each type, a variety of specifications determine the quality of the picture that they produce and the application in which they can be used, like:
- Resolution
- Viewing angle
- Color or black & white
- Night illumination
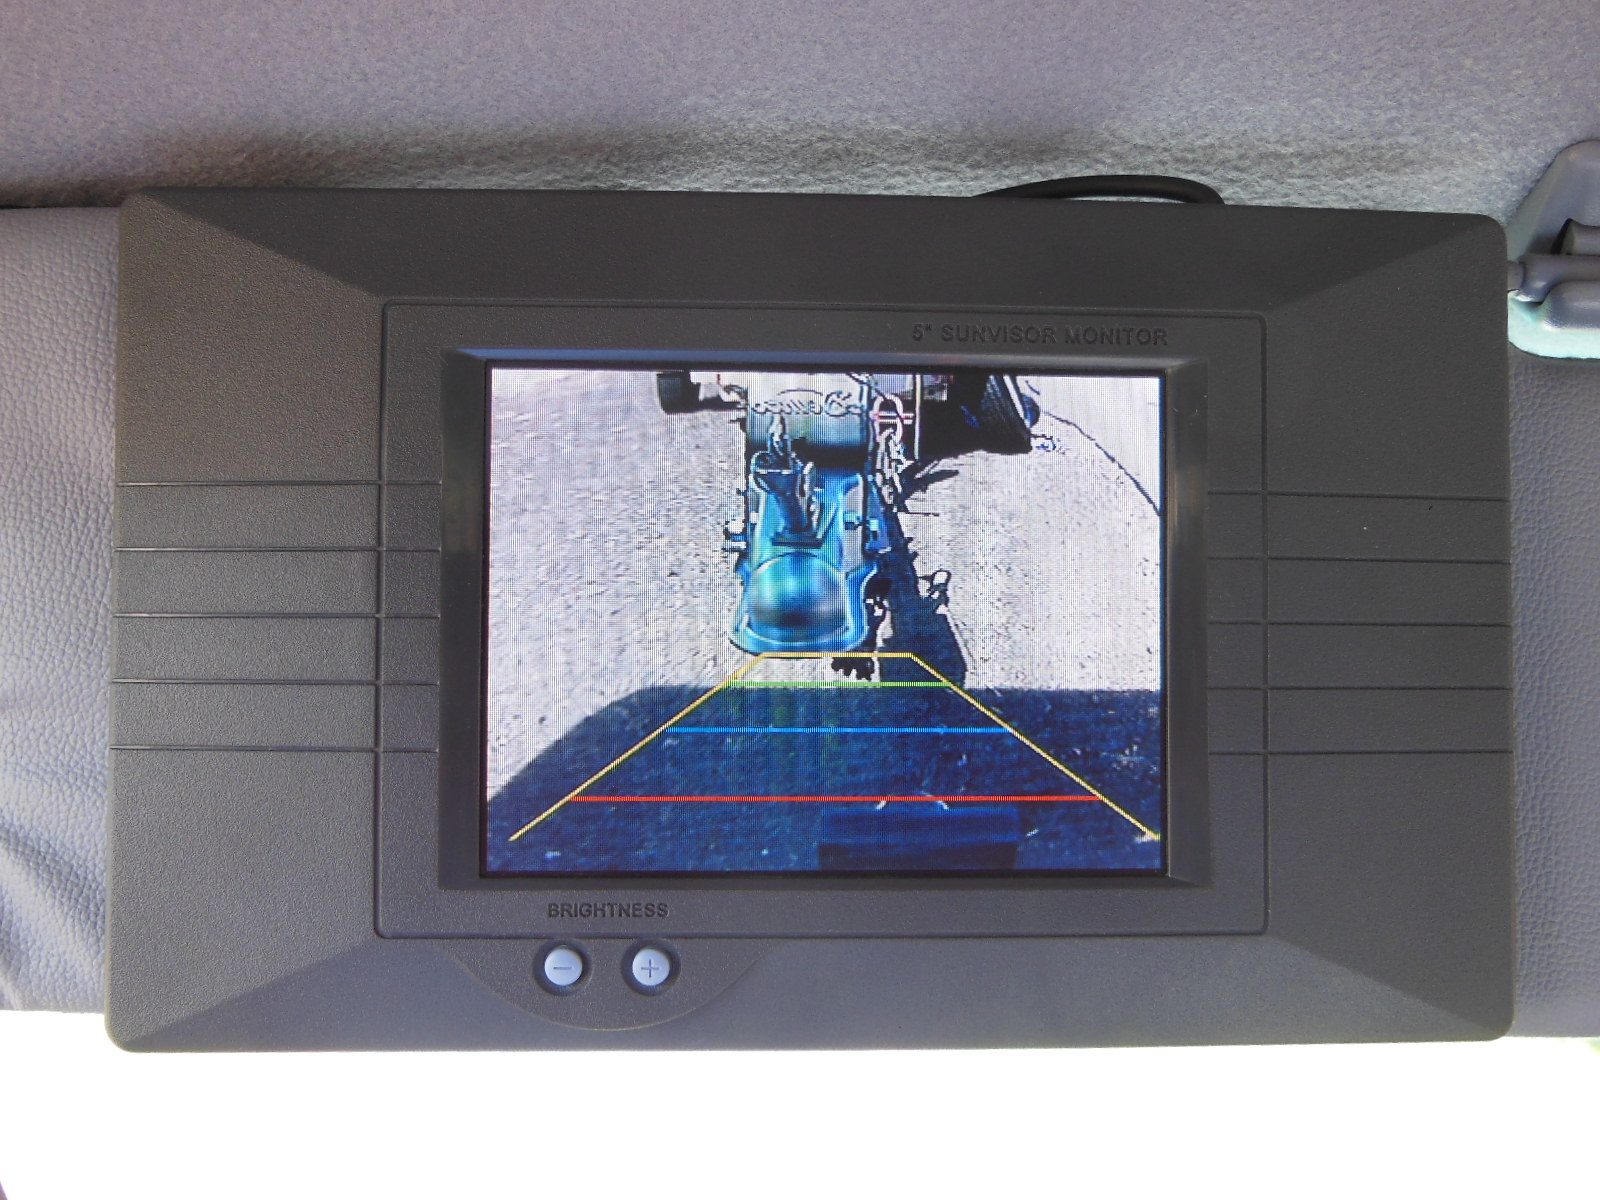
- Scale lines overlay (See the picture of the monitor below. These are more useful when the camera is aimed near horizontal and not very useful for hitch alignment)
- Weatherproofing
- Enclosure & mounting
You mount the backup camera somewhere on the back of your vehicle. Common locations for the camera are mounted onto or into the vehicle’s roof, lift gate, bumper, or license plate frame.
Backup cameras are typically used for backing and parallel parking the vehicle, so they are aimed close to horizontal. To use it for aligning the vehicle’s hitch ball with the trailer coupler, the camera should be aimed more downward. As such, it doesn’t work as well for long distance backing or parking. With large enough viewing angles, you might even be able to use it to judge how far into the water to back your boat at the launch. In my case, the view isn’t tall enough but I typically use the side mirrors instead anyway. Something to consider.
I chose a common, inexpensive, license plate-mounted CMOS night vision camera for its ease of installation and because I only use it for connecting my trailers. The negative reviews on this camera are mostly about poor cold weather performance and poor waterproofing. I don’t intend to use the camera much during the winter. I can always revert to the old trial and error method if it’s so cold that the camera doesn’t work. I disassembled the camera when I received it to confirm that it was completely sealed, which it is. However, as extra insurance against water getting into the camera, I added a drop of liquid electrical tape where the wires exit the camera enclosure. The way mine is mounted, water will easily run down the cable to the exit hole.

The camera uses three electrical connections, power and ground to the camera and video signal from the camera to the monitor. I routed the power wires to my truck’s taillight cavity where I connected the ground wire to the common ground wire of the taillight assembly and the positive wire to the backup light positive wire. This makes the camera turn on only when the truck’s transmission is in reverse gear. I routed the video signal on top of the truck’s frame into the engine compartment and then through a grommet in the firewall, behind the dash, up inside the driver’s side windshield pillar, and then to the monitor clipped onto the sun visor.
I can see clearly now
You mount the LCD monitor somewhere in the vehicle’s cab where you can see it. They are available in a variety of sizes from tiny ones built into a rear view mirror to large ones suitable for watching DVDs and mounted on or in the dash of your vehicle or the roof. They are also available with a variety of specifications and features that make them useful for different applications:
- Maximum picture resolution
- Screen ratio
- Video signal standard (NTSC, PAL)
- One or more video source inputs
- Picture quality controls
- Picture mirroring (necessary for natural steering while backing)
- On-screen menus
- Automatic source detection and selection
- Infrared remote control
I chose a simple 5″ monitor that clips to the sun visor for its size and ease of installation. It’s held onto the visor by two metal clips similar to a garage door opener remote control and by a strip of Velcro. When not in use, it folds neatly out of the way. Most of the monitors that are integrated with a rear view mirror get bad reviews for the quality of the mirror (particularly at night) when the monitor is off. The picture size is also smaller. For precisely aligning your hitch ball and trailer coupler, you might want a larger screen.
Like the camera, the monitor uses three electrical connections: power and ground to the monitor and video signal from the camera to the monitor. I routed the power wires down to behind the driver’s side kick panel where I connected the ground wire to a ground screw and the power wire to the same backup light wire as the camera. This makes the monitor also turn on only when the truck’s transmission is in reverse gear. I connected the video cable from the camera where it ended in the windshield pillar to the input jack of the monitor. The wiring is all concealed except where it emerges from the pillar trim and enters the monitor.
Amaze your friends and family
I’ve used the camera numerous times since installing it. It couldn’t be easier to use. There are no switches to toggle. I simply shift into reverse, pull the visor down, and I can back my hitch ball right under the trailer coupler the first time without help from anybody. When I shift out of reverse, the monitor and camera turn off. It has completely eliminated the need for the first mate to guide me back to the coupler and vice versa, which never works on the first try. Zero frustration. It’s especially fun to use when you don’t tell a helper that you have it and then magically back up to the exact spot.
The Bottom Line
Suggested price: n/a
$tingy Sailor cost: $56.14
Savings: n/a
What do you use to accurately hook up your trailer?

Thanks for sharing!
Sent from my iPhone
>