

This is a guest post by Kevin Curran. Kevin sails his 1976 Newport 30 out of San Diego, California and shares his adventures and DIY tips at Captain Curran’s sailing blog.
As a novice sailor, it was common for me to run into all sorts of trouble out on the water. One of the more common issues I had was depleted batteries. After spending the day out sailing with the engine off and the electrical devices on, I would find that my 12 volt starting battery had sunk below 10 volts. That meant that I couldn’t start my diesel engine. At that point, my crew would panic and I would start trying to hand crank the engine. All in all, a stressful way to end the day.
But those days are long gone. I fixed the problem. I installed a small solar panel on the stern of my sailboat. That turned out to be one of the better decisions I’ve made in my boating life.
In this article, I share a simple, four step process to help an electrical novice install a solar panel on their sailboat.
1 – Choose a panel size
There are a lot of variables to consider when choosing the physical size and electrical output of your panel. You need to consider your daily amperage needs, the average number of sunshine hours/day in your location, and the amount of physical space available for your panel. A common choice for sailors with a medium size boat is a 100 watt panel.
A 100 watt panel will generate about 500 watt hours/day. The simple equation is:
[watts of output] X [hours of sun on the panel/day]
So, for a 100 watt panel, the equation is 100 x 5 = 500 watt hours.
This is enough to run most cabin lights, instruments, and accessories and still keep your battery bank topped off. For more information on the subject, this article helps estimate how much solar power you need for your boat. Talk to an electrician if you’re unsure of the best panel for your electrical needs.
2 – Mount the panel
I chose to mount my panel on my stern rail. Some skippers prefer to mount the panel on top of their canvas dodger. Either way, the panel will rest on tubing. Any boating store will have rail mounts. Once these are attached to your railing, you can bolt your panel onto the rail mounts without too much difficulty. You can read a more detailed description of this process in this article describing mounting solar panels on a sailboat.
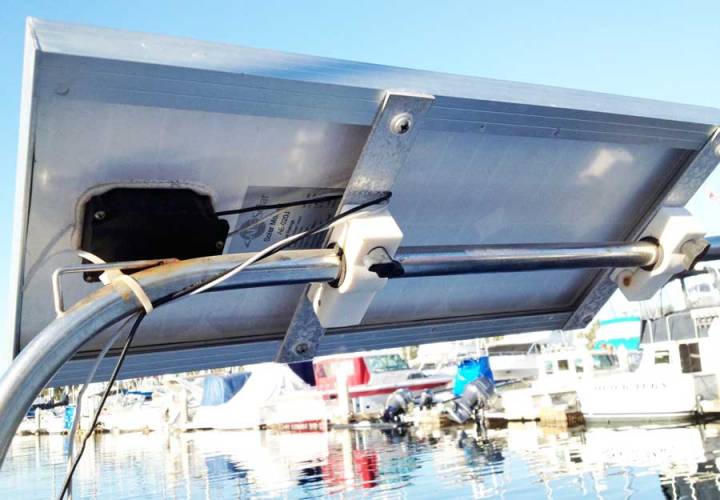
3 – Install the charge controller
This is a necessary electronic part. The charge controller is a small panel that you connect between the panel and your battery bank. The controller helps regulate the electrical flow from panel to the battery. It prevents overcharging the battery and prevents current from flowing in the opposite direction from the battery to the panel. It’s either included with the solar panel as a kit or purchased separately. This part should be installed somewhere accessible in the main cabin.
4 – Wire the parts together
Assuming you already have your battery bank in place, then all you need to do is wire everything together. I use marine electrical wire. All boating stores sell this. This wire resists the degrading effects of the marine environment. I used 18 AWG size wire. However, every sailboat is different, so check with an electrician if you’re not sure of the best gauge for your system.
Attach a red wire to the positive output terminal of the panel and attach a black (or yellow) wire to the negative terminal on the panel. Then drill an inconspicuous hole in the cockpit and guide the wires down into the main cabin. Attach the wires to the solar panel input terminals on the solar controller, observing correct polarity.
Next run another pair of wires from the solar controller output terminals to the positive and negative posts on your battery.
Make sure to use marine grade ring terminals when attaching wires to the battery and to the controller. They help prevent corrosion. Also, for circuit protection, I recommend connecting a fuse in the positive wire close to the positive battery post.
The next thing you know, you’re harvesting energy from the sun.
It has been years since I installed my panel and I am proud to report that not once have I been left stranded with a dead battery.
Best of luck with your installation!
[$tingy note: If you don’t have a suitable mounting location for a solar panel but you have an outboard motor with generator coils, another option is to Upgrade Your Outboard Motor to Charge Your Battery.]
Would you like to be notified when I publish more posts like this? Enter your email address below to subscribe to this blog and receive notifications of new posts by email. You will also receive occasional newsletters with exclusive info and deals only for subscribers and the password to the Downloads page. It’s free and you can unsubscribe at any time but almost nobody does!

My plan also. I’m looking at 2 or 3 250 watt panels on an arch. That should give me everything I need.