

While I was doing my How To Repair a Rudder project, I noticed that the tiller bushings were worn and loose. At the time, I hoped they would last the season until I figured out how best to replace them. That was wishful thinking. While putting Summer Dance in the water for our last cruise, one of the bushing flanges nearly fell off in my hands. It didn’t keep us from sailing that day, but it meant I was going to have to make the repair sooner rather than later.
A certain Catalina parts dealership doesn’t offer replacement bushings. The rudder is a “non-serviceable” item. I’d seen bronze bushings at hardware stores before but my luck has always been that they’re the wrong size for the job at hand.
This time, I was in luck! Lowes happened to have 3/8″ x 1″ flanged bronze bushings with 1/16″ walls. The C-22 tiller bolt is 3/8″ in diameter and the original bushings are seated in a shallow countersink the thickness of the bushings, which isn’t much. They seem to be made of paper thin copper. Since the rudder is 1-1/2″ thick, two of the bushings would be more than long enough, one from each side.
Like a hand in a glove
The original tiller bolt hole is slightly larger than 3/8″. I drilled it out to 1/2″, the outside diameter of the new bushings. Then I used a Forstner bit to create a 1/16″x1/16″ counter sink on each side for the new bushing flanges. I cut just under 1/4″ off the length of each bushing and filed off the sharp edges. This step is important to fully press the bushings into the rudder. Otherwise, the sharp edges can catch in the new hole. I used a bar clamp to press the new bushings into the new holes equally from both sides simultaneously. They fit perfectly snug without forcing. No epoxy is necessary. For good measure, I sealed the edges with Dr. Tolley’s Creeping Crack Cure.
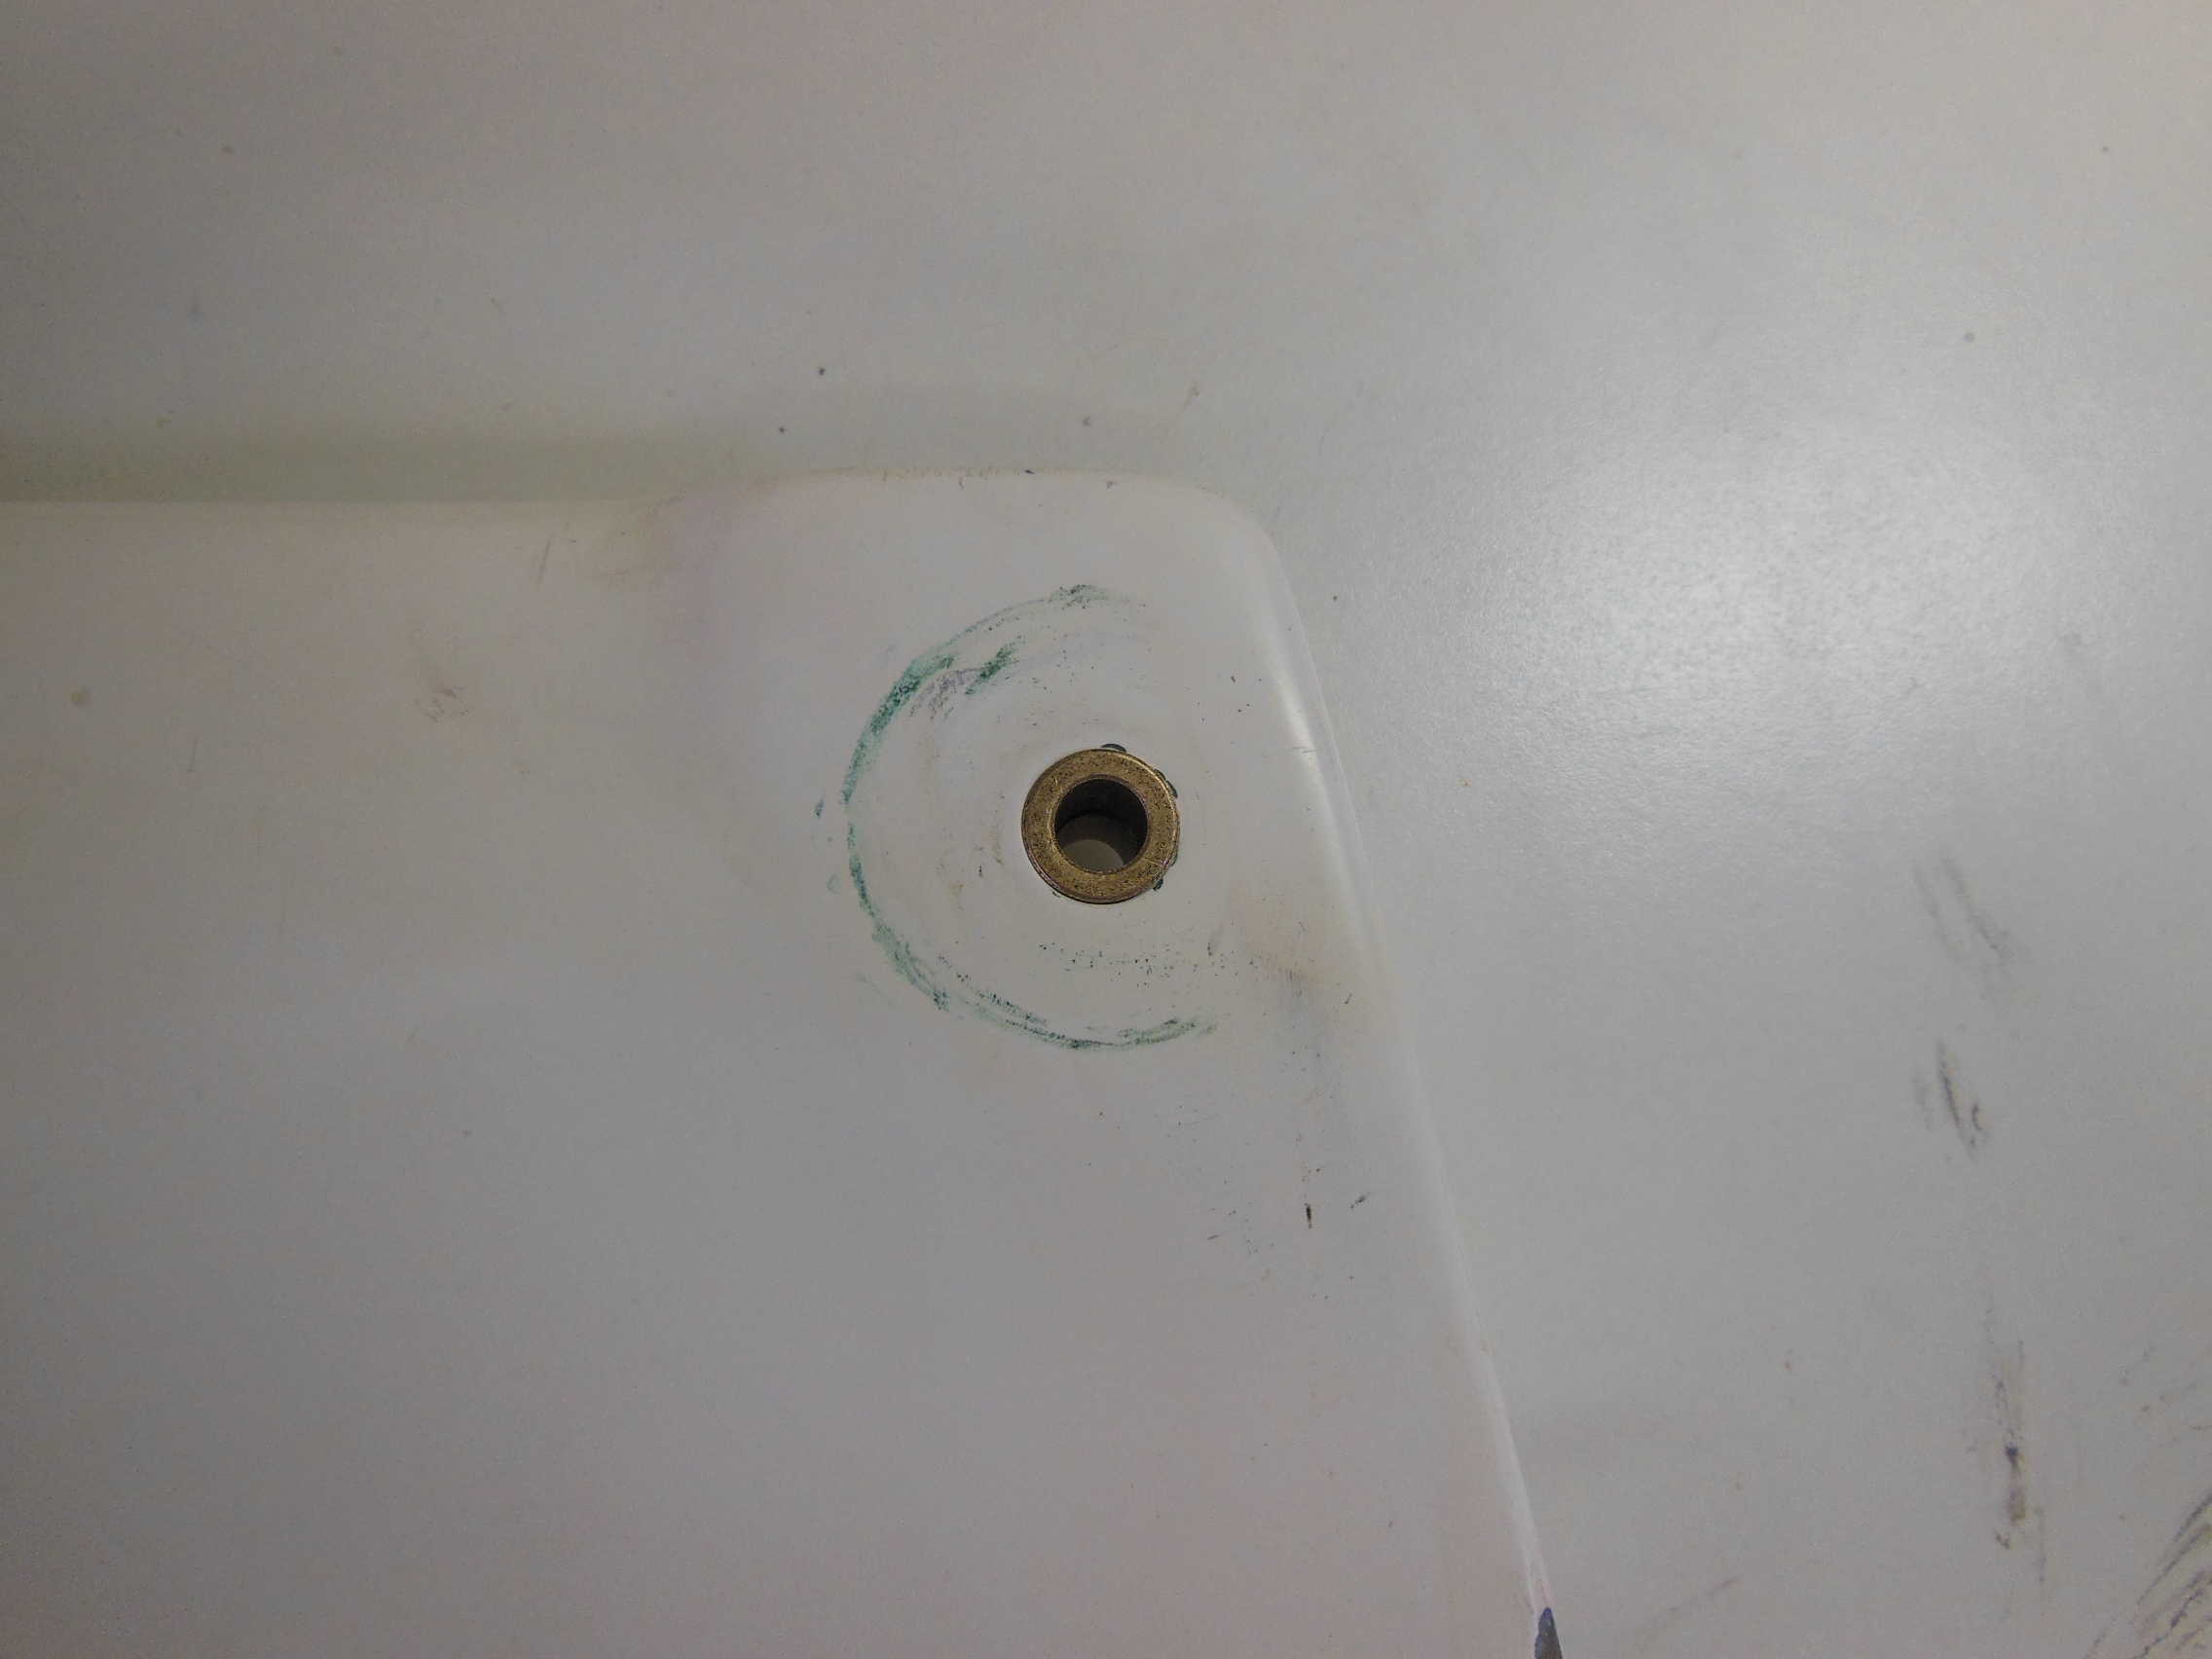
The repair looks like factory manufacturing. The tiller bolt now has a close fit and plenty of bearing surface that will not wear out like the original bushings. An added benefit is the flanges of the new bushings make a flusher fit with the tiller straps. The tiller now has a less slop with the rudder, resulting in a more responsive feel.
The Bottom Line
Suggested cost: n/a
$tingy Sailor cost: $7.31
Savings: n/a
If you trailer your boat, do you leave the tiller attached to the rudder when stowed or remove it?

Great idea and simple to execute. I found a 1/2” aluminum rod and cut off a 1-1/2”piece. Then bored a 3/8 hole thru it. Your approach sounds easier!
Mike