

Among several projects that I’m working on this winter is adding some boom rigging to Summer Dance: mainsail outhaul, jiffy reefing line, and topping lift. I’ll dedicate posts to each of those projects later but this post is a tip that I want to pass on to those that might be doing similar projects.
Each of those projects requires some hardware mounted on the boom. I carefully planned the hardware placements with all 3 projects in mind, 4 actually. What I wanted to avoid was mounting hardware on the boom for one project and then discovering later that it’s in the way of the hardware for another project. I’ve seen other boats that look like seventh grade shop projects with holes drilled all over from hardware added, moved, and removed over the years. That doesn’t appeal to me. I consider fine craftsmanship as a thing of beauty and an end in itself.
After figuring out where to mount everything out of the way of everything else on the boom, I needed to accurately lay out where I would drill the mounting holes. Most projects are simple, place the hardware where you want it, mark the holes, and drill. That might have worked okay, but I prefer more precision. I would be mounting three cheek blocks and five eye straps on the little C-22 boom. I wanted most of the parts centered on the sides of the boom but some of the eye straps needed to be off-center to clear other hardware. What I came up with is an easy way to quickly and accurately lay out any distance around the circumference of a cylindrical object. This will work for masts, booms, railings, and any other cylindrical surface. In essence, by flattening out the circumference of the surface, you can divide it mathematically as though it were a linear surface.
Start by attaching one end of a piece of tape perpendicular to the axis of the object and at a prominent feature of the surface such as a seam, corner, or other mounting hole. It doesn’t matter what the feature is so long as you can easily reattach the tape in the same place later. In my case, I attached it over the mainsail slot in the boom. Then make a mark on the tape that will be the starting point of the circumference.
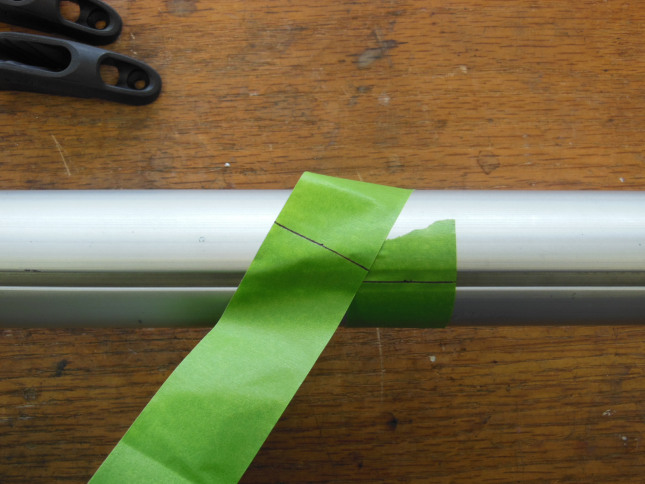
Next, wrap the tape around the object so that it overlaps the mark that you just made. Now make a second mark on the tape in exactly the same place as you made the first mark.
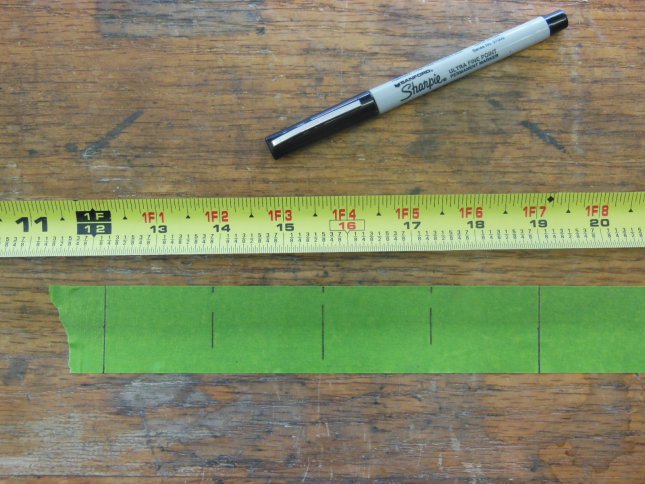
Unwrap the tape and lay it on a flat surface. You now have a measurement of the circumference of the object that you can work with normally. In my case, I wanted to divide the circumference in fourths so that I could align the cheek blocks exactly on the 3 o’clock and 9 o’clock positions on the boom. If you want to find multiple points around the object, measure the distance between the two marks and divide it appropriately. If you only need to find a single point, measure that distance from the proper end. Make marks on the tape at the locations that you want. You will transfer these marks to the object next.
Once you have your measurements marked on the tape, return it to the object and align your first mark with the feature where you originally made the mark. Wrap the tape around the object so that the second mark overlaps the first mark. Your calculated points are now ready to transfer to the object. I used pencil marks for this so that they could be removed later.
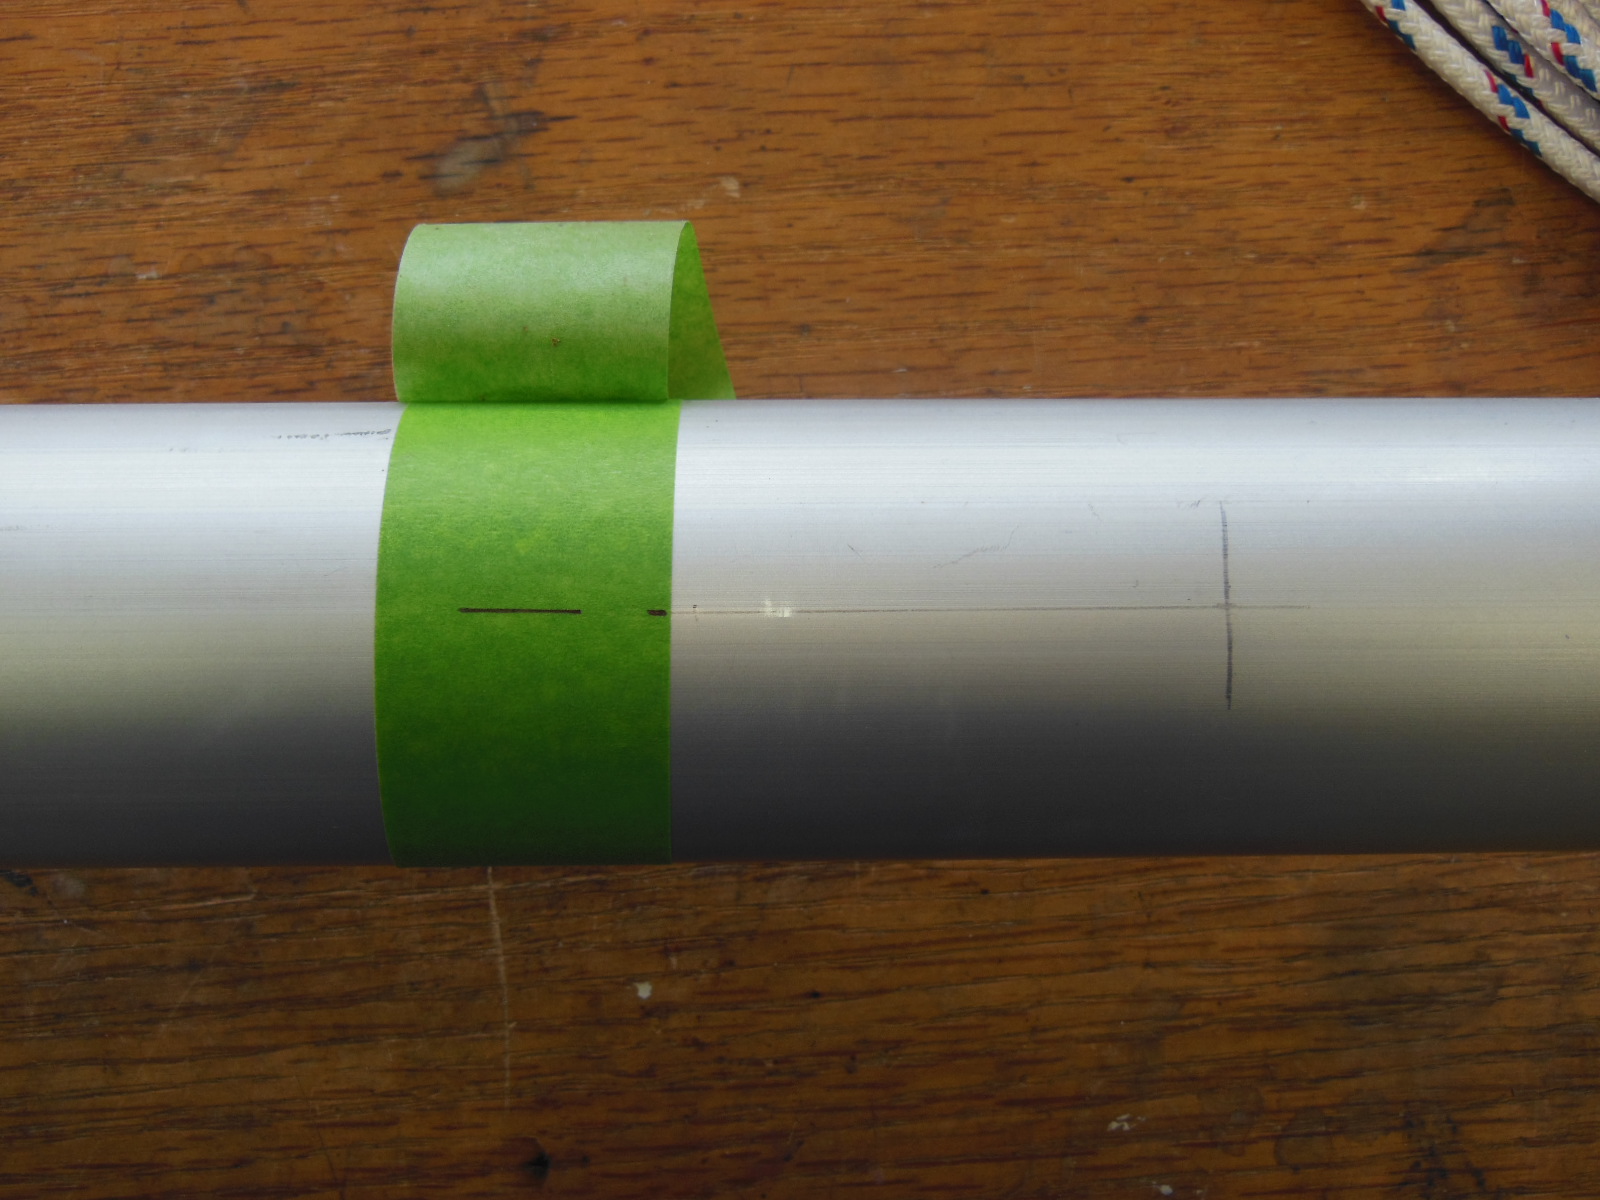
All that’s left is to take perpendicular measurements to arrive at a precise point (X) on the object for each hole, in my case, from the end of the boom. For best results, use a center punch to prevent the drill bit from wandering off from your carefully calculated points and use a drill press if you have one for clean, accurate holes.
This method may take a little longer than just eyeballing it, but the results are worth it.
Would you like to be notified when I publish more posts like this? Enter your email address below to subscribe to this blog and receive notifications of new posts by email. You will also receive occasional newsletters with exclusive info and deals only for subscribers and the password to the Downloads page. It’s free and you can unsubscribe at any time but almost nobody does!
