

I have a love/hate relationship with crib boards. I like their classic functionality and love the look of well-finished natural wood. They’re a pain to remove and replace but they’re more of a pain to store safely when the companionway is open. They’re in the way practically anywhere you set them.
The best location that I’ve seen is stored vertically in between the galley in its stowed position and the cockpit sole. I’ve seen variations on canvas bags used there but they seemed clumsy to use. I found a solution that’s almost effortless, meaning it’s likely to get used more often.
Less is more
The design is basically two PVC channels mounted horizontally to the lower cockpit wall. They are positioned a little more than the width of the crib boards apart, the lower channel opening upward and upper channel opening downward. You slide the crib boards in between the channels like drawers. The thickness of the channels is close to the thickness of the stacked crib boards so that there’s a tension fit. The crib boards don’t slide out.

The channels are fabricated from the edge of a 6″ vinyl fence rail about 42″ long. I ripped the edges from the rail on my table saw. By cutting next to the webs on the inside of the rail, it produces two channels.

I closed the aft ends of the channels by cutting a flap with fastening tabs at the end of the channel, then bent it into place and secured it by the tabs with aluminum rivets. This just keeps from sliding the crib boards too far aft out of reach.
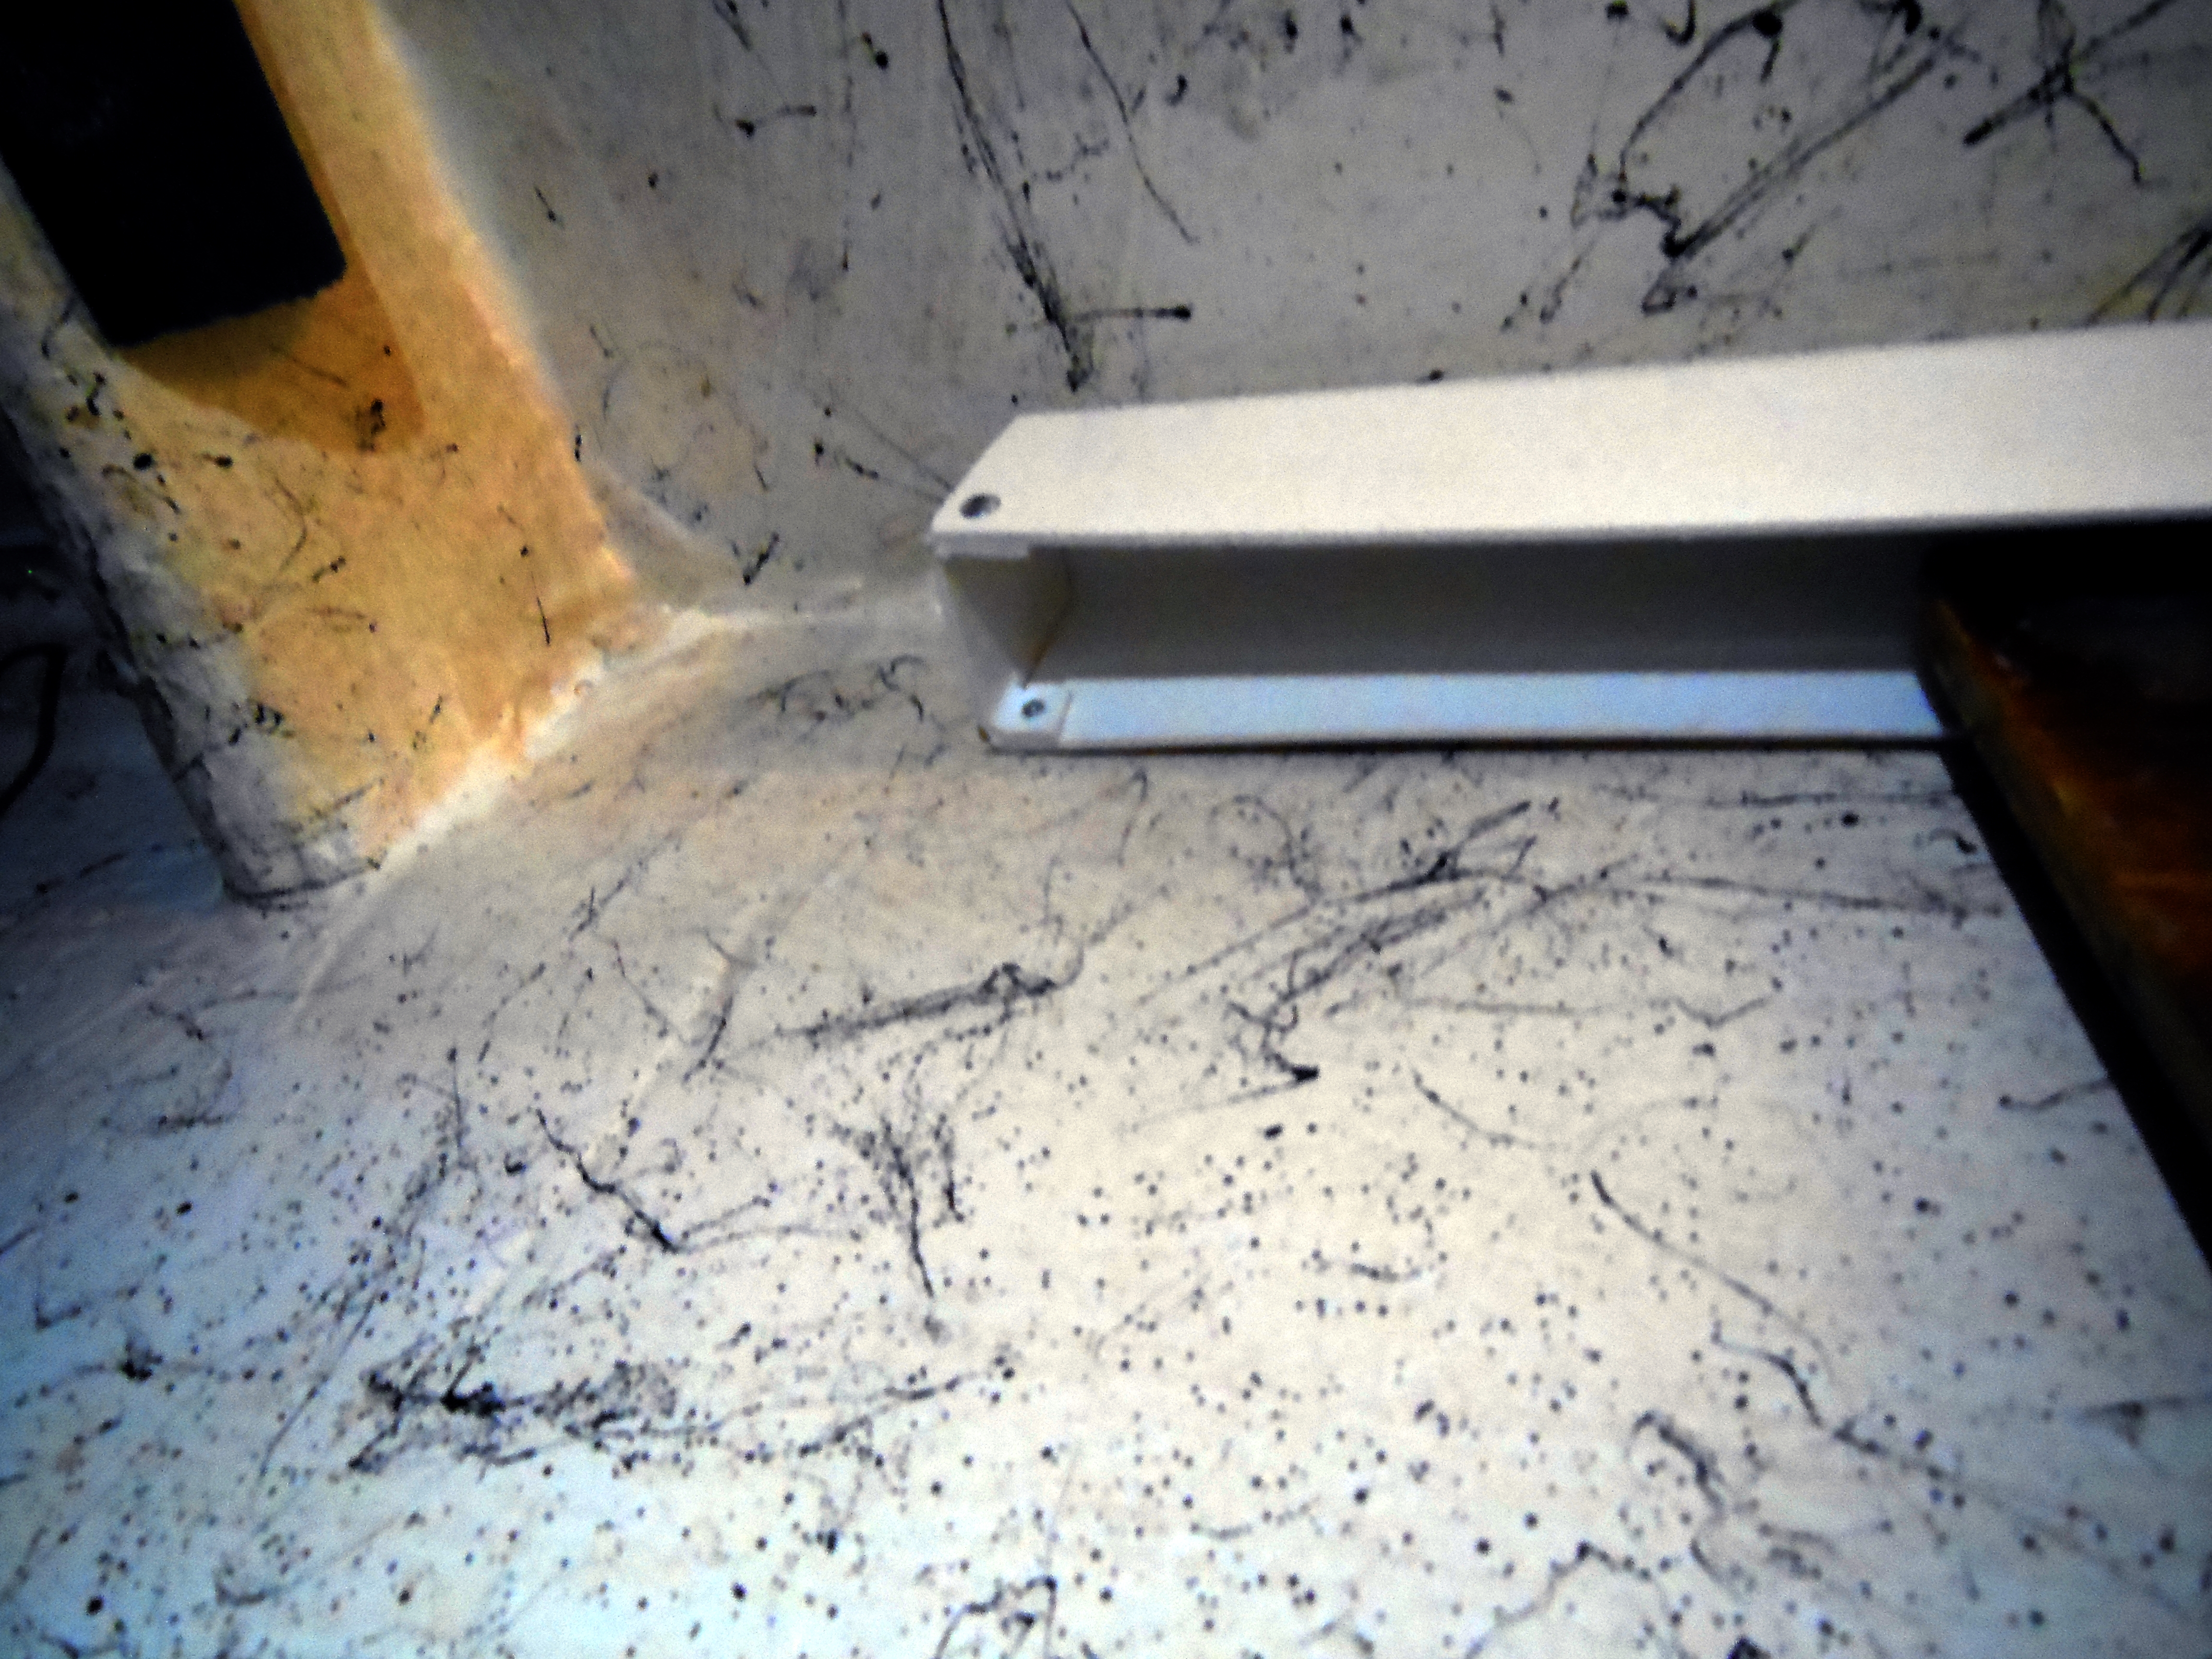
I attached the channels to the cockpit sole wall with 3M Super Adhesive Automobile Mounting Tape, the kind used for mounting body side moldings on cars. It’s really strong and means no hole drilling. But it can be removed, if necessary.
The thickness of the channels is a perfect fit for two crib boards. Since my lower crib board has stereo speakers and cup holders mounted to it, it doesn’t get stored here, only the two upper crib boards.
After I made the channels, I thought of another use, a winch handle fits in one too. To see how it works, check out the separate post. You can probably think of other uses. This is just an example of repurposing leftover materials to solve a problem.
Solution remix
When I made new crib boards during my exterior teak restoration project, I didn’t yet mount the speakers and cup holders in the new bottom board. I have another idea for those that I’ve yet to decide on. Rather, I want to keep the new bottom board normal. But that also meant that I needed a different storage solution since the one above only works for two boards. Now I have three to store. Since I’ve been making a lot of Sunbrella canvas projects lately, I decided to make a canvas bag.
The bag is basically an envelope with two dividers inside that make three compartments, one for each board.
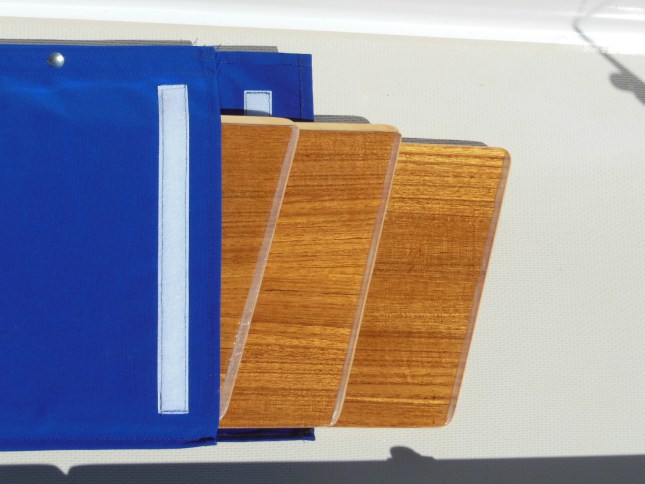
It has three snaps at the top that attach it to the PVC channels from the old storage solution. Velcro strips close the end so that the boards don’t slide out onto the floor and a webbing handle makes the whole thing easy to transport. The opening is next to the step, which makes it just as easy to use as the old solution. Just pull the boards out of the companionway and slide them into the bag. The cost was about $20 for a yard of canvas, the snaps, Velcro, webbing, and thread.
The Bottom Line
Suggested price: n/a
$tingy Sailor cost: $0
Savings: n/a

If you like this project, then you’ll really like my ebook Do-It-Yourself Small Sailboat Canvaswork. It contains a dimensioned drawing for this project and eight more canvaswork projects as well, all for only $20 USD. Click the picture at right to order your copy for immediate download and get started today!
Would you like to be notified when I publish more posts like this? Enter your email address below to subscribe to this blog and receive notifications of new posts by email. You will also receive occasional newsletters with exclusive info and deals only for subscribers and the password to the Downloads page. It’s free and you can unsubscribe at any time but almost nobody does!
