

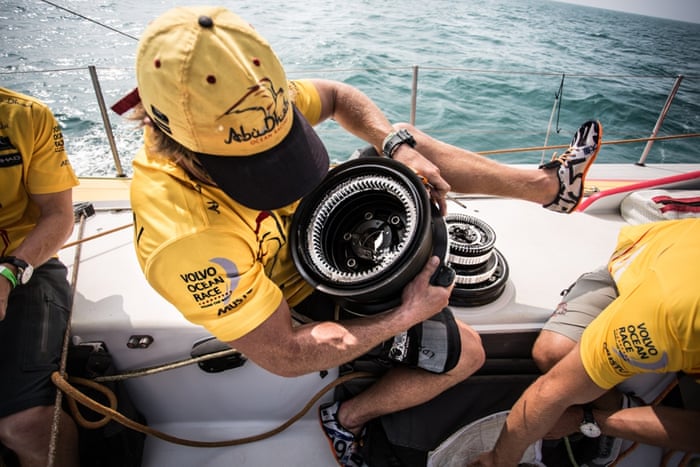
The winches on your sailboat are the workhorses of your rig. They do the heavy lifting and make your job as skipper easier so you can enjoy the ride. They’re also the most expensive hardware aboard so it only makes sense to take good care of them. In this post, I describe how they work and how to maintain them in peak condition. If you’re a beginner to winch maintenance, this post will bring you up to speed with the savviest captains.
How a winch (not a wench) works
Sailboat winches work on the same principle as many other rotary ratchet mechanisms: bicycle hubs, ratchet wrenches, mechanical watches, and many more. That is, there is a stationary part, and one or more rotating parts. In a sailboat winch, the stationary part is the base that is attached to the deck. The rotating parts are the spindle that you turn and the drum that the line wraps around. That is the basic design of every sailboat winch, even the more complicated two- and three-speed winches. They just have more parts, typically gears to multiply the speed that the drum turns with respect to the spindle.
One of the parts has ratchet pawls attached to it and the other part is a toothed gear. Pawls are the little spring-loaded flippers that engage the teeth in the gear and allow the gear to only turn in one direction. In some ratcheting mechanisms, the pawls are attached to the stationary part. In other mechanisms, the pawls are attached to the rotating part. In the example winch shown in this post, the pawls are attached to both the stationary part (the base) and one of the moving parts (the spindle).
Maintaining your winches means making sure the moving parts are well lubricated and the mechanism is cleaned of dirt, sand, water, and other contaminants that can accelerate wear and corrosion. Maintenance is as simple as removing, disassembling, lubricating, and reassembling. If you do this job on the sailboat while it is in the water, ensure that you don’t drop any small parts over the side of the boat during disassembly.
15 minutes to smoother working winches
Following is a step-by-step guide to doing just that. At the end of this post is a video that demonstrates the entire process. It doesn’t take much time, under 15 minutes. After you watch the video, you can print this post to take it with you to your boat to remind you of the steps.
Your winches might be different than the example shown here, which was chosen for its simplicity and is the type often found on trailerable sailboats. This procedure and video may not be adequate to do the job if your winches are more complicated. Refer to the manufacturer’s documentation for specific parts and procedures for your winches.
To service a winch:
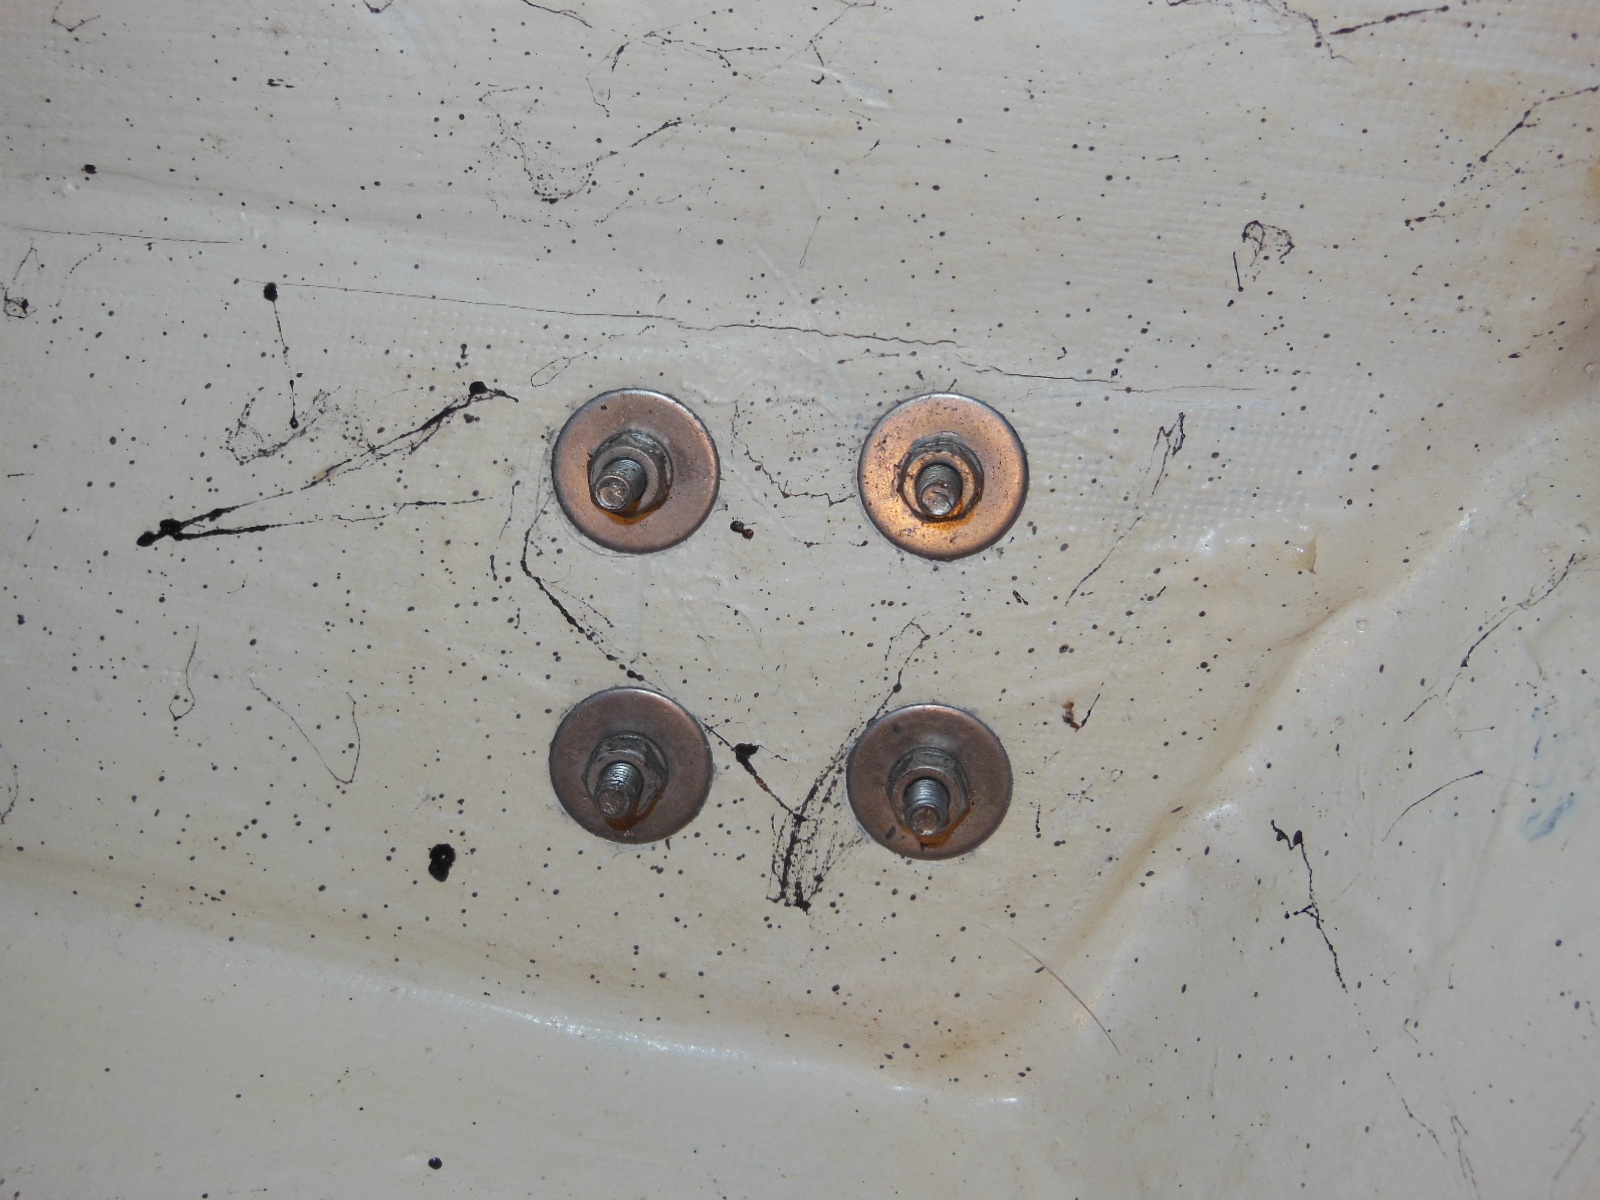
1. Remove the winch from the deck. You need to access the underside of the deck where the winch is located to remove the nuts and washers from the screws or bolts that hold the winch to the deck. You might need a helper to hold the fasteners from above while you work below.
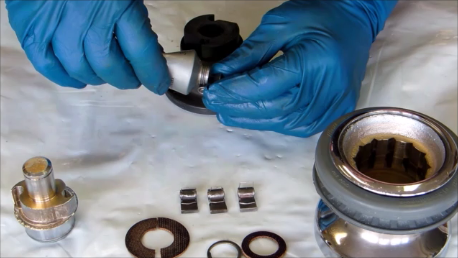
2. Use an awl or a sharp screwdriver to pry one end of the spring clip loose from the top of the winch. Carefully remove the spring clip by pulling the clip out of its retaining groove and away from the winch. Take care to not permanently bend the spring clip.
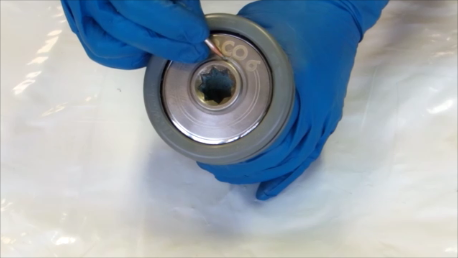
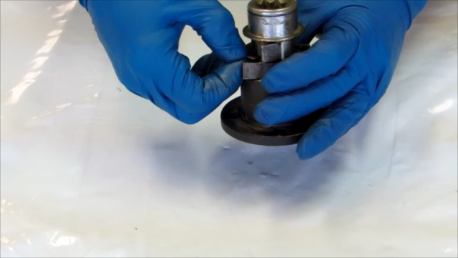
3. Rotate the drum slightly while you pull it off the spindle.
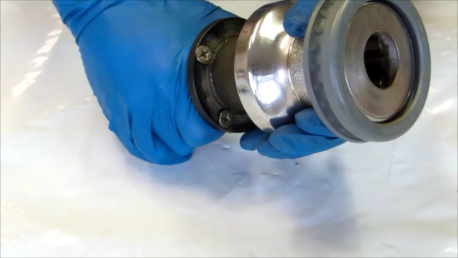
4. Pull the two semi-circular, phenolic spacers out from between the spindle and the base.
5. Turn the winch upside down and using a pair of external snap ring pliers, remove the snap ring from the end of the spindle that is recessed in the base.
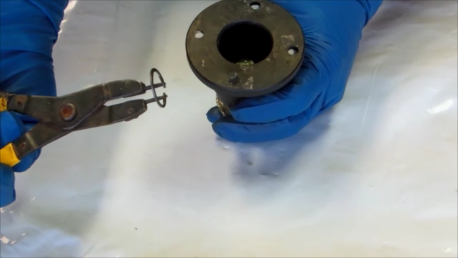
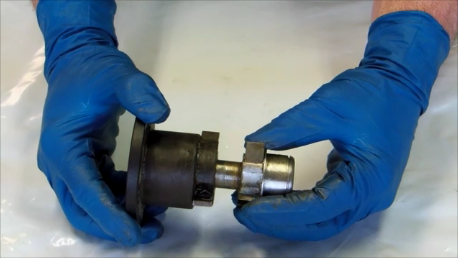
6. Pull the spindle apart from the base.
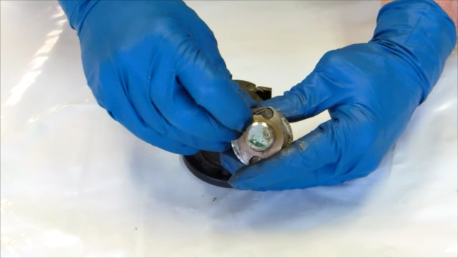
7. Remove each of the spring-loaded pawls by depressing it against the spindle and sliding the pivoting end out of the circular slot in the base or spindle. Be careful to not drop the pawls overboard or shoot a spring into the deep blue.
8. Thoroughly clean all grease, dirt, rust, and corrosion from the parts with solvent followed by soapy water. Allow to dry completely before proceeding.
9. Apply a light covering of lightweight, waterproof marine grease or oil to all wear surfaces.
10. Reassemble the winch in the reverse step order until you are ready to reassemble the hub onto the spindle.
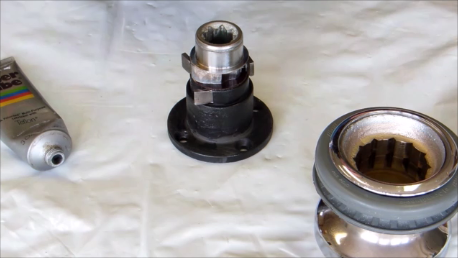
11. Apply a waterproof, non-hardening bedding compound such as butyl tape to the underside of the winch base and around the bolt holes.
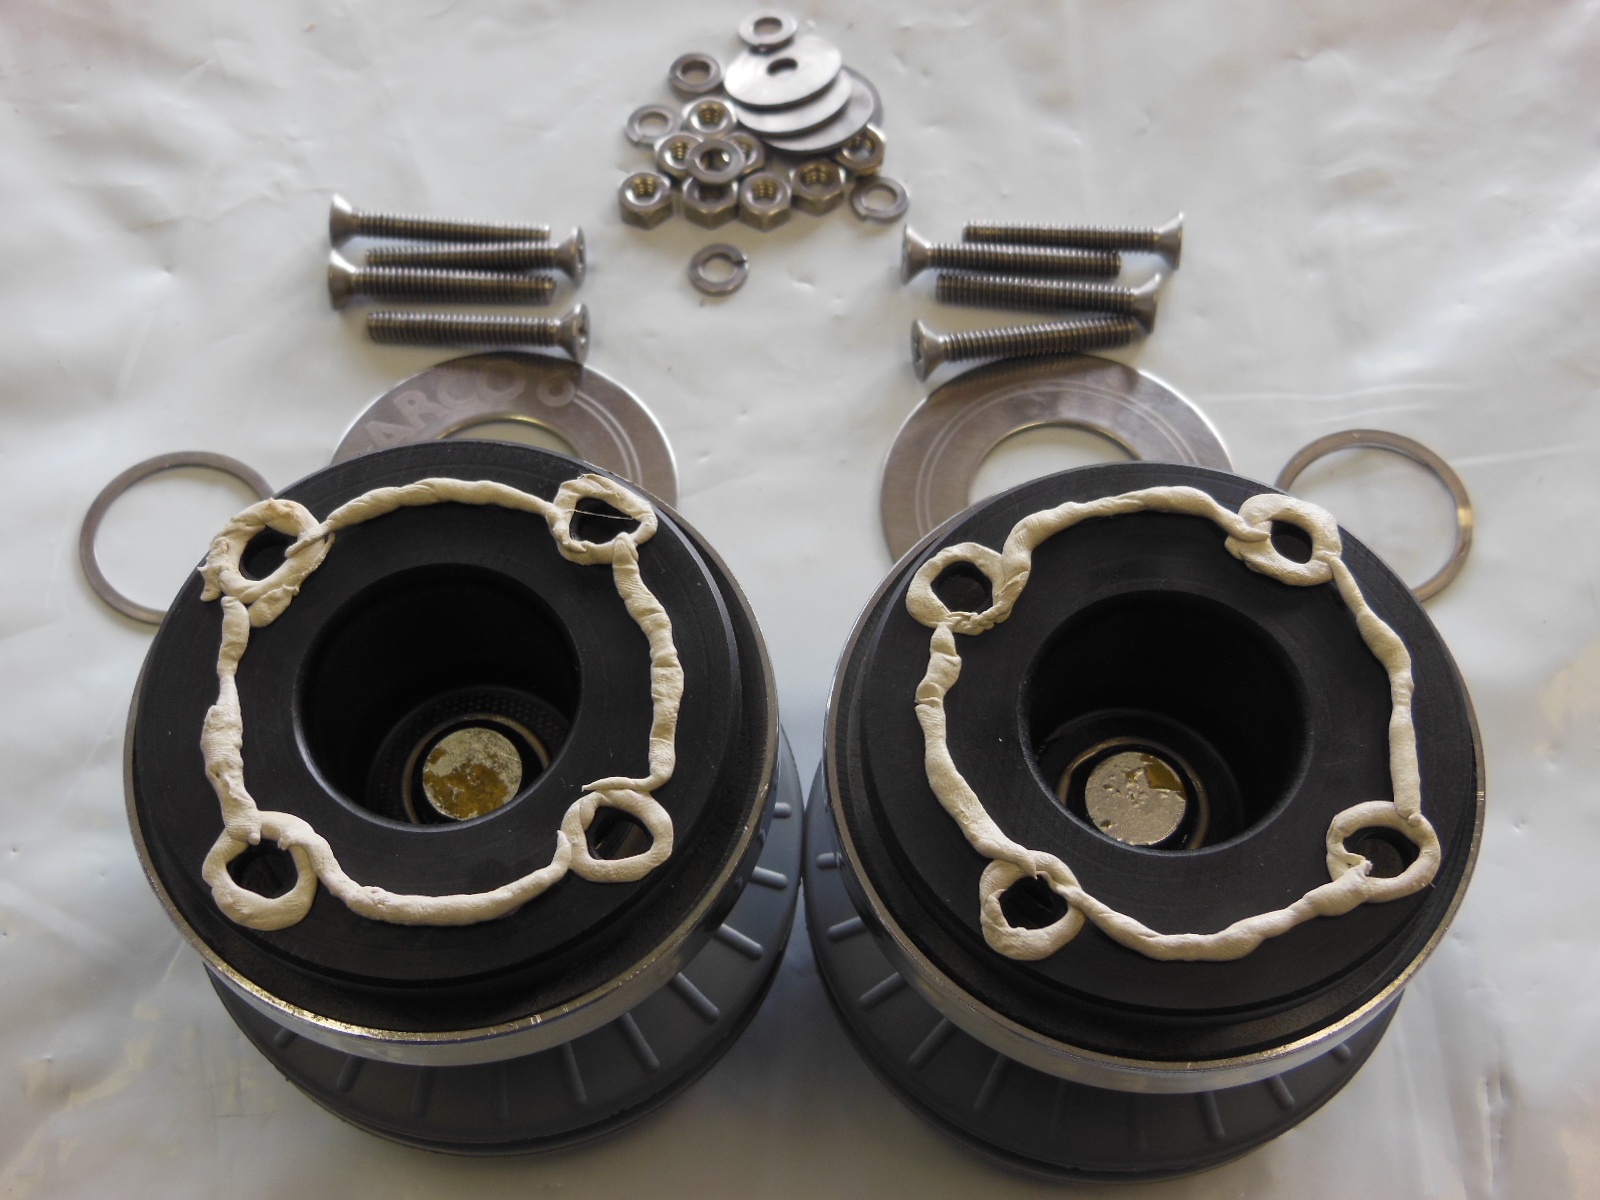
12. Reattach the winch base to the deck with the original fasteners.
13. Simultaneously press and twist the hub clockwise to reassemble it onto the spindle.
14. Replace the trim ring and spring clip.
15. Test for proper operation.
Sail on!
To see how easy it is, watch this video.
Repeat this job every couple of years or more often depending on how often and how hard you sail, whether you protect your winches from the elements with covers, and your sailing conditions—fresh water or salt water.
Would you like to be notified when I publish more posts like this? Enter your email address below to follow this blog and receive notifications of new posts by email. You will also receive occasional newsletters with exclusive info and deals only for followers and the password to the Downloads page. It’s free and you can unsubscribe at any time but almost nobody does!

Thank you for this! Its on my to-do list for the summer, I will definitely be referencing this.
Good video. Thanks for taking the time to make it.
I notice you don’t have a backing plate on that winch. I guess you think one isn’t needed? I have 6 bolts on my little barlow 12, but no backing plate either.
Probably the most expensive item on a Catalina 22 is the outboard motor. When winter rolls around, it would be great if you make a post on winterizing it.
Something else is more likely to fail before you rip a winch through the deck and it would take more torque to do that than you’re going to create with just a winch handle. Nah, I don’t think they’re necessary and apparently Catalina Yachts didn’t think so either.
There are a lot of articles published every fall already on winterizing outboards but I might do one with a stingy spin on it. I think my impeller is about ready for replacement, so I could work that in too. Thanks for the suggestion!
Do you know where you can get replacement parts for the Arco 6? I am specifically looking for the pawl spring. One of mine was broken when I took the winch apart today.
Hi, Scott
A popular online Catalina parts retailer sells a kit with 4 pawls and 6 springs for $39. A better option, in my opinion, is to buy a used winch on eBay like this Lewmar #6 with a current bid of $25. You can keep the Arco as a cabin top winch or as a spare.
I was racing yesterday and my crew member was operating the winch which controls the jib sheet. He overtorqued the winch and broke the winch. It appears he snapped the bolt inside the winch. Is this a replacable item or should I donate the entire assembly to Davey jones? 1982 Mac 22
Hi, Chris
It should be replaceable. Check with the winch manufacturer, Google it, or if it’s a standard bolt, get a replacement locally.
Winch maintenance time is a great opportunity to swap out those thin cupped fender washers with extra thick SS 18-8 fender washers washers. A source for washers:
https://www.boltdepot.com/Fender_washers_Stainless_steel_18-8_-_Extra_thick.aspx
Standard fender washers were designed to attach fenders to cars. They are thin to allow deformation to the washer instead of damaging the car fender during installation. Attaching winches, rails, tracks or other parts to fiberglass boats benefits from using a thicker washer or a backing plate to distribute the forces. I’ve found a stack of thin washers isn’t as stiff a thick washer. Go for the extra thick washers.
Thanks for your helpful article.
Thanks so much!
Very well explained everything. That’s all good information that will help me make a decision.Thanks.