

This project is one of the easiest you’ll ever do to your sailboat. There’s no epoxy, painting, drilling, wiring, or splicing involved. If you can saw through a piece of PVC pipe, you can do this job. Heck, this might be a good project for a junior crew member to work on their stingy sailor skills!
Before I continue, a bit of legal housekeeping. This post contains affiliate links. That means I receive a small commission if you make a purchase using those links. Those commissions help to pay the costs associated with running this site so that it stays free for everyone to enjoy. For a complete explanation of why I’m telling you this and how you can support this blog without paying more, please read my full disclosure.
Give Chafing the Boot!
Turnbuckle boots protect your expensive running rigging and sails from chafing on your turnbuckles and snagging on cotter pins. If you’ve been eyeing a set of Davis Instruments Turnbuckle Boots for your sailboat at about $6 a piece, you’ll be glad to know that you can make your own turnbuckle boots for under $1 a piece.
All you need is some white 1″ diameter schedule 40 PVC pipe from your favorite home center. It’s usually sold in 10′ lengths, so one piece should suffice with some left over. I recommend covering at least the upper shroud and the forward lower shroud turnbuckles—that means four pieces—six pieces if you want to cover all six turnbuckles. Don’t buy schedule 80 pipe. It has a thicker wall and smaller inner diameter and it costs more, none of which make it any better for this project.
One inch diameter pipe is large enough to fit over most turnbuckles on small sailboats but not so big that it slips over the T bolt toggles and off the ends of the shrouds. The diameter is important because you want to slide them up off the turnbuckles so that you can adjust them when you need to, but you don’t want them to slip off the turnbuckles every time you disconnect a shroud from its chain plate.
You can cut PVC pipe with just about any saw that will cut wood. A miter saw works well but a hand saw will work if that’s all you have. Cut the boots for the upper shrouds and aft lower shrouds at least long enough to cover your turnbuckles. I cut mine 12″ each. For the forward lower shrouds, you have two choices.
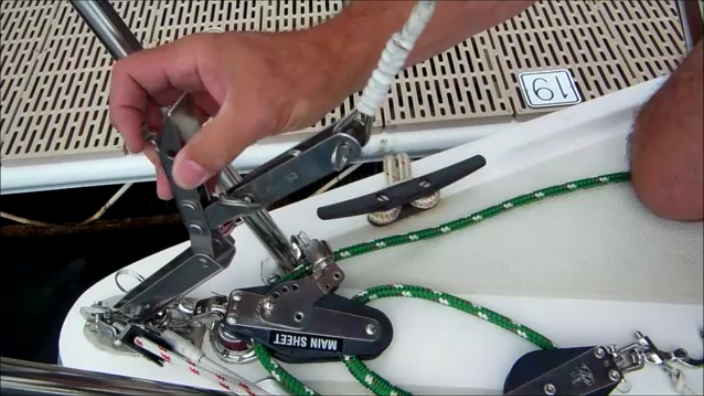
Tack ‘n Roll
If you keep your sailboat in a slip most of the time, you can cut the forward lower shroud boots long enough to work as shroud rollers (also called rigging rollers). Shroud rollers reduce the chafing caused by your foresail rubbing across the shrouds when tacking. Instead of the sail dragging across the wires, the sail rolls across on the shroud rollers. The rollers can also prevent the jib sheet clew knot from hanging up on the rigging. If you heave to often, especially in moderate to heavy winds, your headsail can take a beating. Shroud rollers eliminate that chafing too.
If you want to cut the forward lower shroud boots long enough for shroud rollers, you’ll need to buy two 10′ long pieces of PVC. Cut one pipe in the middle for the two forward lower shrouds and cut the rest of the boots from the other piece.
If you trailer sail, I recommend that you cut the forward lower shroud boots the same length as the others. That makes them easy to secure for transport. If you make them 5′ long for shroud rollers, they’ll be a hassle to handle when stepping and unstepping the mast and when storing for transport.
If you trailer sail and want the protection of shroud rollers without the storage hassle, consider using snap-on cable covers one size too big for your rigging. Instead of a tight fit, they’ll roll like rollers but bend easily for convenient handling.
After you have your turnbuckle boots cut to length, round over the sharp edges on each end with sandpaper. To remove the ink printing on the pipe so your boat doesn’t look ghetto, wipe it off with acetone. Follow up with a coat of Armor All and they’ll look great!
Remove each turnbuckle from its shroud to slide a boot onto the shroud, then replace the turnbuckle. If you have quick release levers below your forward lower shroud turnbuckles like I do, the levers should hold the boots over the turnbuckles and out of your way when working the lever. While you’re at it, this is a good time to make sure your chain plates tabs are all pointing toward the mast.
Don’t worry about not having caps on top like the Davis boots, they don’t do much and you won’t miss them (or lose them)!
Would you like to know when I publish more posts like this? Enter your email address below to subscribe to this blog and receive notifications of new posts by email. You will also receive occasional newsletters with exclusive info and deals only for subscribers and the password to the Downloads page. It’s free and you can unsubscribe at any time but almost nobody does!

I made a similar gizmo of PVC and a plug to put the hanks above the turnbuckle on my Cat 22
Having slightly larger turnbuckles (a 26′ Herreshoff), I have made some up using 18″ long, plastic kitchen sink drain tubes. These are very light and they spin like the dickens you say! No more chafe for s/v Spirit nowadays. However, I really value Stingy Sailor for all the really useful ideas!
Hey, mates, lookit here.
If it is going chilly where you live, why not get yourself this guy’s ebooks? I have ’em and they are just chock full of really useful ideas. We might indeed improve our minds and stay warm at home by a dandy fire reading these fine ebooks, eh? Rackin’ up plans for spring time to come! Eh?
I know this is an older post, but…My Capri is in her slip. Can I install these boots one shroud at a time, or do I have to lower her mast to be safe? In other words, will one shroud securely support the mast in calm conditions?
Hi, Ray
Yes, you can leave the mast up and install them one at a time, no problem.
Thanks for your question,
$tingy
Very much appreciated!
I made some of these for my Venture 21 before I saw this article. I ended up cutting them lengthwise on my table saw with a thin blade so I didn’t need to undo the turnbuckles to put them on (also the end caps). The saw kerf was slightly narrower than the cables so they won’t come off. I also used pipe end caps on the tops. The only problem I have is sometimes the jib sheets get caught between the bottom of the PVC boot and the chain plate but I think a little larger dia. sheet line won’t.
If you do cut/split a tube (like PVC) to use without undoing your shrouds, set yor saw blade at an angle to avoid it coming off as easily. You can also use a wrap of white shrink wrap tape around it … usually the tape is about 6″ wide on the roll so it should do the job!!
The 1″ PVC was too big for my catalina 22, 3/4 PVC fit just right
Thanks for the reminder of this helpful addition.
re: caps – I like caps since they can keep the line from catching on the top of the tubes plus without caps I’ve had the top of the tubes scrape me when moving quickly about the deck.
I’ve designed these caps which can be 3D printed. If someone on here wants them but doesn’t have a 3D printer Google my user name and get in touch.
https://www.thingiverse.com/thing:6492699
Pvc is easy to mold when hot. plan to use s heat gun and pliers to cut and pinch the top closed and oval the bottom to also cover the shackle. I will then file off sharp edges.
i have not figured out how I might mold some PVC spreader boots as well.