

When it comes time to varnish the wooden panels and trim on your sailboat, doing the job more efficiently will save you time. One way that you can be more efficient is by varnishing all sides of a piece at the same time. You want to varnish all sides of the pieces in order to seal even the backsides of parts from absorbing water that will cause varnish to peel and mildew to grow. Many people omit that step and simply lay the pieces on their work surface to dry. But spending a little more time in preparation can save time by the end of the job and give you better results. You can do this by using simple jigs to hold the pieces suspended while you varnish them.
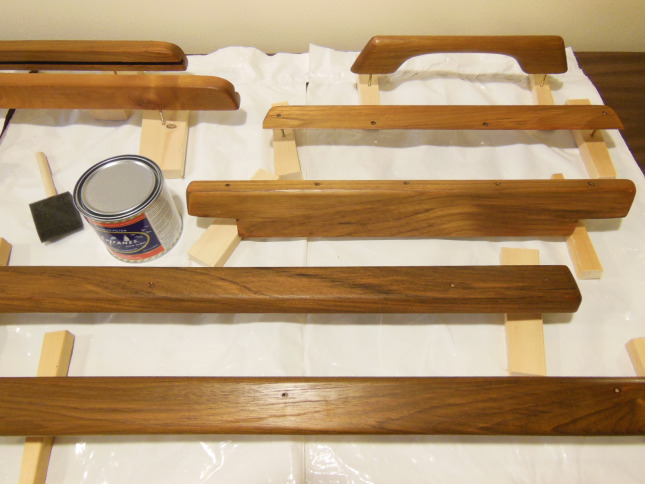
For trim pieces, handles, and small parts, make temporary scrap wood “feet” for the parts to stand on. Loosely screw them into the existing holes in the teak with long deck screw “legs.” This way, you can seal the back sides of the pieces with varnish at the same time and not have to wait for one side to dry before you can varnish the other side. The feet also make good handles for turning the part around while you brush and for moving the parts if you need to.
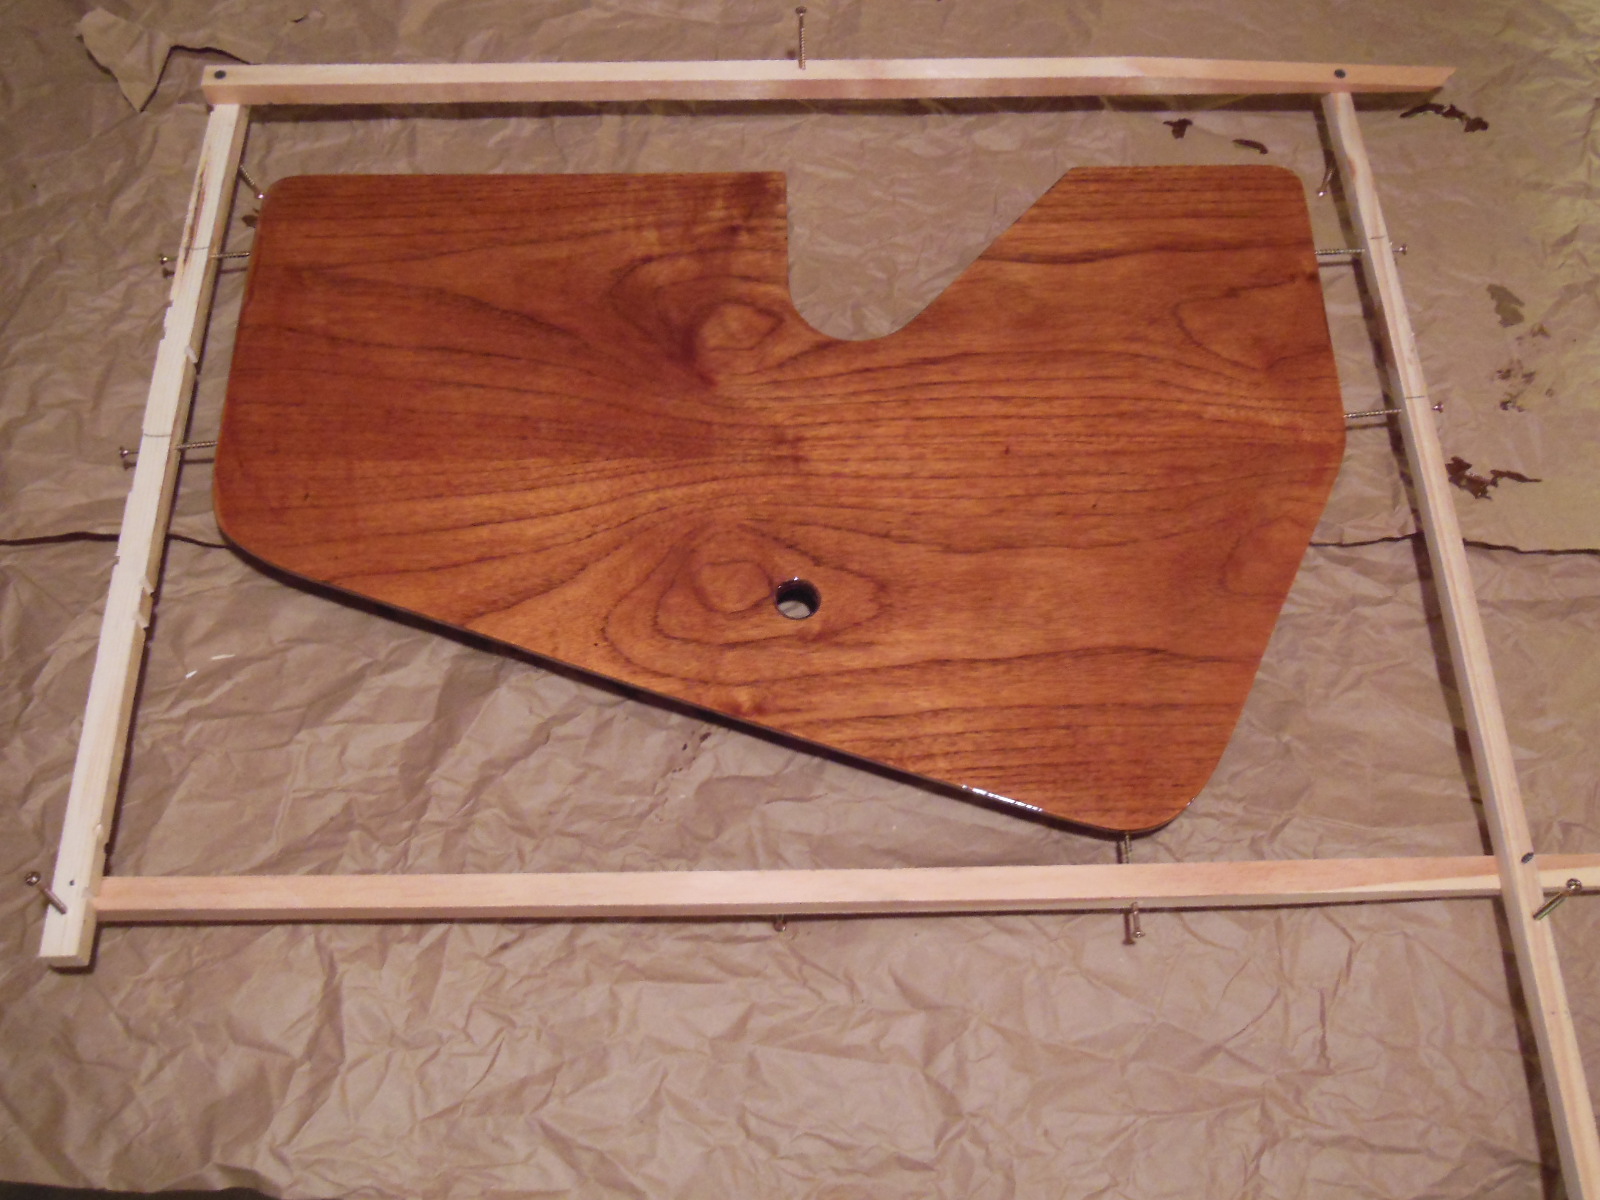
For panels and other large, flat parts, make temporary scrap wood frames that hold them by the edges. Use a couple of deck screws through the frames on each side to hold the panels by just the points of the screws. Add several deck screws as legs into the faces of the frames on both sides. This way, you can brush varnish on both sides and the edges of the panels all at the same time and still lay them flat to dry, which will also help prevent sags and runs. You can touch up the screw point pinholes at the end of the job or seal them with epoxy like I did in the [Exterior teak restoration] project.

Glad I found your blog. I have always done that first one but the idea for large panels is great since you can pick it up and flip it over to make sure you get any runs from the other side.
Thanks for stopping by, Tod, and I’m glad you found something to take with you. There’s plenty more coming, so come on back from time to time!
Please discuss how you drill out the plugs covering the screws holding the teak trim pieces. Also how to finish new
dowel plugs so they get finished in a matching color and are flush with the surface?
Hi, James
Unless you need to replace the screws, you shouldn’t need to remove the plugs. Just remove the nuts and washers on the underside and pull the handrails up with the screws intact. Refinish the wood and replace in the reverse order. If you do need to remove the screw for some reason, carefully drill out as much of the plug as you can without enlarging the hole. A little hand carving might be necessary get it all. Make a replacement plug with a plug cutter or turn one on a lathe. Glue it in place, sand smooth, and finish as usual.
Does that answer your question?