

When we purchased Summer Dream, the only tiller control accessory she had was a contraption made with two pieces of shock cord joined in the middle with two wooden beads that formed an eye. It had hooks on the ends that could be attached to the pushpit stanchions. When the tiller handle is in the eye, the cords would hold it somewhat centered and you could adjust the tiller position by sliding the beads (and therefore, the eye) to one side or the other. It was simple and clever but the shock cord allowed the rudder to overpower it, so I couldn’t trust it to hold a heading for very long. I decided to replace it with a tiller lock device that would hold the tiller stationary no matter what. After evaluating several products, I chose the popular Davis Tiller Tamer.
The Tiller Tamer comes with decent installation instructions, so what follows are some tips for installing one on a C-22 or similar small sailboat. These changes make for a better installation, I think. I hope you will too and will consider them if you’re going to install a Tiller Tamer on your boat.
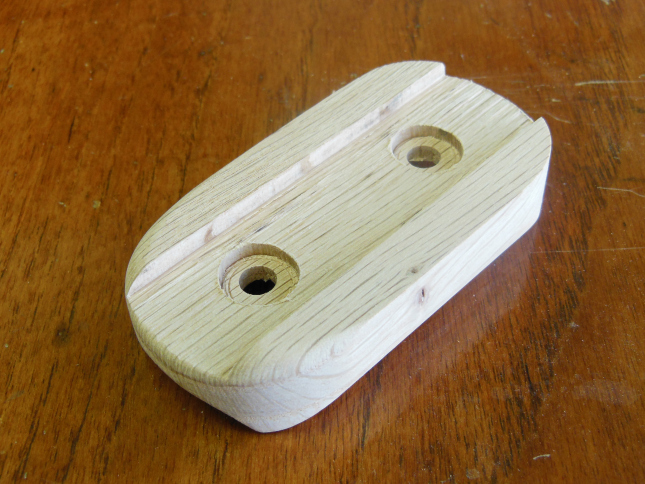
Mounting a flat base on a round handle
The bottom of the Tiller Tamer is basically flat. A C-22 tiller handle is rounded. The installation instructions give no consideration to this difference. I guess they assume that if you follow their recommendation and epoxy the mounting screws into the tiller, it will be strong enough. Excuse me, but I don’t want to epoxy any accessory onto my tiller. I want to be able to easily remove it if I want to move it to a new tiller or to be able to refinish my tiller without having to work around the Tiller Tamer. A better solution to using epoxy to make up for a poor fit is to improve the fit so that it doesn’t need epoxy in the first place. So I set out to make an adapter that would make the Tiller Tamer fit my tiller and provide adequate support and strength without epoxy.
I machined the adapter out of a piece of oak to match my oak tiller. One side of the adapter fits the bottom of the Tiller Tamer. The other side fits the top of my tiller handle.
The adapter simply fits in between the Tiller Tamer and the tiller. The Tiller Tamer still attaches to the tiller with stainless steel screws but they pass through the adapter. Due to the thickness of the adapter, I had to buy longer screws than the ones that in the kit. To make the attachment as strong as possible, I opted for through bolts with flat washers, lock washers, and acorn nuts on the underside of the tiller. The acorn nuts prevent gashed knees and legs from exposed threads.
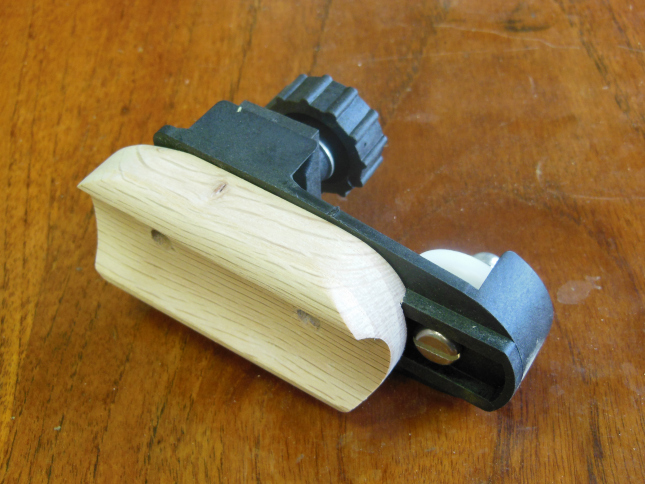
Although I carefully shaped the bottom of the adapter to fit my tiller handle as tightly as possible, I also went one step further and cut a piece of bicycle inner tube to fit the joint. This not only makes up for any spaces in the joint but it also waterproofs the joint and the screw holes.
After applying several coats of varnish, I installed the Tiller Tamer on the tiller handle at the location described in the installation instructions.
Just say no to more screw holes
The Tiller Tamer installation instructions recommend that you install a clam cleat on each side of the transom to hold the ends of the control line. If you’re a regular reader of this blog, you know that I avoid holes in my boat if I can find another way to do the same thing. When installing the Tiller Tamer, this was relatively easy to do.
Instead of installing a cleat on the port side, I simply tied the line to the bottom of a pushpit stanchion with a bowline. This has two benefits. The first is that it keeps the line attached to the boat at one end where it won’t get misplaced and it’s always ready to use. When not in use, I just hank up the line and let it hang from the stanchion. The second benefit is that I only need to think about and tighten the starboard end of the line.
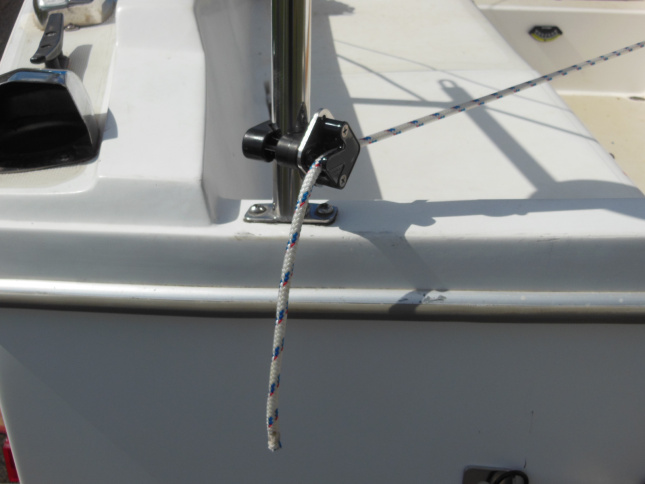
On the starboard side, I could have tied the other end to the opposite stanchion if I wanted to keep the Tiller Tamer usable at all times, such as if Summer Dance was kept in a slip. But since we trailer her to every dance, I need to be able to remove and attach the rudder with every trip. So on the starboard side, I mounted a Sea-Dog Rail Mount Fender Cleat to the stanchion instead.

The cleat makes the control line easy to remove and stow on the port side and just as easy to attach and tighten.
When a quarter inch line isn’t a quarter inch line
The Tiller Tamer comes with a length of 1/4″ rope for the control line. But since I was replacing all of my lines with color-coded double braid in the lines led aft project, I used 1/4″ New England Ropes Sta Set instead. The problem is, the Sta Set is larger in diameter than the Tiller Tamer rope, which makes it difficult to reeve through the sheave in the Tiller Tamer when setting it up. I considered using 3/16″ line instead but it is too small and the Tiller Tamer doesn’t get a good grip on it. The solution was to simply remove about 6″ of the core from the end of the Sta Set. This makes it smaller and easy to reeve through the Tiller Tamer. Once the end is through, the rest pulls through easily.
The Tiller Tamer works well and holds the tiller rock solid when I need to leave the helm for a few minutes. I no longer have to keep my eye on the heading and hurry back to the shock cord to make course corrections. I thought the Tiller Tamer was as far as I would go in the direction of hands-free steering. That was until I read how much others enjoyed their autopilots and I discovered that I could get a used one for half price. If you noticed the extension bracket attached to the tiller in the photos above, then you know that I followed through on it. The rest of the story will be in a future post, so stay tuned!
The Bottom Line
Suggested price: $48.55
$tingy Sailor cost: $46.77
Savings: $1.78
If you have a tiller lock, what’s the most unusual way that you’ve used it?
