

Are your salon and head privacy curtains old, faded, or tattered? Want to spruce up your cabin interior? Sewing your own curtains can add a designer touch without breaking the bank. If you’re replacing your cabin cushions entirely or just the covers, new curtains are a must-do companion project.
In this post, I’m showing off some of Mrs. Stingy’s handiwork for a change. She doesn’t get involved in the exterior restoration or system upgrade projects, but she’s a “nester” when it comes to the cabin interior. She enjoys interior decorating our home and it overflows to Summer Dance. I’m grateful because she’s good at it and her efforts make spending long weekends aboard more pleasant and comfortable.
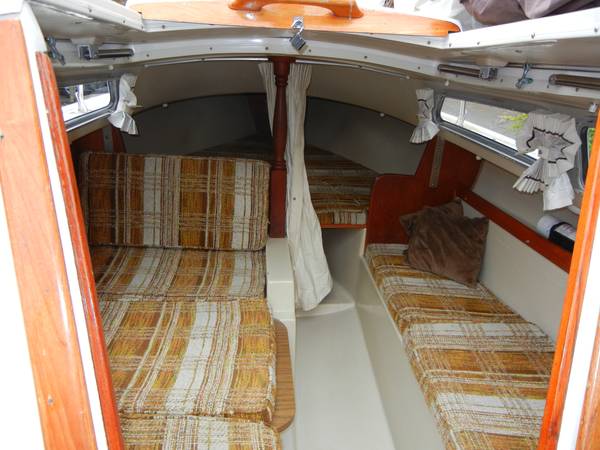
About as fancy as a covered wagon
The first generation C-22s came with plain white canvas curtains. They were functional and durable but I wouldn’t call them stylish. When we laundered them after buying Summer Dance, the portlight curtains disintegrated from UV damage. Most new sailboats these days don’t have curtains but instead use either tinted portlights or pleated shades. I tinted the portlights on Summer Dance too, but for maximum privacy and the best sleeping environment, you want curtains.
Replacement curtains aren’t offered by Catalina Yachts and are a special order item from that popular online Catalina parts retailer. You can find sets on eBay for $260 and up, but they’re aren’t made to work with the original curtain tracks and they’re no bargain. Mrs. Stingy sewed fantastic-looking curtains for Summer Dance for around $80 and that was splurging on premium fabric. If your taste is more modest, you can make them for much less.
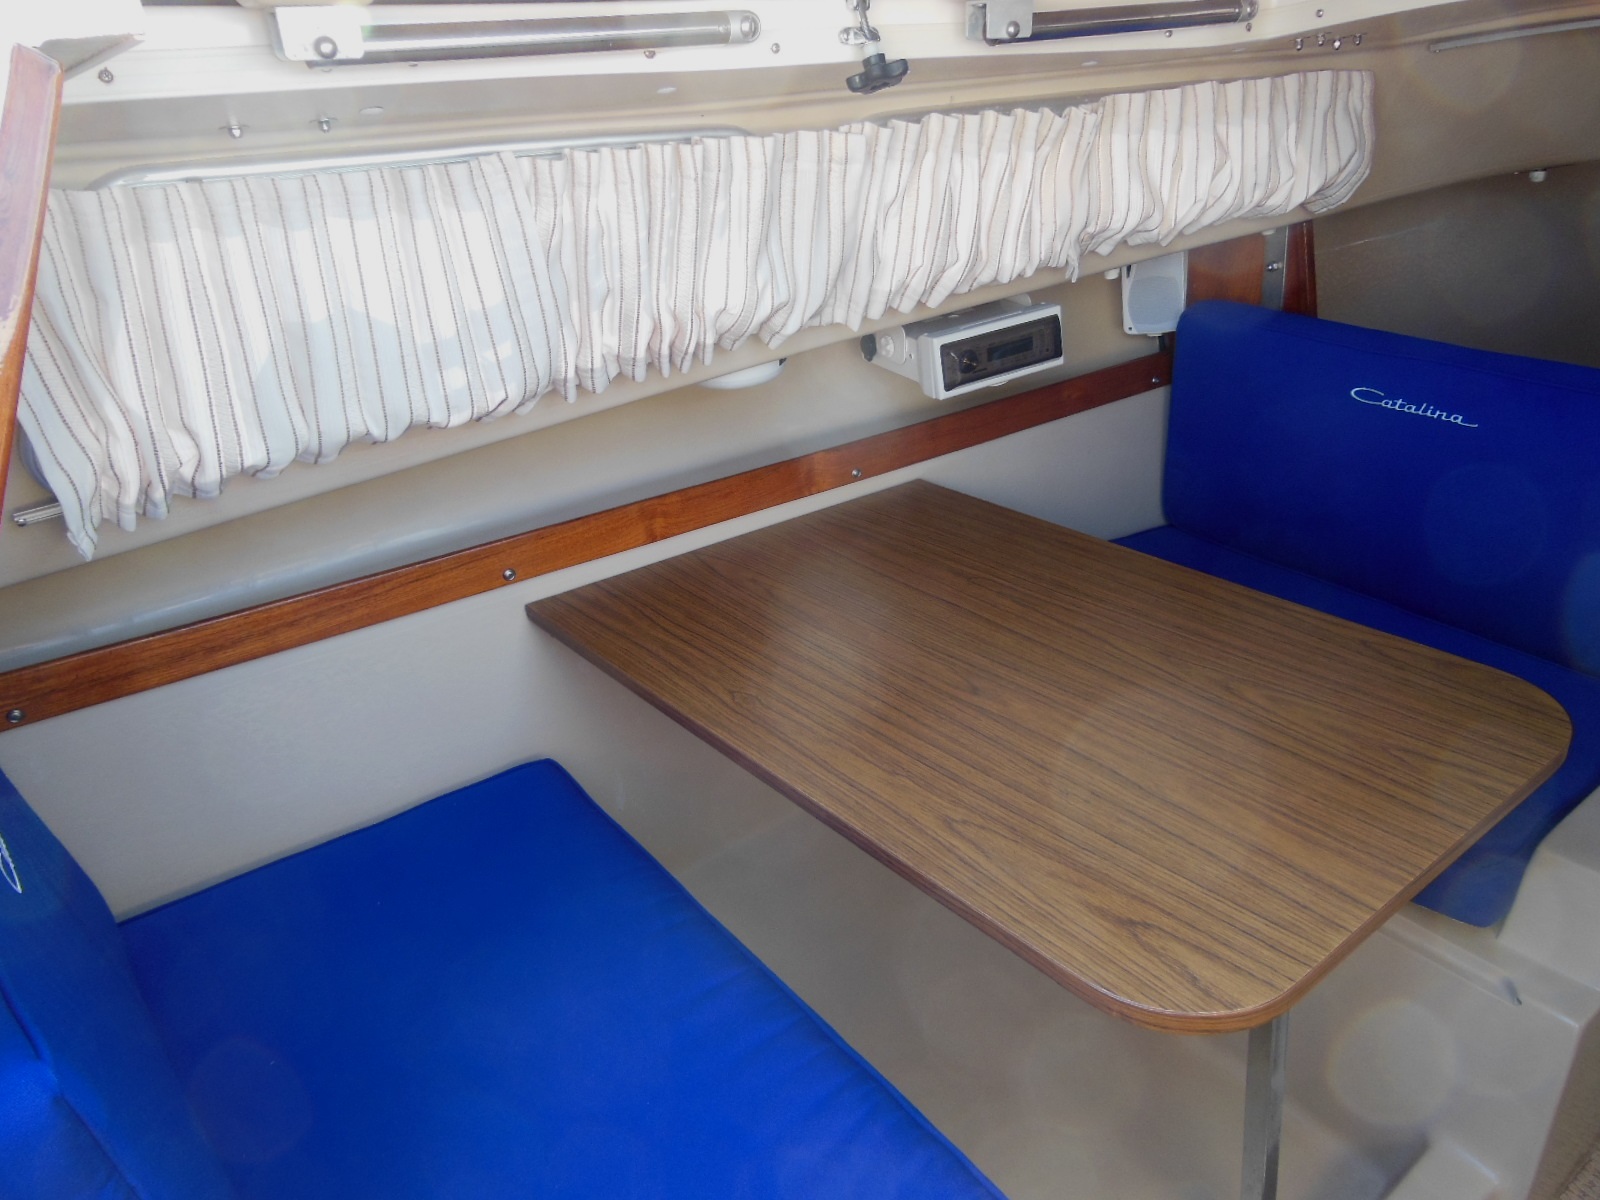
Mrs. Stingy wanted a high quality fabric with texture and colors that complement the tan fiberglass, teak woodwork, and our homemade blue Sunbrella cushion covers. She found what she wanted in 2 pre-made 50″ X 84″ Jute Stripe Curtain panels at Pier 1 Imports. She simply cut them into the sizes that she needed and sewed them on her home sewing machine.

A stitch in time, times nine
Using the old curtains as guides, she first cut patterns out of parchment paper. She made 8 panels for the portlight curtains, each one 25″ long and one rectangular head privacy curtain 48″ X 46″. The height of each portlight panel depends on its place within the set on each side of the cabin because the tracks are narrower apart toward the bow. She added 2″ to the distance between the curtain tracks on the top and on the bottom of each panel for hems.

She sewed new tab tape from Sailrite along the top of the head privacy curtain.

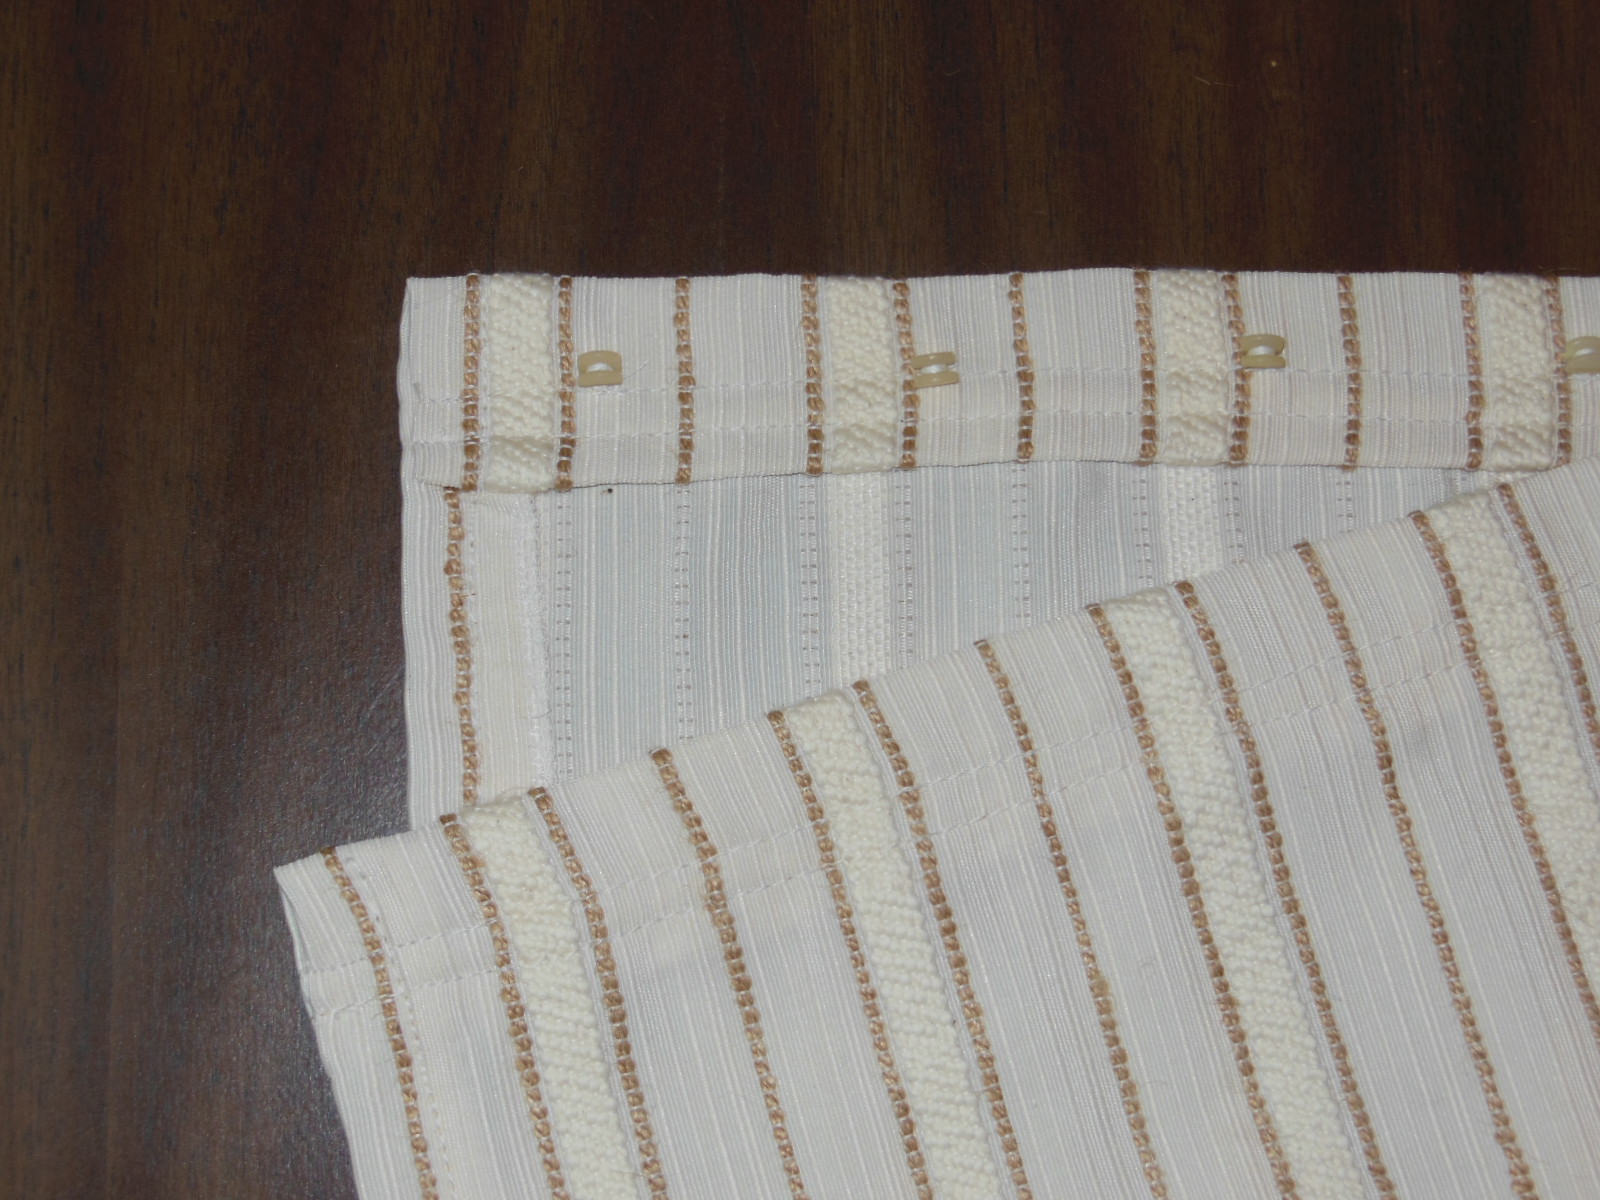
Hand-stitching the old carriers 2-1/2″ apart on the new salon panels was time-consuming. You basically sew them on like buttons. That is, first whip a set of several wraps through the fabric and laid in the carrier slot. Finish by whipping around the first set of wraps underneath the carrier as shown in the next picture. That cinches the threads together and makes the carrier stand up so that its easier to insert in the track.

If you’re more interested in saving time than money, you can sew snap-on tape to receive snap-on carriers instead but it’s pricey. If you just need to replace a few missing carriers, Sailrite also has eyelet style carriers too.
The old T style tracks and carriers are no longer made as near as I can tell. Other than at Sailrite, I wasn’t able to find them even at online RV parts retailers. They’ve been replaced by C style parts that are incompatible if you want to keep your original tracks.
Do these curtains make my boat look big?
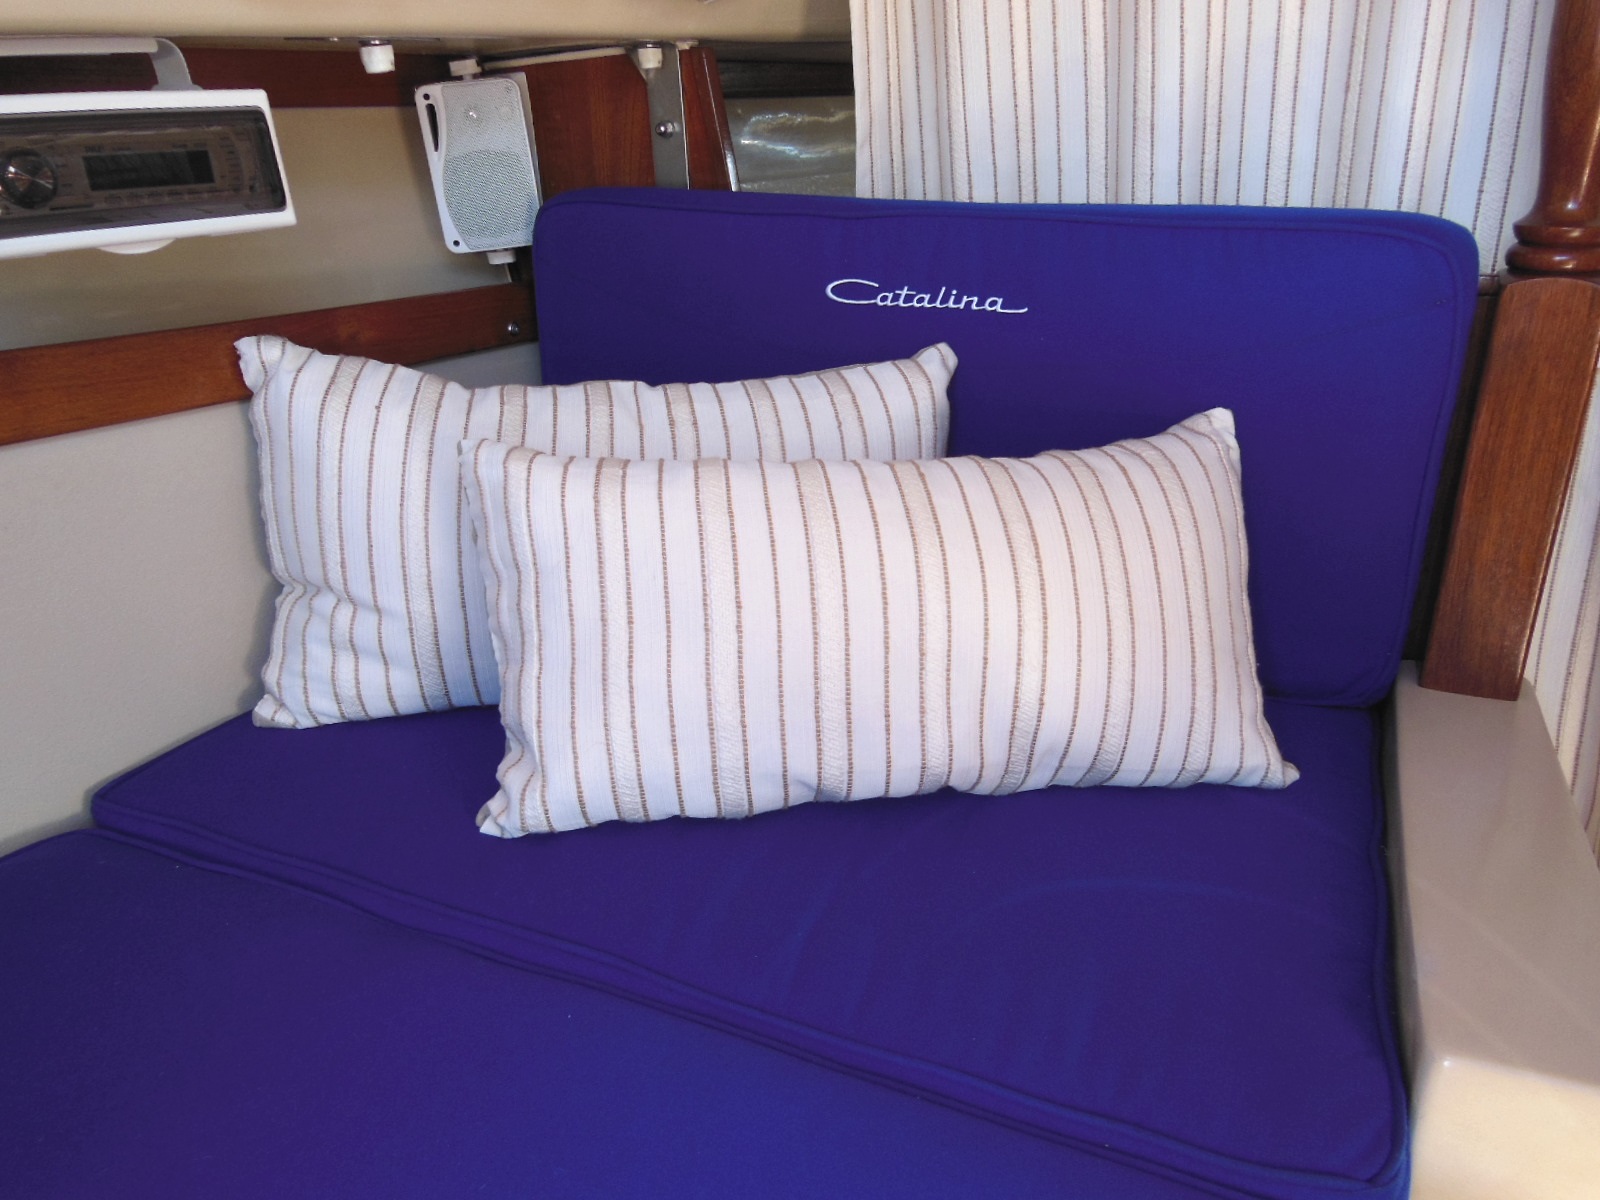
There was enough material leftover from the curtains to sew matching pillows that are the right size for both lounging around or sleeping on.
She hemmed the remnants that had rod grommets still in them to use as valances in our dining room. Now that’s getting maximum utilization!
Besides fabric and fasteners, Sailrite also has an excellent video on making this style of curtains.
Like so many other things in our lives, our boats are an expression of ourselves. I’m glad that Mrs. $tingy likes to express herself and her talents in Summer Dance. We’re partners in creating our own personal hole in the water. I think the new curtains look great. I gave this post an Enjoyment rating of High because if she likes ’em, I like em.
The Bottom Line
Suggested price: $260
$tingy Sailor cost: $80
Savings: $180

If you like this project, then you’ll really like my ebook Do-It-Yourself Small Sailboat Canvaswork. It contains this project and eight more canvaswork projects as well, all for only $20 USD. Click the picture at right to order your copy for immediate download and get started today!
Would you like to be notified when I publish more posts like this? Enter your email address below to subscribe to this blog and receive notifications of new posts by email. You will also receive occasional newsletters with exclusive info and deals only for subscribers and the password to the Downloads page. It’s free and you can unsubscribe at any time but almost nobody does!

Well I’m no Mrs. Stingy, but after a little problem with the alcohol stove I was in need of new curtains. I went to Joanne’s fabric, bought some linen like fabric and ordered the tabby carrier thingies. I didn’t do too bad for a first time project. “Woody”
Good on ya, Don!
The old alcohol stoves can make for dramatic startups. Especially first thing in the morning for coffee and you’re not awake enough yet to remember to part the curtains. Mrs. Stingy didn’t go for my suggestion of making the curtains out of aluminum foil 😉
What type of needle and thread did you use to sew the flags onto the curtains? The flags seem very stiff and hard.
Hi, Natalie
I assume you mean the tab tape. I didn’t watch her sew that on but I know she didn’t change needles or thread. She doesn’t remember for sure, but thinks she just sewed right through the tabs.