

If you’ve been following this blog for a while, you’ve seen how I’ve taken on almost every possible restoration and improvement project. There’s more that I want to do to Summer Dance, but now that all her major systems have been overhauled, my attention has turned toward more aesthetic projects. One that was quite obvious when you saw Summer Dance up close was the Catalina 22 emblems on the cockpit coamings.
Both sides had become brittle, parts of letters had broken off, they were badly scratched, and the paint was almost worn off. They weren’t fitting for a fully restored, classic yacht. I know that some readers would disagree with me that a C-22 is a yacht in the classic sense of the word. I don’t usually call it that, but I’m using that word this time. I’m not a Lord of the Rings fan but I sometimes call it my hobbit yacht. Only a hobbit or small child can stand up in it.

Keep it classic
Unfortunately, the classic emblems are no longer available from Catalina Yachts. A certain Catalina parts dealership offers replacements but they aren’t the same style, which I think look much better but I’m old-school and biased. I also like the look of the classic style because it’s suspiciously similar to the emblems on 1961-1962 Pontiac Catalina cars with only minor changes. Frank Butler, who designed the C-22 and started Catalina Yachts, must have been impressed by the Pontiac logo and maybe owned a Catalina.

To replace the tired old emblems, I considered cutting some out of teak on my scroll saw. Those would look really classy but probably wouldn’t stand the test of time and crack eventually. Next, I considered having them cut out of acrylic by a shop with a computer numerical control (CNC) machine, which is capable of amazing accuracy. I even found a fellow C-22 owner who had such a machine and was interested in the project but even his smallest bit wouldn’t be able to reproduce the emblems accurately enough.
Then I learned that, besides the more common use for RTV silicone, it’s also used for mold making. RTV silicone is a tough, heat-resistant, flexible form of silicone rubber that is often used to make gaskets for engines, transmissions, and so on. It’s also used to make molds for casting intricate plastic parts. A company named Alumalite makes casting and molding supplies for model makers, jewelers, and various other crafts. Their Alumilite Amazing Mold Putty product can make a flexible, reusable mold in a matter of minutes. One day while I was wasting time waiting for Mrs. $tingy at our local Hobby Lobby store, I coincidentally saw it on the shelf and had to give it a try.
An experiment in mold making
First, I reattached the broken part of a letter to the best of the two emblems on Summer Dance with double-sided tape.
Then I followed the directions and kneaded equal size balls of the two parts of Mold Putty together until they were well blended and pressed it firmly over the emblems. I made sure that the bottom of the mold was flat so that it would lay flat during casting.
After the putty had cured, I very carefully pried the mold off the emblems, paying special attention to not tear the “islands” in the centers of the letters and numbers. A little mold release like Vaseline would have helped this step.
After the mold was loose, I mixed up a small amount of West System epoxy, filled the mold, and let it sit overnight to cure. The next day, I repeated the mold removal process, this time from around the emblem castings.
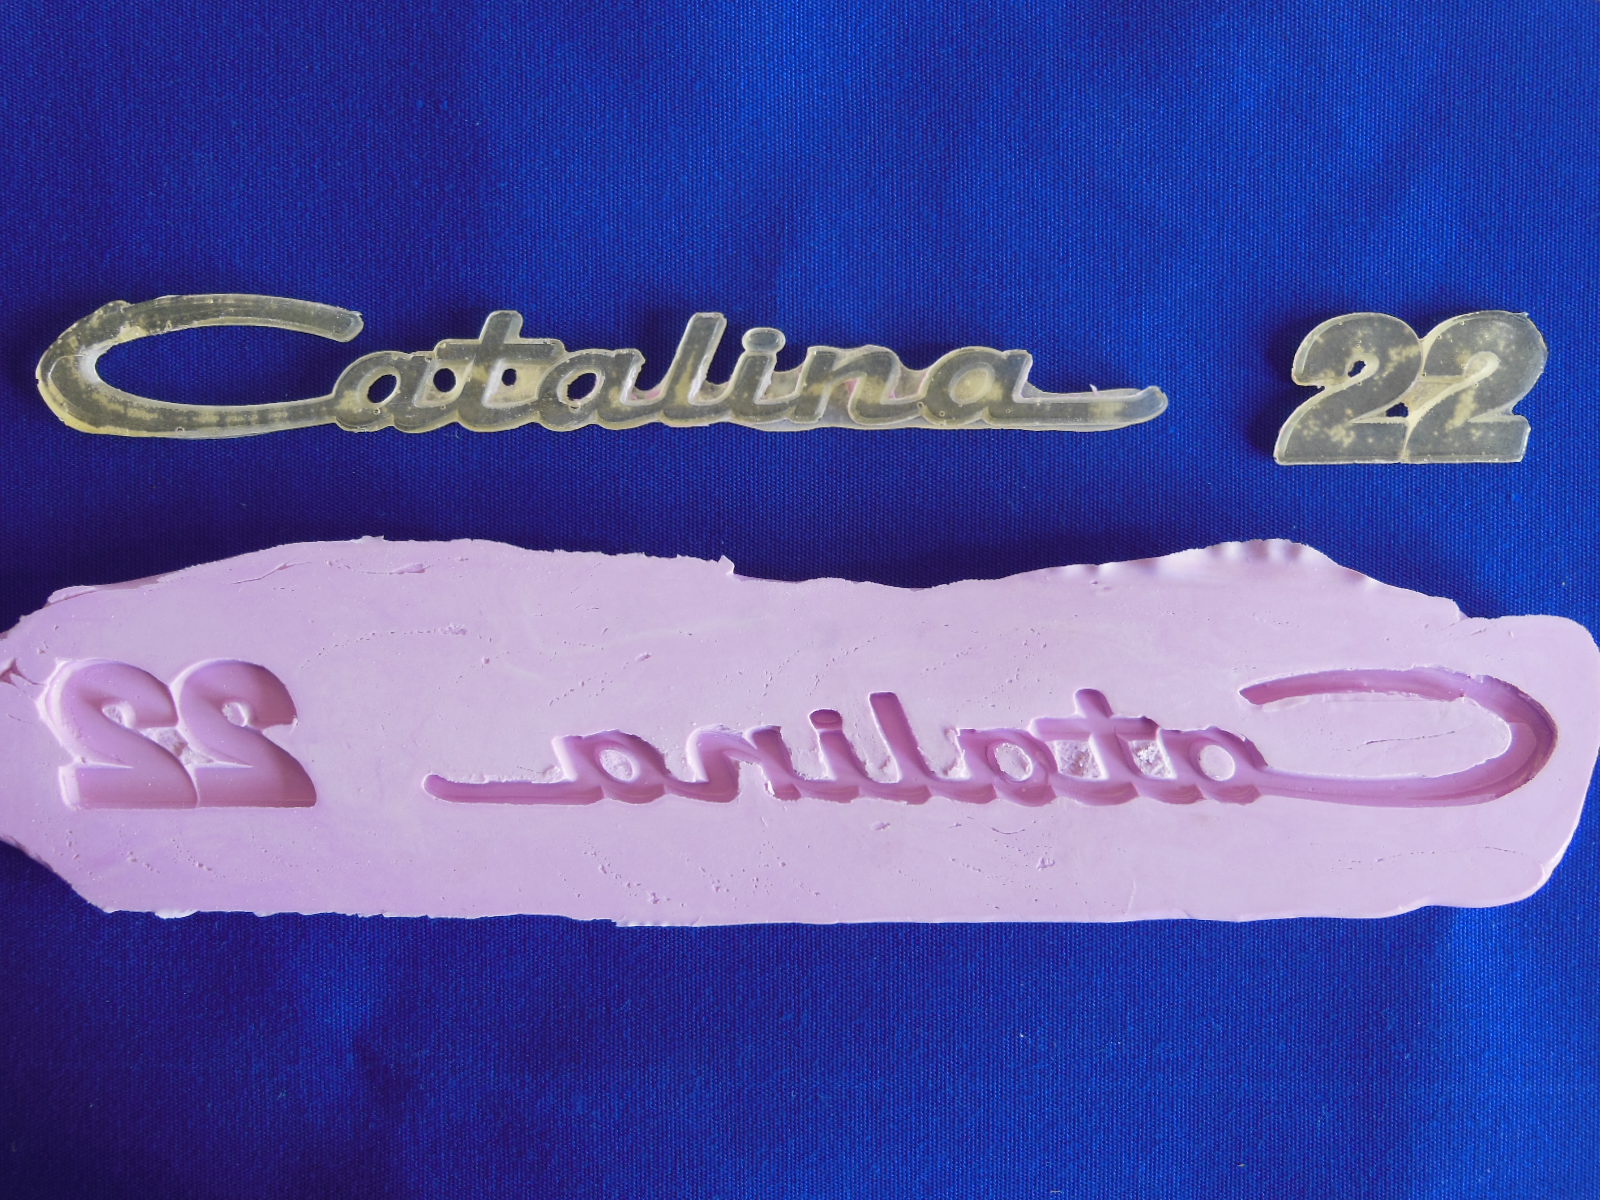
The castings were a little rough but nothing that a little trimming with an Exacto knife and smoothing with a small file couldn’t handle, so I poured another set in the same mold.
Paint to match the stripes
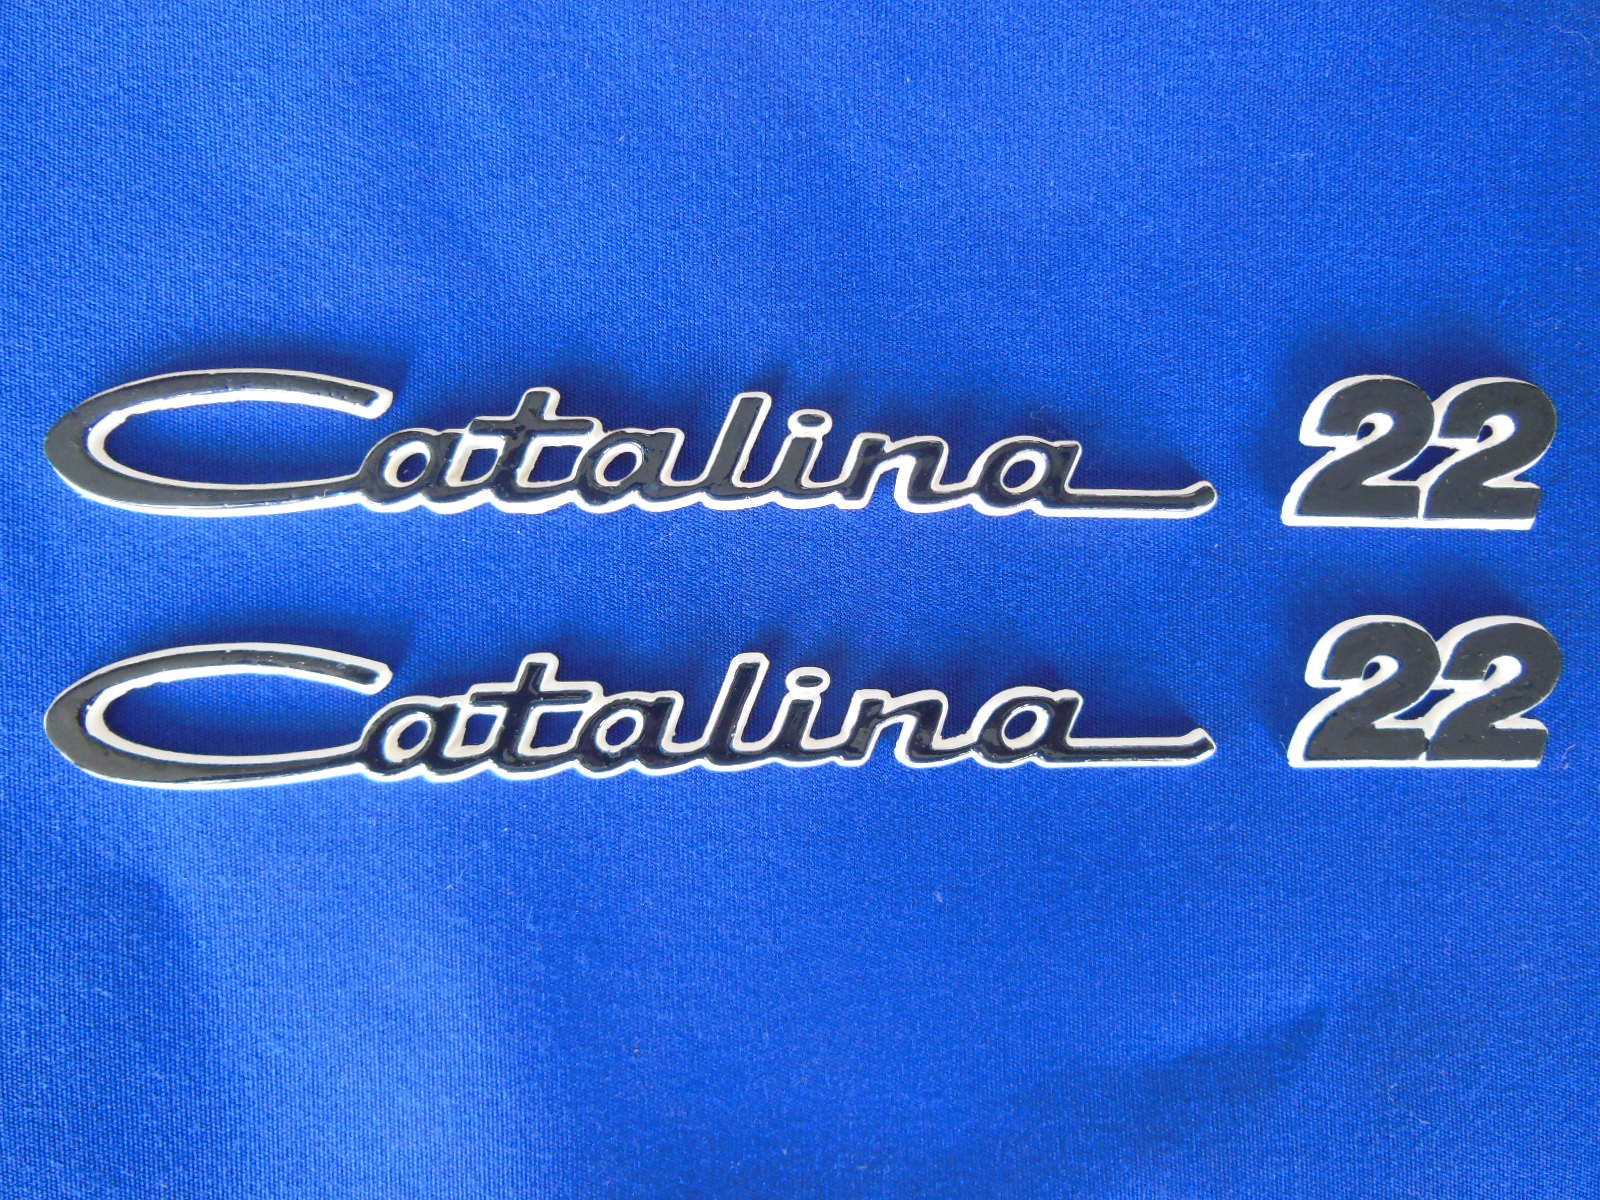
With both sets shaped and smoothed, I brushed on several base coats of white Interlux Brightside paint. I used small loops of double-sided adhesive tape to hold the emblems on a piece of cardboard while painting. After the third coat, I suspended the cardboard upside down so that the paint would cover the edges better, which weren’t holding paint well.
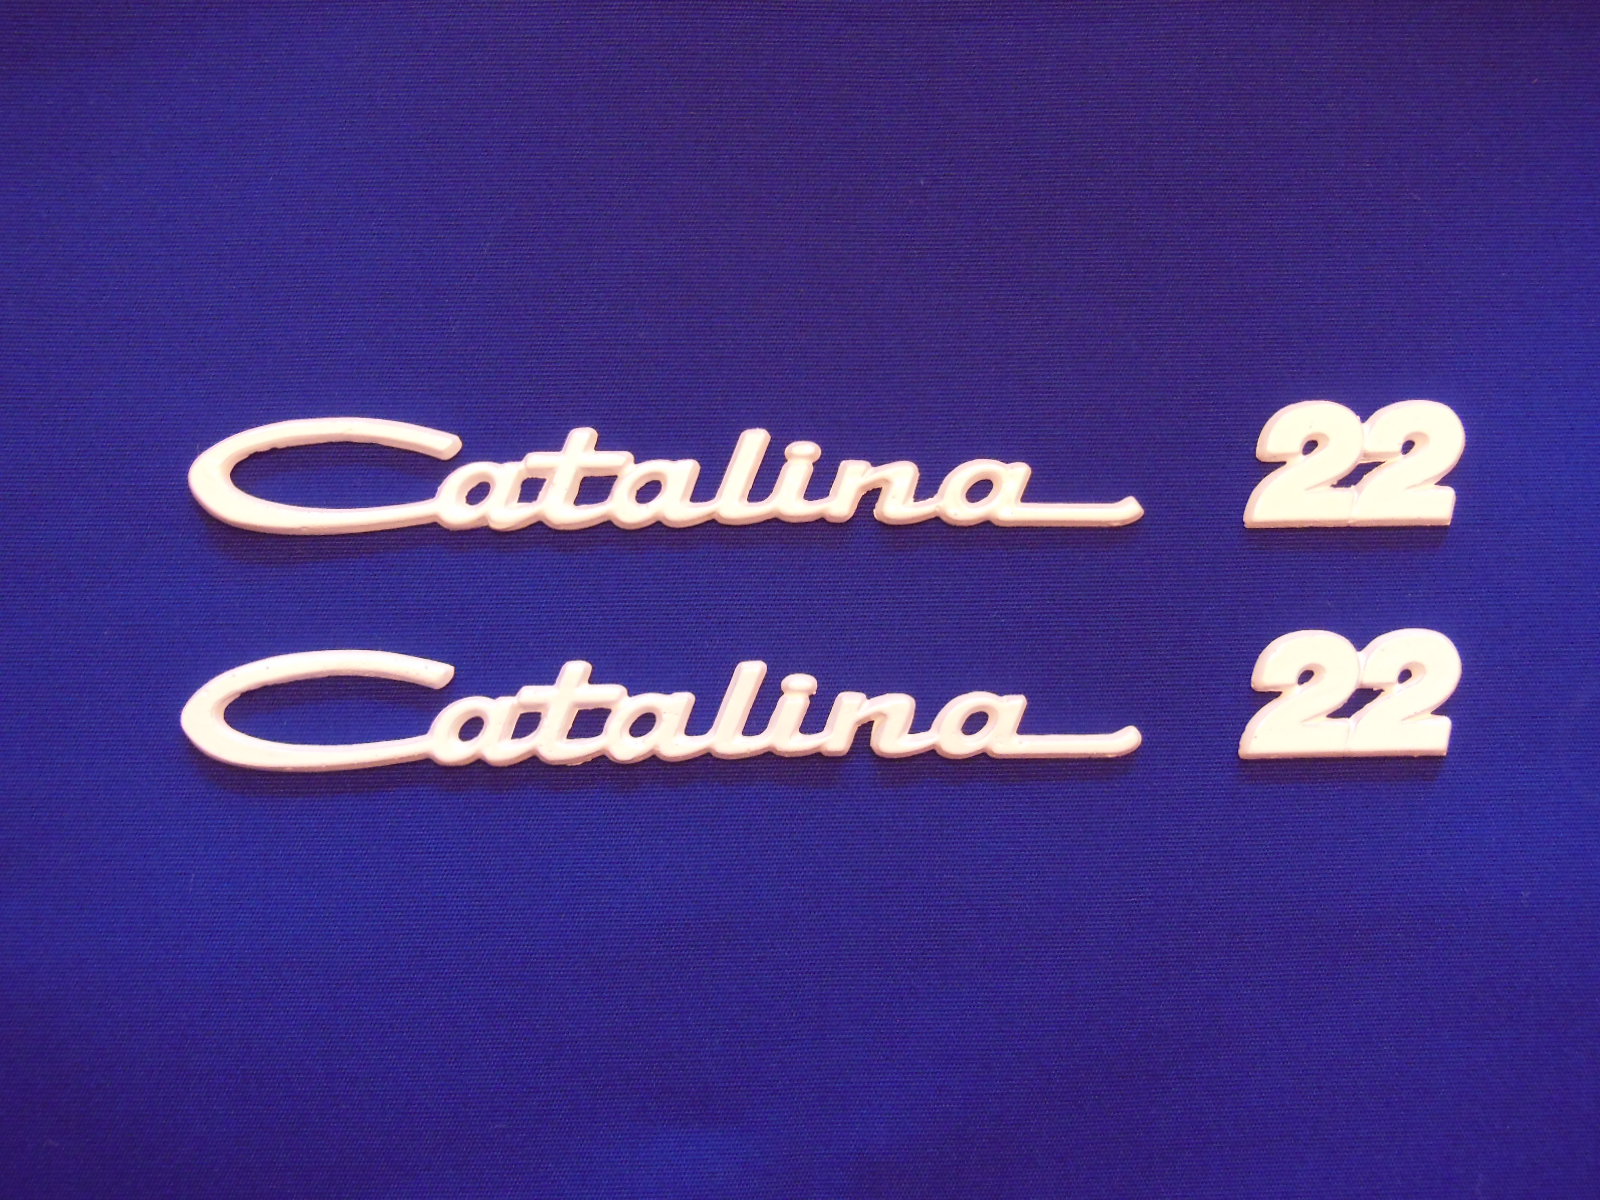
At the same time that I painted the cove and boot stripes on Summer Dance, I used the same Interlux Brightside Flag Blue paint on the top faces of the emblems. To do that, I cut a piece of parchment paper (any non-absorbant paper should do) larger than the emblems and taped the edges down onto a flat surface. I brushed a medium-thick coat of paint onto the paper, taking care to avoid any thick or thin spots. Then I placed the emblems face down into the paint, making a reverse stamp. In seconds, the paint was transferred to the emblem faces and left the emblem edges white. The trick to this working well is to put just enough paint on the paper to leave the right amount on the emblems without it running over the edges.
Just peel and stick
After the paint cured well (you want it hard so that you don’t leave fingerprints when you press the emblems on), I applied automotive double-sided adhesive film to the backs of each piece. I carefully cut the film around each piece with an Exacto knife.
Before mounting the emblems on the sailboat, I cut the remains of the old emblems off the coamings with a razor blade and restored the surfaces. I wet sanded with 500, 1000, and 1500 grit sandpaper, then machine buffed with rubbing compound and finished with polishing compound. I cleaned the areas with acetone, laid a baseline with masking tape, and then peeled the release film and pressed the new emblems in the old locations.
As you can see, they turned out great. The new color really stands out compared to the old. This was a fun little project that helps to hide Summer Dance’s age well. I recommend you give it a try if you want to replace your boat’s emblems but keep it classic-looking.
The Bottom Line
Suggested price: $79.32
$tingy Sailor cost: $19.99
Savings: $59.33

Hi,
I want to let you know that I really enjoy your posts. I have done the jiffy reefing, Boom vang and lazy jacks, strongly inspired from you excellent writings.
I am in the process of designing and building a furler for my Genoa with high pressure PVC pipes, an old bicycle wheel hub from a recycling yard and Sta Lok fittings (the most expensive part). I would love to have your spin on this project. Once I have it all done and tested in some reasonably strong wind I will let you know how it went.
Thank you for the great posts and please continue your excellent writing.
Bernie the Sailor man.
Hi, Bernie
That sounds like an interesting project and one that I’d like to see if it works for you. Furlers seem extraordinarily expensive to me for what they are and an economical DIY version for trailer sailors would be a good addition here.
Very sharp. Nice!
I really enjoy your posts and have mentioned them on Facebook in the Catalina 22 Sailboat Owners Group a few times recently. Also this past weekend at the Titusville Sailing Club’s Regatta where the Catalina 22 travel series group were racing. Several of the racers had heard/read your posts before, so your famous down here ;-).
I had tried this replication of the Catalina 22 emblems myself last year with poor results due to using child’s hardening clay which hardens overnight but didn’t release from the emblems easily resulting in the clay crumbling. I also would of rather have the original logo (retro look) over the modern logo, personally. I did a Google search for the Pontiac emblem to see cost and material used. If they are metal and priced right, I’d be in favor of just using them rather than epoxied replications as I’m sure they would weather and take abuse better. I will without a doubt get my hands on some mold putty and try this with my modern logos just to have backups for when they eventually break or fall off.
Thanks for your comments, Matthew. I’m glad to hear that others want to keep the classic look alive. Let me know if you come up with any improvements.
Thanks for the idea! I just finished doing this project and am thrilled with the results. I used fiberglass resin for casting and it worked great. Also, if anyone is having difficulty finding molding putty, use silicone. I used clear 100% silicone kitchen and bath caulking and kneaded it in soapy water to turn it into a molding putty. Also, cooking spray is great to use on the mold before pouring in the resin. It will pop out super easy.
Thanks for sharing your results, Adam!
Would you be interested in making a set for my C-22 for the CDI price? Unfortunately my boat is missing most of the emblems.
Hello, Hunter
I appreciate your offer but, sadly, they take more time to make than I have to spare right now. You might consider finding someone with a 3D printer in your area. They should be able to turn a 2D logo into very accurate replicas in short order.
Thanks,
$tingy
For those of you with access to a 3D printer, someone graciously made one and posted it on Thingiverse: https://www.thingiverse.com/thing:4815046
that’s awesome! I would like the 3D printed cockpit drain scuppers…