

This post is the continuation of Refinish Your Swing Keel for Best Performance – Part 1: Removing. This week, I describe using hand tools and power tools to remove most of the old coatings and rust, one way to lift and move the keel so you can work on it elsewhere, and the different methods of removing the remaining rust either chemically or by sandblasting to prepare it for fairing. Fairing is the process of making the keel fair, meaning the right shape, smooth, and pretty.
In the previous post, I described getting the keel off of the sailboat. With the keel out where I could easily work on it, there wasn’t a lot of loose, flaking paint to scrape off like I expected. Most of it was pretty intact. There was what looked like original white gelcoat or some kind of thick paint over the bare iron followed by haphazardly applied patches of red Bondo filler over that, and several layers of red antifouling paint on top. At first, I thought the minimal flaking was a good sign, that the outer coating was fully intact and that there was minimal rust damage. That wishful thinking turned out to be very wrong.
Just a little off the top and sides, please
I started grinding the paint off partly because I wanted to know what and how many coatings were applied to the keel over the years and partly because I wanted to minimize the cost of sandblasting if I chose to have that done. I used a 4″ angle grinder but that was too slow. I also began discovering deeper flakes.
This is one of the restoration tasks that the Swing Keel Refinishing DVD glosses over. Maybe the job was easier back in 1999 when the DVD was made. Our keels have deteriorated for 15 more year since then. I switched to the more primitive method of hammering the loose material off in small sections. I alternated between hammering and then grinding three passes over each section to give my forearms time to rest. This seemed to work the fastest and with the least amount of effort, but it was still about 6 hours of messy, hard work.
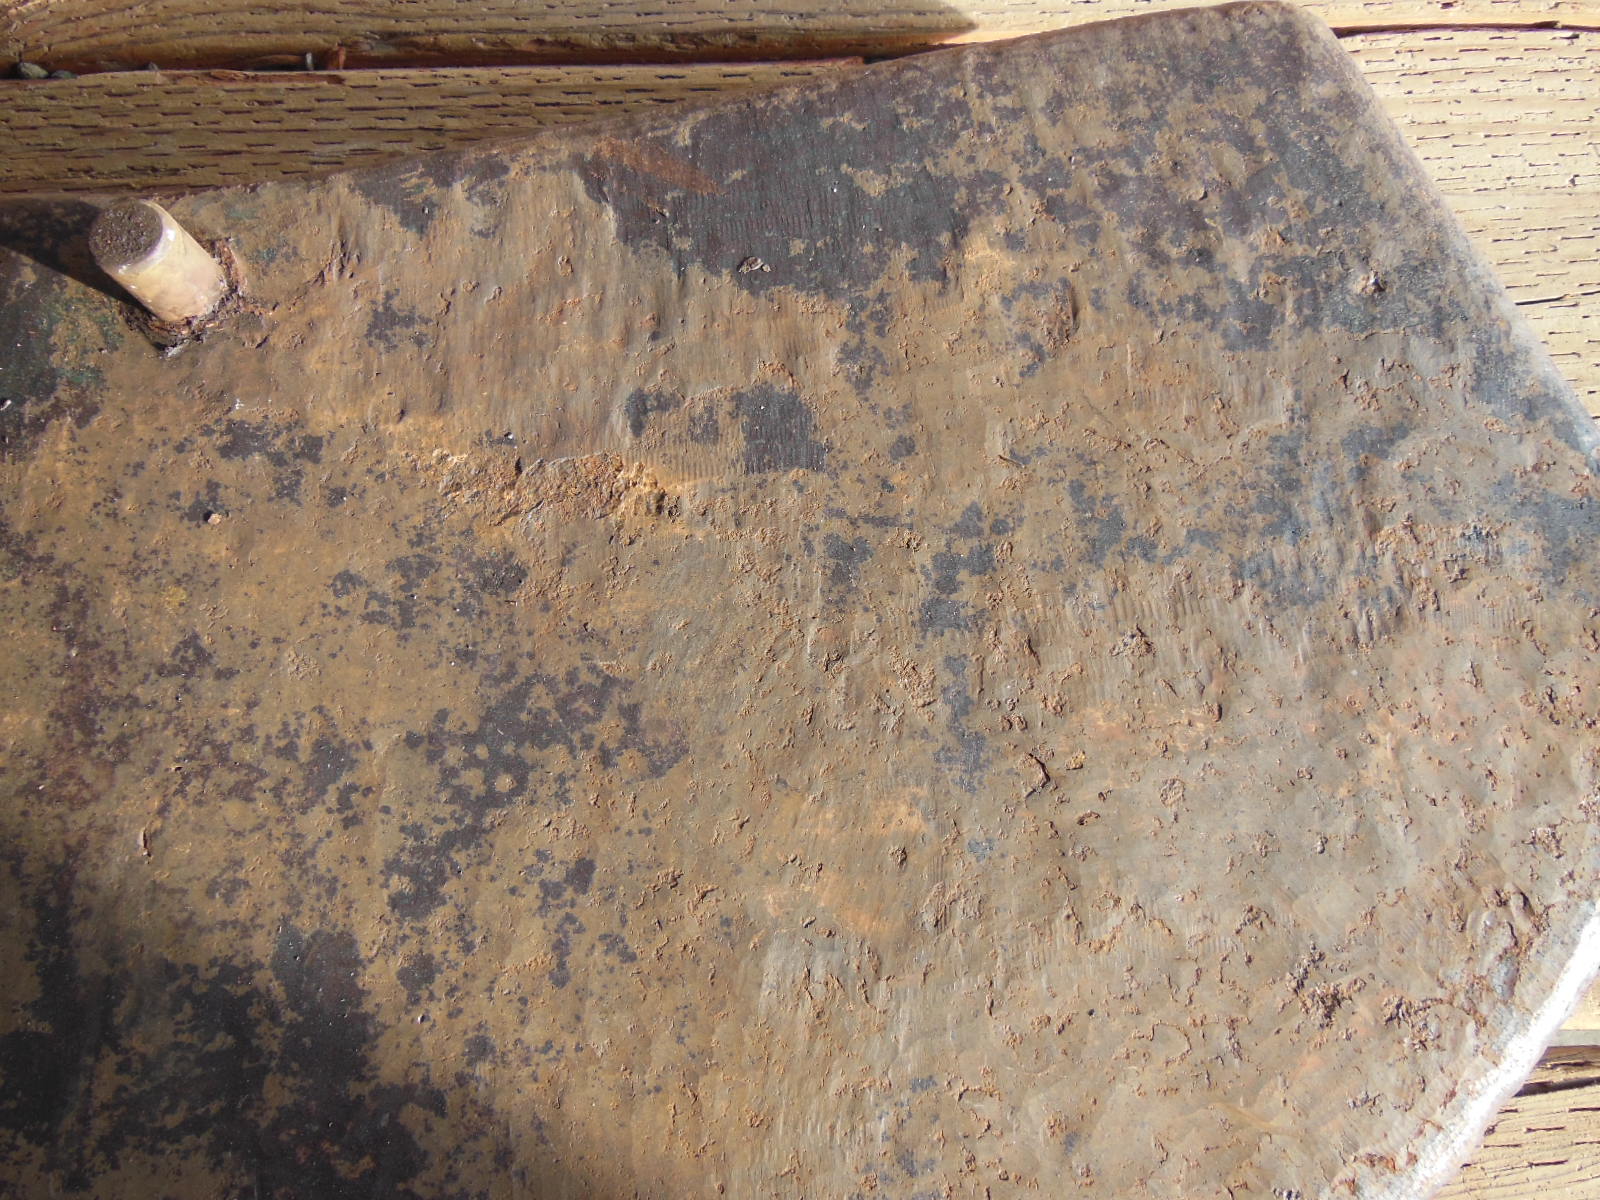
Most of the filler and paint crumbled off easily from the hammering. The gelcoat underneath it was more difficult in places and revealed light but widespread rust underneath.
Old C-22 keels are extremely porous and rust had penetrated up to half an inch deep in some spots. Don’t expect to grind down to flat, solid, shiny metal easily.
Depending on how you intend to deal with the rust, either mechanical removal by sandblasting or neutralizing it with chemicals, just take off the loose material down to reasonably solid metal and move on to the next step.
Holy holes, Batman
I was surprised at one spot near the MEXICO stamp to find an area where there was a lot of filler. By the time I had all the filler and loose chips of iron the size of silver dollars dug out, there was a pit in the keel about the diameter of a softball and as deep as a golf ball.
Not all keels are as bad as mine, but don’t be surprised if yours is.
With all the old coatings removed, I moved the keel from my boat garage (barn) into my better lit and heated shop to make it easier to work on. It usually gets down to the single digits Fahrenheit here in Stingyland in the deep of winter. To do that single-handed, I erected a tripod of fence poles over the keel sled. I tied the top ends together with a chain to which I connected a come-along with a snatch block. I connected that in turn to a lifting strap slung around the keel.
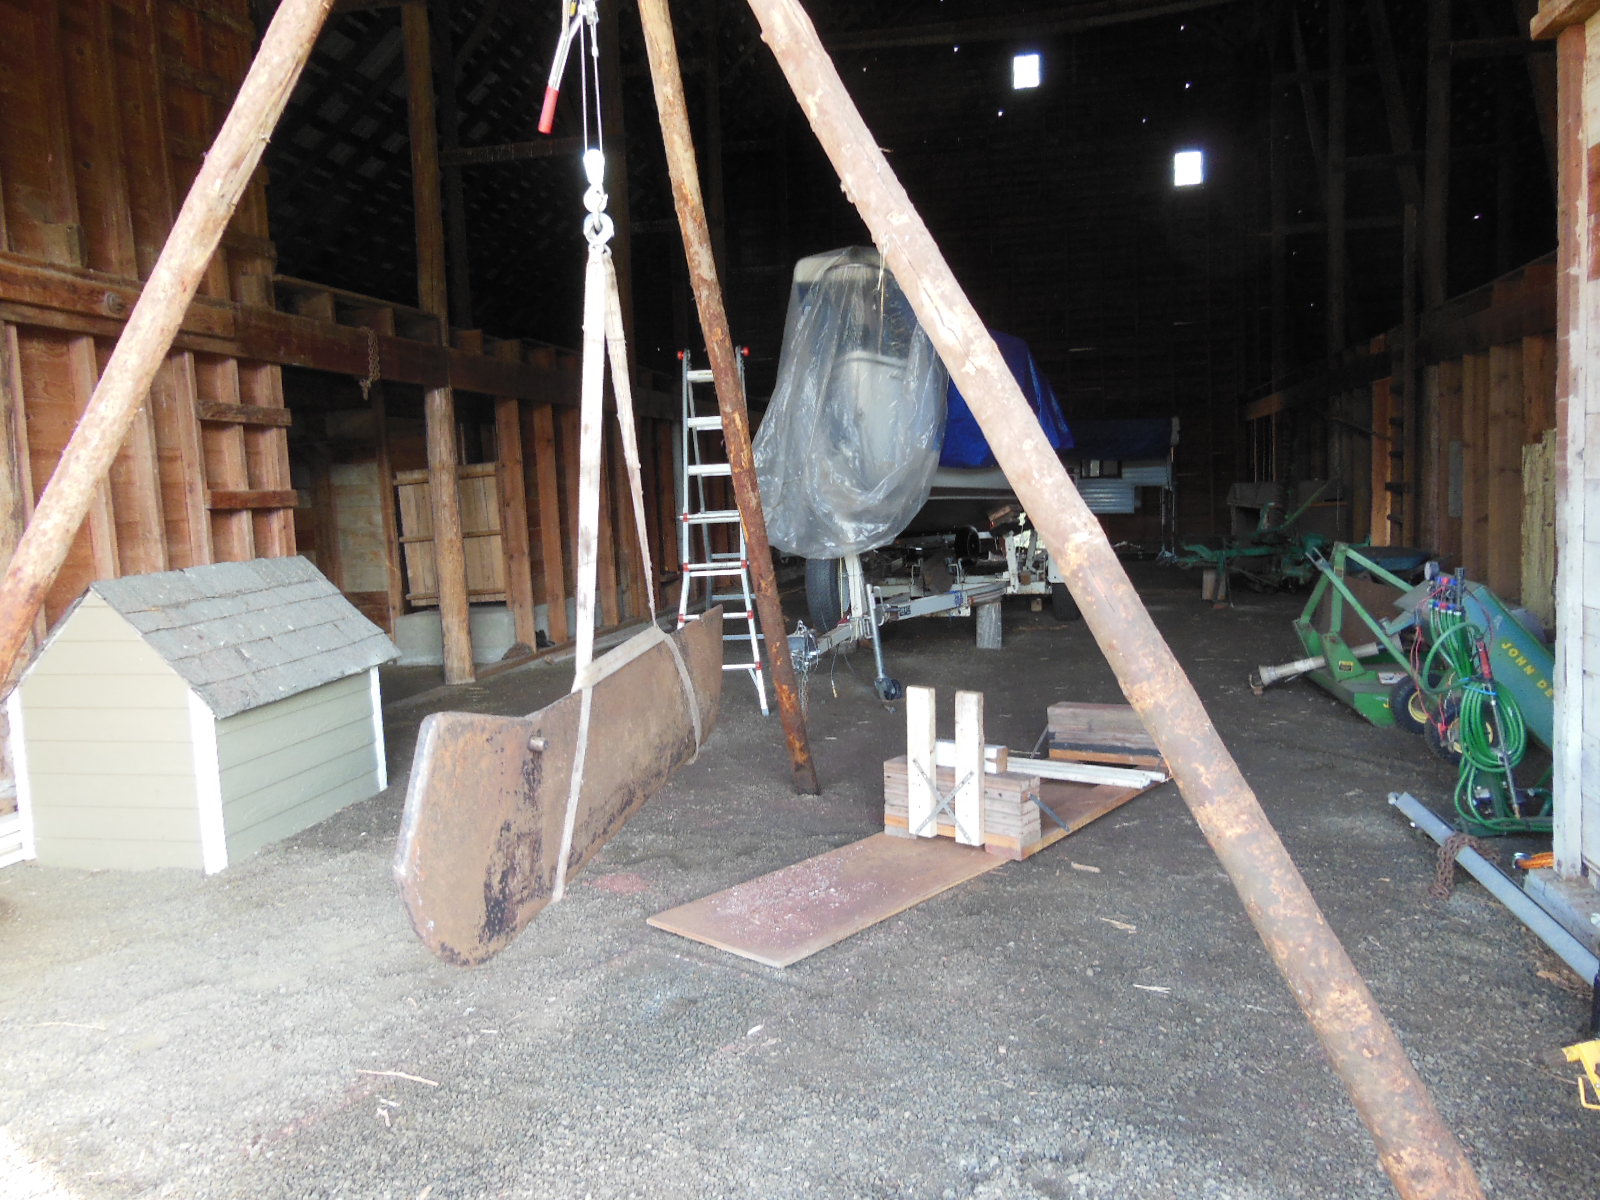
I was able to easily lift the keel enough to back my utility trailer underneath it before lowering the keel onto the trailer. The trailer made a useful workbench for the keel inside the shop and made it easy to move the keel by hand to wherever I needed it.
Other owners have used motorcycle lifts, engine hoists, or whatever they had on hand. The important thing to remember is to lift the keel in a balanced, well-controlled way. It’s balance point is not in the middle, lengthwise. It’s farther toward the lower end where the keel is thicker. If it gets even a little bit out of control, it’s probably going to fall and damage anything it its path.
Rust never rests
As you can see from the pictures above, which were taken the next day after grinding, rust forms almost immediately on the exposed iron. The day before, it was shiny metal. Granted, the humidity was pretty high when I was doing this (it was raining on and off), but I was very surprised at how fast the rust started. This is no high-tech alloy but nearly pure iron.
Some of the moisture was also coming out of the keel itself even after months of being out of the water. When I started work on the keel one day, I noticed small beads of moisture where I had ground the coatings off the night before. It wasn’t dew because the keel was inside my barn. And the “sweat” was on the underside of the keel.
This is proof that it’s a very good idea to let the keel dry out for at least several weeks after you clean it and before sealing it.
The Swing Keel Refinishing DVD recommends 30 days. The more, the better, I say, and if you have one of the moisture meters commonly used for woodworking, it will tell you when the keel is dry enough to seal.
Stop the decay with chemical treatment
Depending on how badly deteriorated your keel is, you can deal with the remaining rust in one of two ways. The DVD recommends grinding the old coatings off and most of the remaining rust before applying Permatex #81775 Rust Treatment (Extend) and proceeding with the fairing step. The rust treatment purportedly reacts with the iron oxide, renders it inert, and encapsulates it in a polymer barrier. It is supposed to stop future rust and make a good base on which to build up the foil shape with filler material. POR-15 is a similar product used by some owners. If your rust isn’t very bad, this could be a good way to go.
Blast it to oblivion
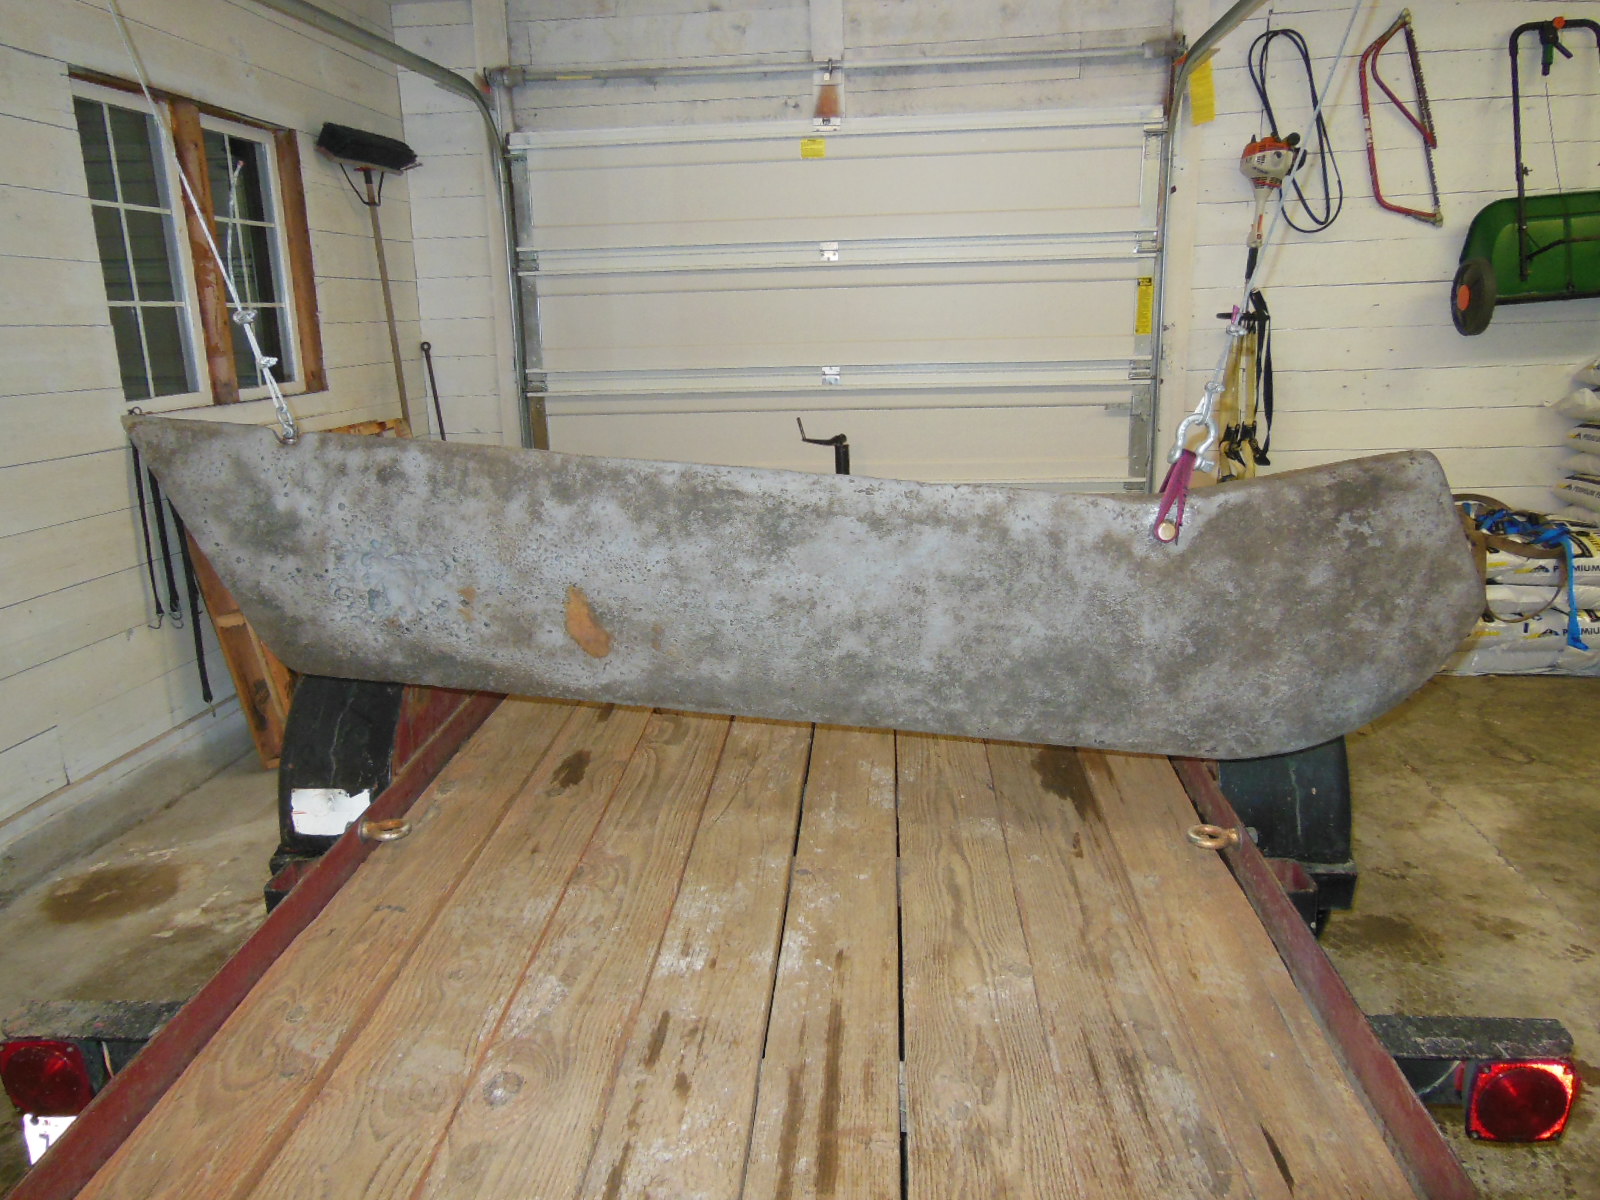
The other option you can take is to sandblast the keel down to solid, clean iron and then seal it with regular two-part epoxy or an epoxy primer paint. The advantage is that you can be sure virtually all the surface rust is removed and all rust pockets opened and cleaned out. You can’t do that by grinding alone and if you have a very porous keel, it’s questionable whether you can reach it all with chemical treatments short of completely immersing the keel. This is a better solution if you have extensive rust and a very porous keel.
I was fortunate and got a quote of $77 for sandblasting from a local shop, Northwest Sandblast and Paint, so that was the route I took. Other owners refinishing their keels at about the same time paid two to three times that amount in other parts of the country. Northwest Sandblast and Paint used copper slag as the abrasive media. They did a good job and protected the pivot pin and eye bolt as I instructed them. I can’t help but think that the preliminary cleaning that I did paid off in keeping the cost down. Time and money well spent, I’d say.
If you take the sandblasting route, you should plan to completely seal the keel as quickly as possible after sandblasting to avoid rust starting on the freshly exposed surface.
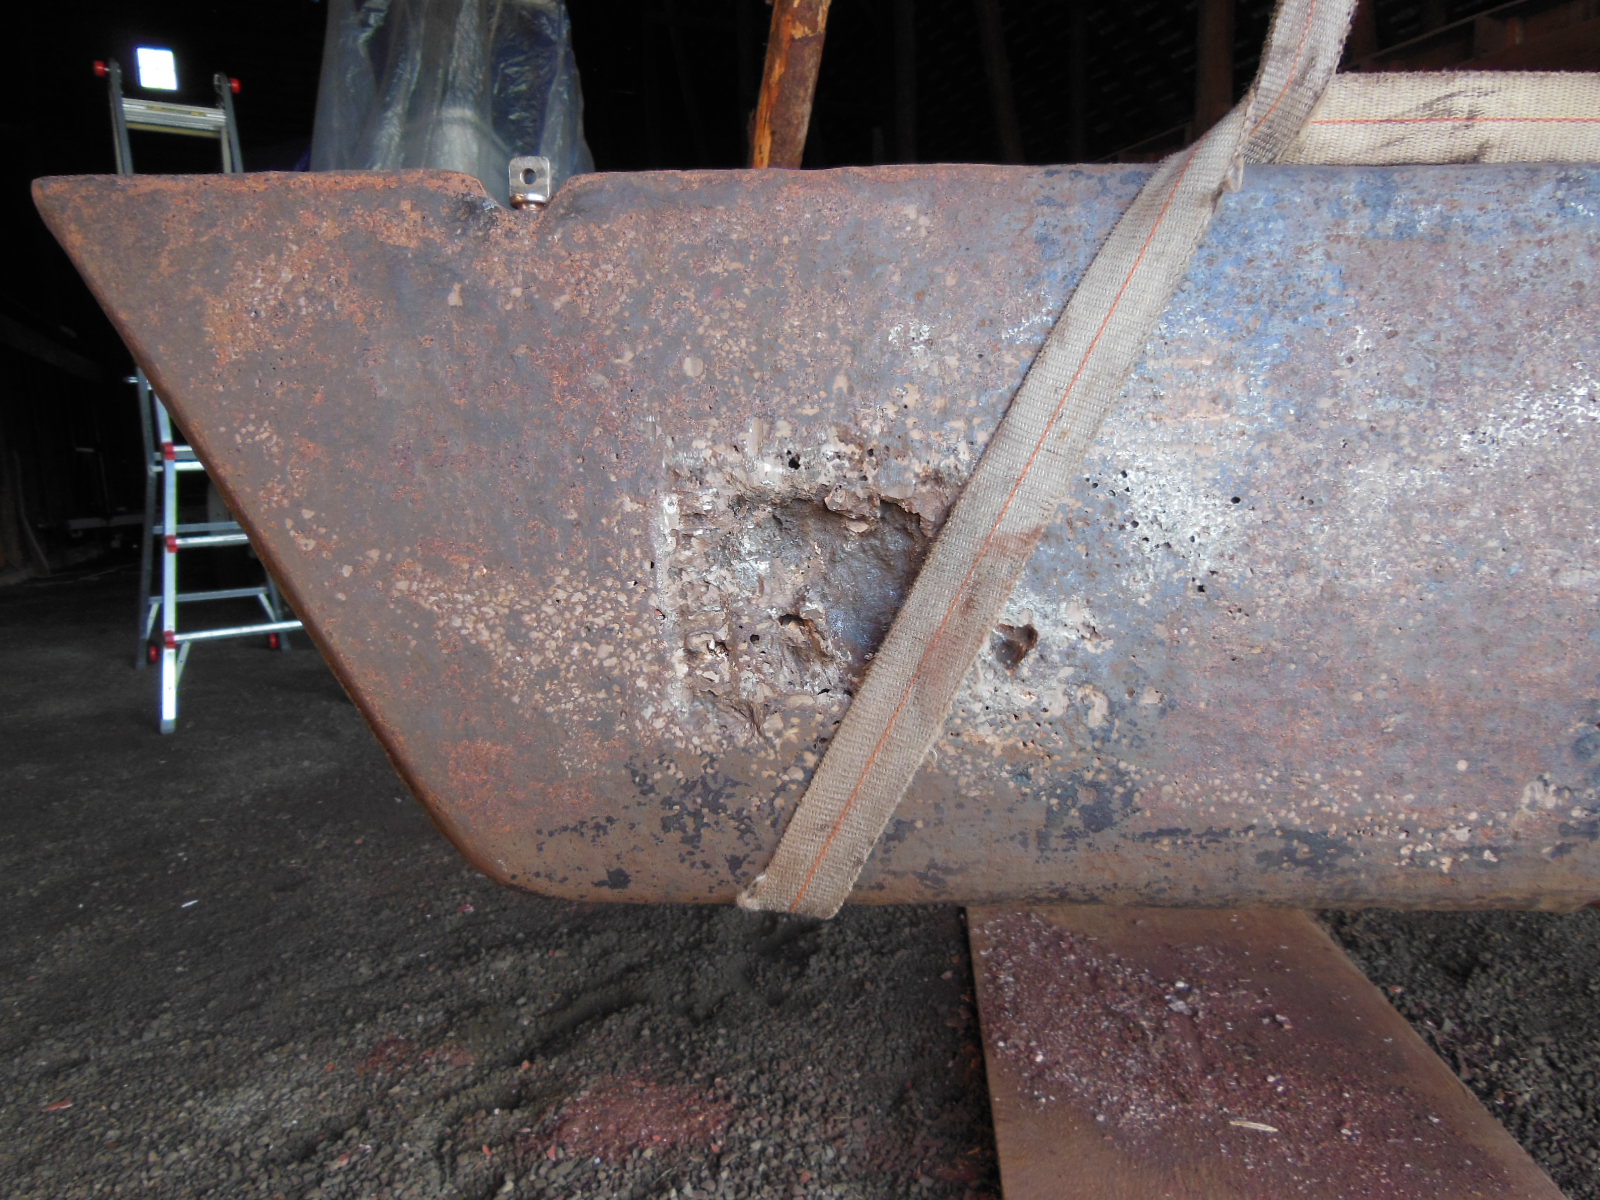
In the pictures above and below, you can see a hand-sized rust patch caused by the keel laying on a damp forklift pallet. That formed in the few hours between when the keel came out of the sandblasting booth and when these pictures were taken. To remove it, I dried it thoroughly with a heat gun, applied Naval Jelly for 5-10 minutes, then washed it off, and dried again. Easy-peasy.
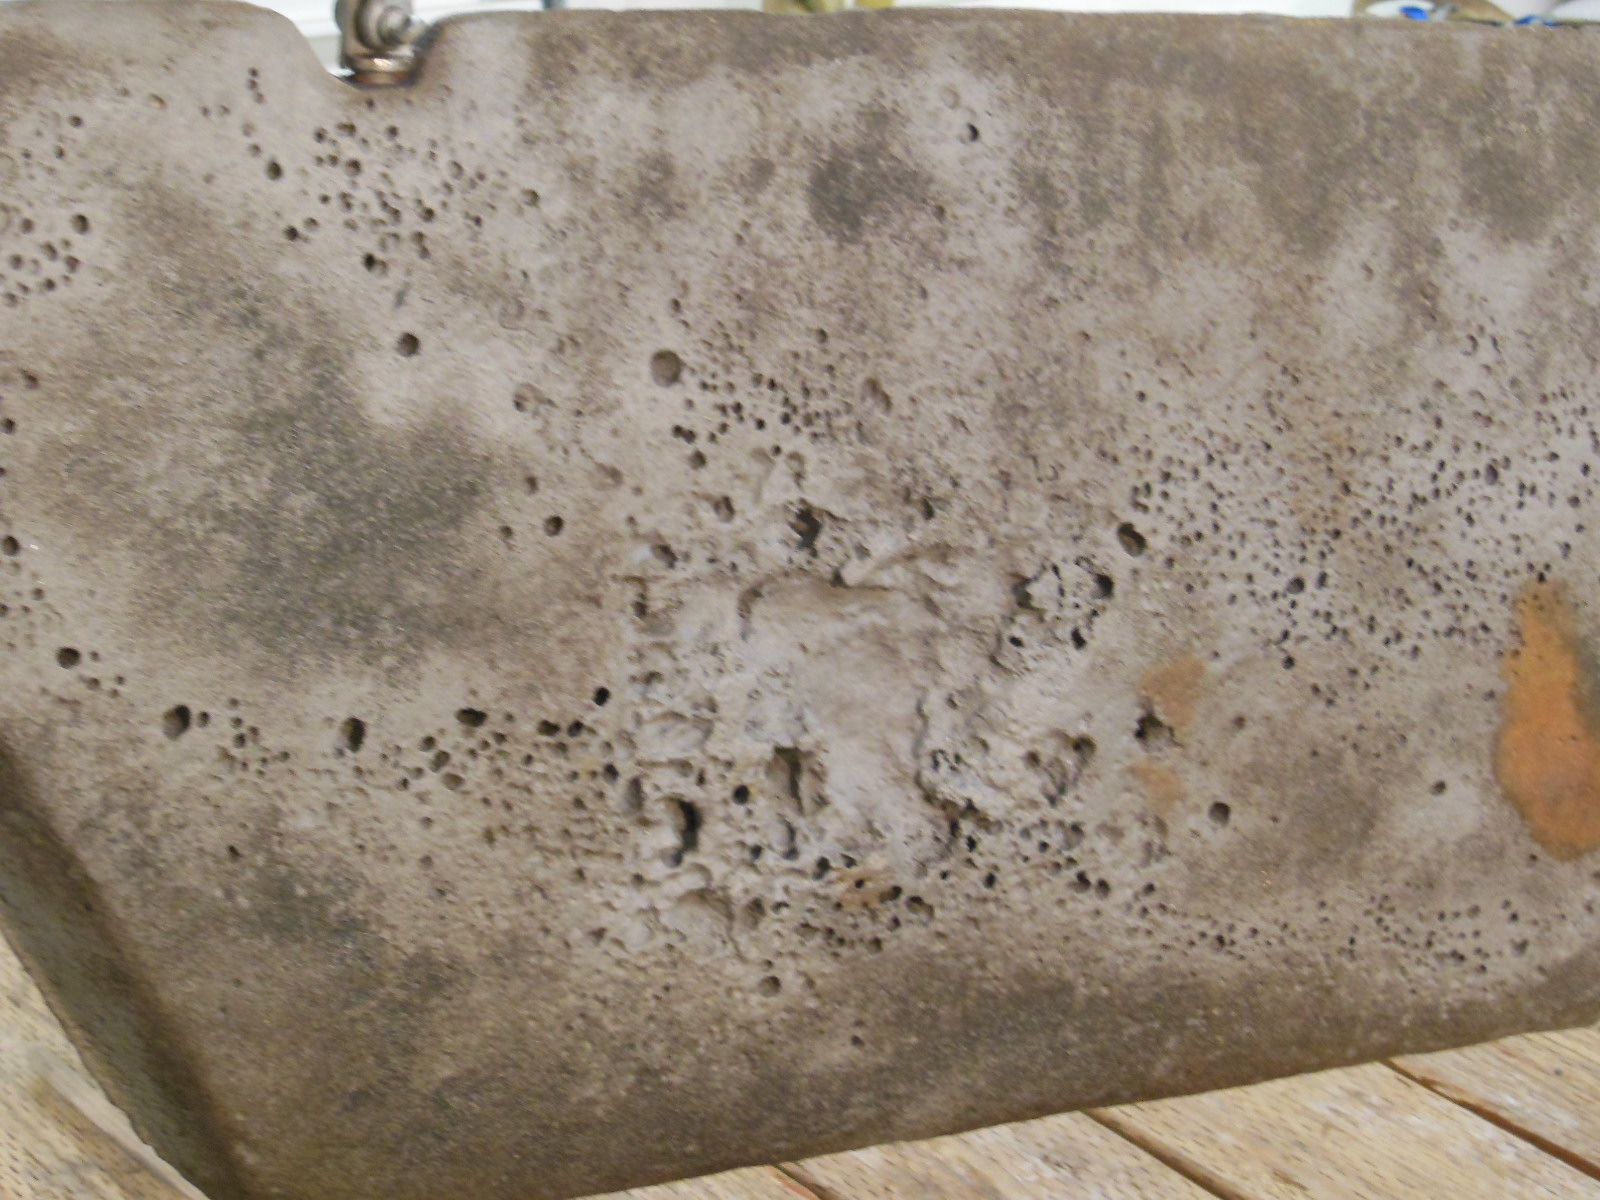
With the keel completely clean, you can easily see the low quality of the crude casting process that was used to make the early keels. The port side is better shaped and the surface is smoother and relatively pit-free. I suspect that was at the bottom of the mold. The starboard side is flatter and riddled with bubbles and pits. I suspect that was at the top of the mold and it was incompletely filled.
The next step in restoring the keel is described in the next post, Refinish your swing keel for best performance – Part 3: Fairing. In that post, I describe the fairing system I used, how to seal a freshly sandblasted keel, the foil curve template for getting the right keel shape, applying body filler to build up that shape, and paying extra attention to the shape of the leading edge of the keel.
Would you like to know when I publish more posts like this? Enter your email address below to subscribe to this blog and receive notifications of new posts by email. You will also receive occasional newsletters with exclusive info and deals only for subscribers and the password to the Downloads page. It’s free and you can unsubscribe at any time but almost nobody does!

Good coverage of the 2nd step. Question: You said, “and protected the pivot pin and eye bolt as I instructed them” How / what was this “protection” done?
thanks, James
Hi, James
I wrapped them good in duct tape but I also warned them. I wasn’t as worried about the eyebolt since it’s stainless steel but I didn’t want them blasting the softer brass pivot pin, which was like new.
Its really shocking the defect in that keel casting. When I do this in the spring I will look closely at mine.
And mine isn’t the worst that I’ve seen by far. It seems that there was no such thing as a rejected keel back then, only some that needed more work than others before they were bolted onto the hulls.