

This post is the continuation of Refinish your swing keel for best performance – Part 3: Fairing. I will describe: building a fiberglass reinforced guard on the leading edge, applying the final waterproofing coats of epoxy, bonding centering spacers on the upper end, priming with a barrier coat of epoxy paint, and applying ablative bottom paint last.
Before I get started, a bit of legal housekeeping. This post contains affiliate links. That means I receive a small commission if you make a purchase using these links. You can purchase the products anywhere you like, of course. For a complete explanation of why I’m telling you this and how you can support this blog without paying more, please read my full disclosure.
Put on your armor
Before applying the top coats of paint to the newly faired keel, I made a fiberglass guard on its leading edge for extra protection. I’ve sailed a little too close to shore a couple of times and bumped the keel on rocks. If I ever do that again, I don’t want it to gouge through the fairing and down to the metal and start a rust problem all over again.
A couple of layers of fiberglass cloth is cheap insurance.

To begin, I wetted down each side of the leading edge with unthickened West System 105A epoxy a little wider than the 4″ fiberglass tape. Starting at the top of the foil, I laid two strips of fiberglass tape butted edge to edge down the length of the keel and along the beveled bottom edge. I worked plenty more epoxy into the fabric until it was saturated but not running. I cut darts in the tape at the sharpest turns but it conformed well around the gentle curves.
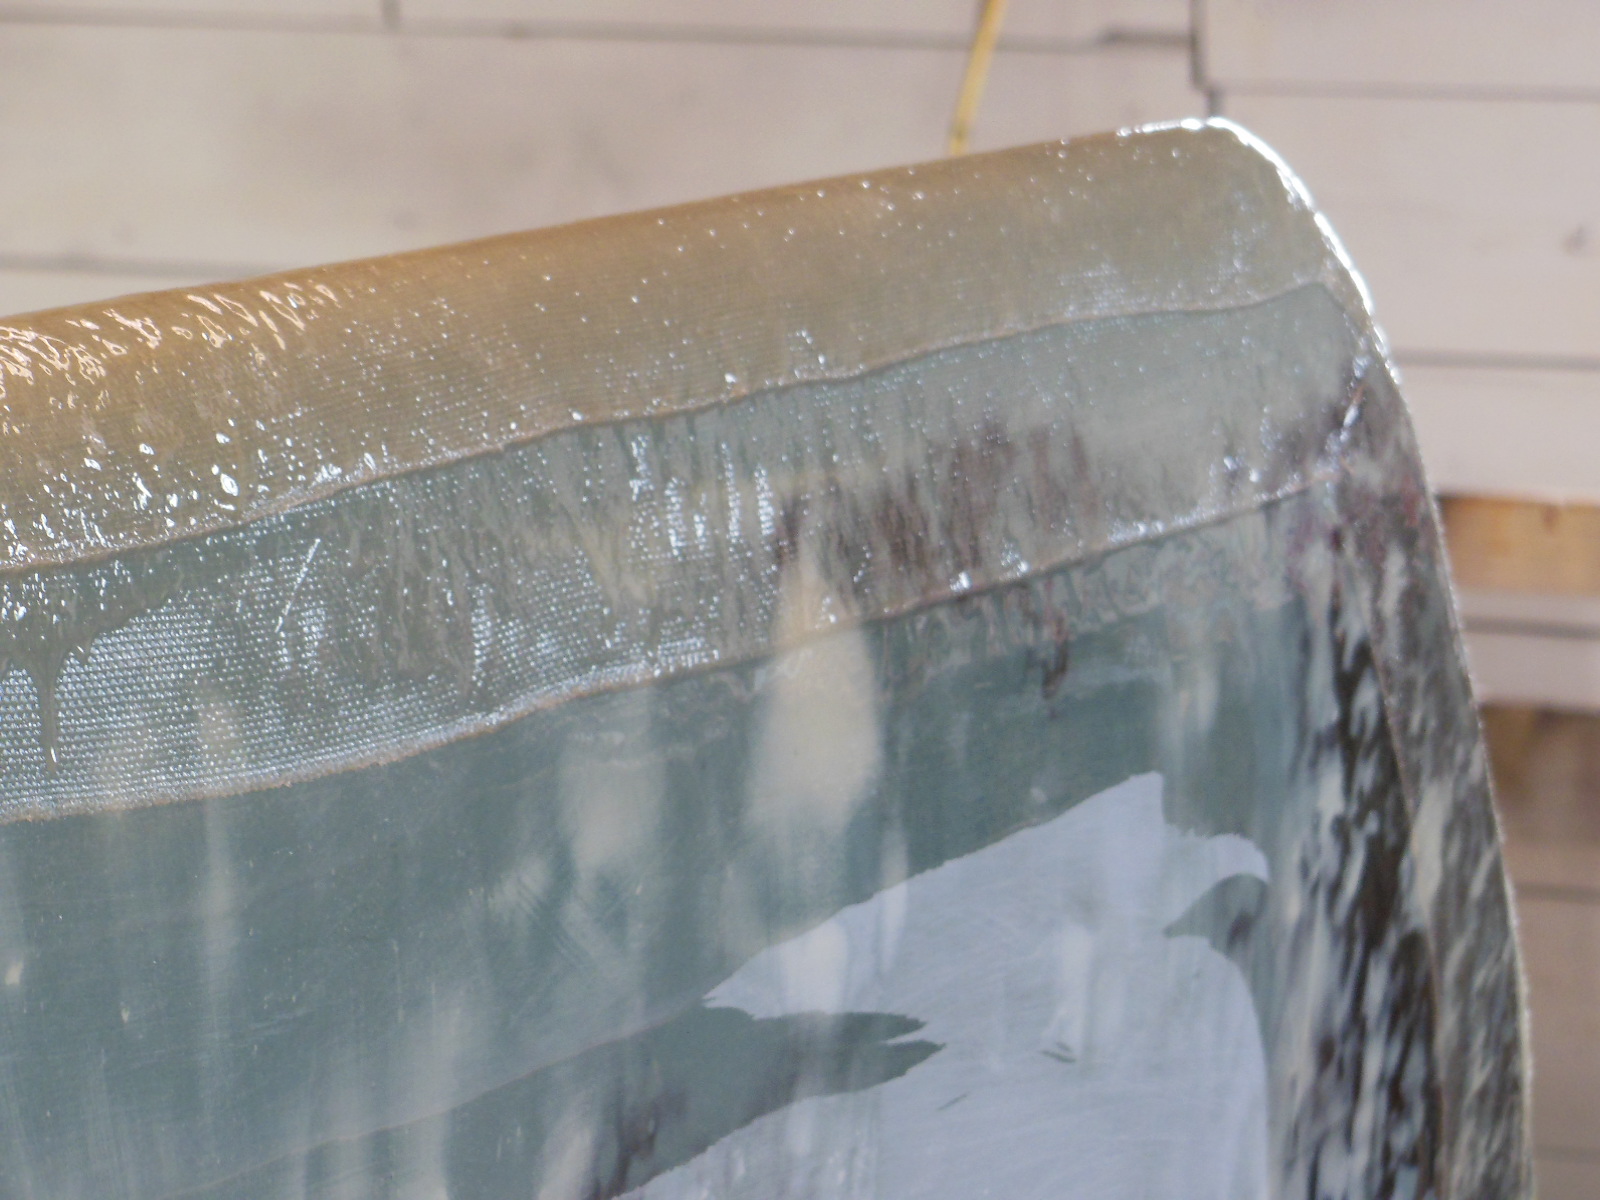
Over that, I laid a third strip over the joint between the two previous strips, but this strip I extended up over the curve at the pin end to give protection when floating the boat on and off the trailer. That area is not likely to hit anything more dangerous than a keel roller or a guide but who knows, I might want to beach the boat someday and I don’t want to have to worry about damaging the keel.

To seal and protect
Then came the last two coats of epoxy to smooth over the tape edges and to seal the fairing filler. First, I hoisted the keel and laid it back on its side on the trailer.
For the first coat, rather than apply the epoxy unthickened with a brush like at the beginning, I thickened it to a creamy consistency with West System 406 Filler Colloidal Silica and spread it on with a 4″ steel putty knife, which left a flat, smooth surface. Immediately, I tipped the epoxy with a chip brush to smooth out any ridges left by the putty knife.
After that cured, I applied the last coat of unthickened epoxy. I mixed 7 pumps each of resin and hardener for each coat per side for a total of 28 pumps.

To prepare for painting, I wet sanded the entire keel with 120 grit sandpaper.
Shimmying inside the keel trunk
The last step before painting was to add centering spacers to the sides of the pin end of the keel. These help to keep the keel centered in the trunk. They also lend the structural strength of the keel trunk to the top of the keel to keep it perpendicular to the hull and to keep it from rocking sideways on the pin and hangers, which accelerates wear.
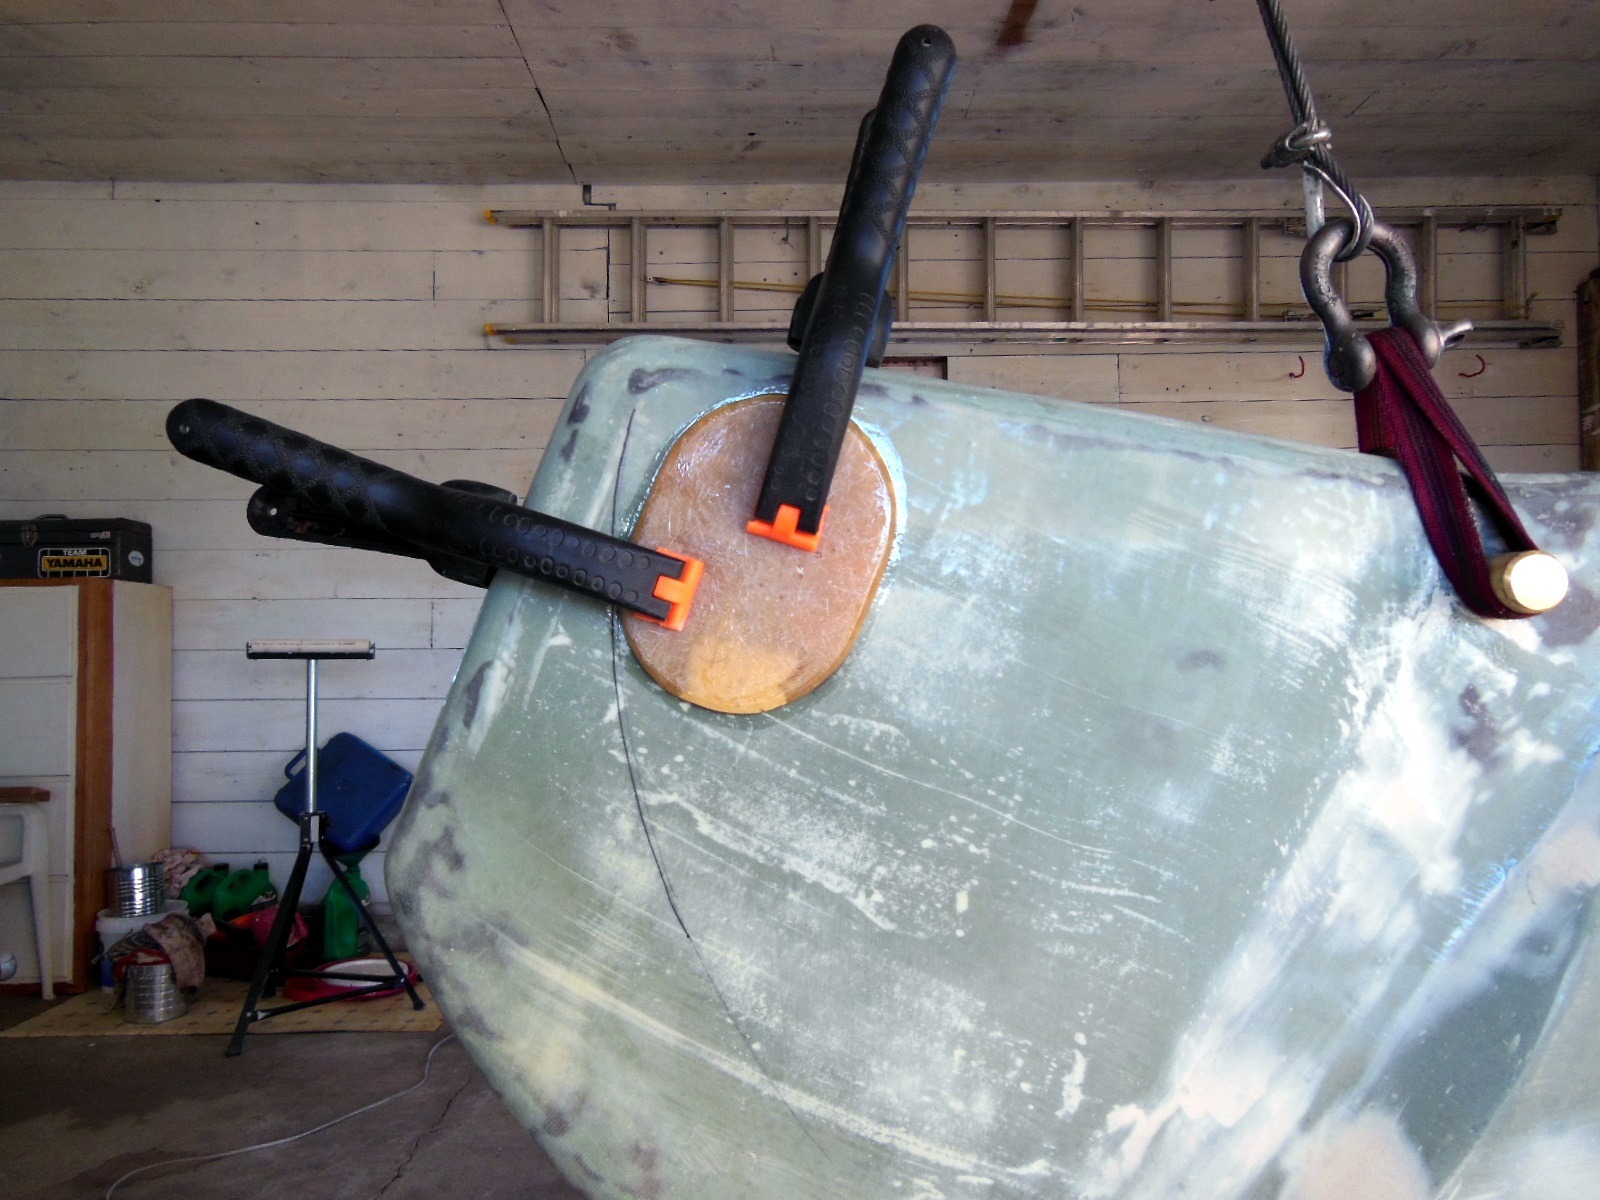
Instead of buying the overpriced kit from a certain online Catalina parts retailer, I cut my own spacers out of fiberglass scrap I had on hand. The spacers should be about 4″ x 6″ x 1/4″. The goal is to make the head of the keel a zero clearance slip fit inside the keel trunk. The exact thickness of the spacers depends on the finished thickness of the keel head and the width of the keel trunk. In my case, the width is 2-1/16″ just below the keel lock bolt. Measure the trunk at the place where the spacers will be, not at the bottom or top of the trunk. The trunk tapers from top to bottom so that it would release easily from the mold when the hull was made.
Be sure to locate the spacers where they won’t interfere with the keel lock bolt, which is centered 15″ from the pivot pin center.
I bonded the spacers to the keel with epoxy. If you choose to buy the kit instead, the installation instructions place the spacers lower on the keel than shown in the picture above. I chose to place mine there to take advantage of the greater stiffness of the trunk near its top corner. The keel must be off the boat to reach that location, so if you add the spacers with the keel still on the boat, use the lower location instead.
Barrier coat and ablative paint
With a properly shaped and sealed keel, the next step was to paint it. I first applied four coats of primer using a two part Interlux Interprotect 2000E quart kit as a moisture barrier and to ensure good adhesion of the ablative paint. About one quarter of the kit (6 ounces of part A and 2 ounces of part B) is enough for one coat. In my case, I also painted the inside of the keel trunk at the same time and this amount was barely adequate. If you don’t also paint the trunk, this amount should be plenty for a thicker coat.
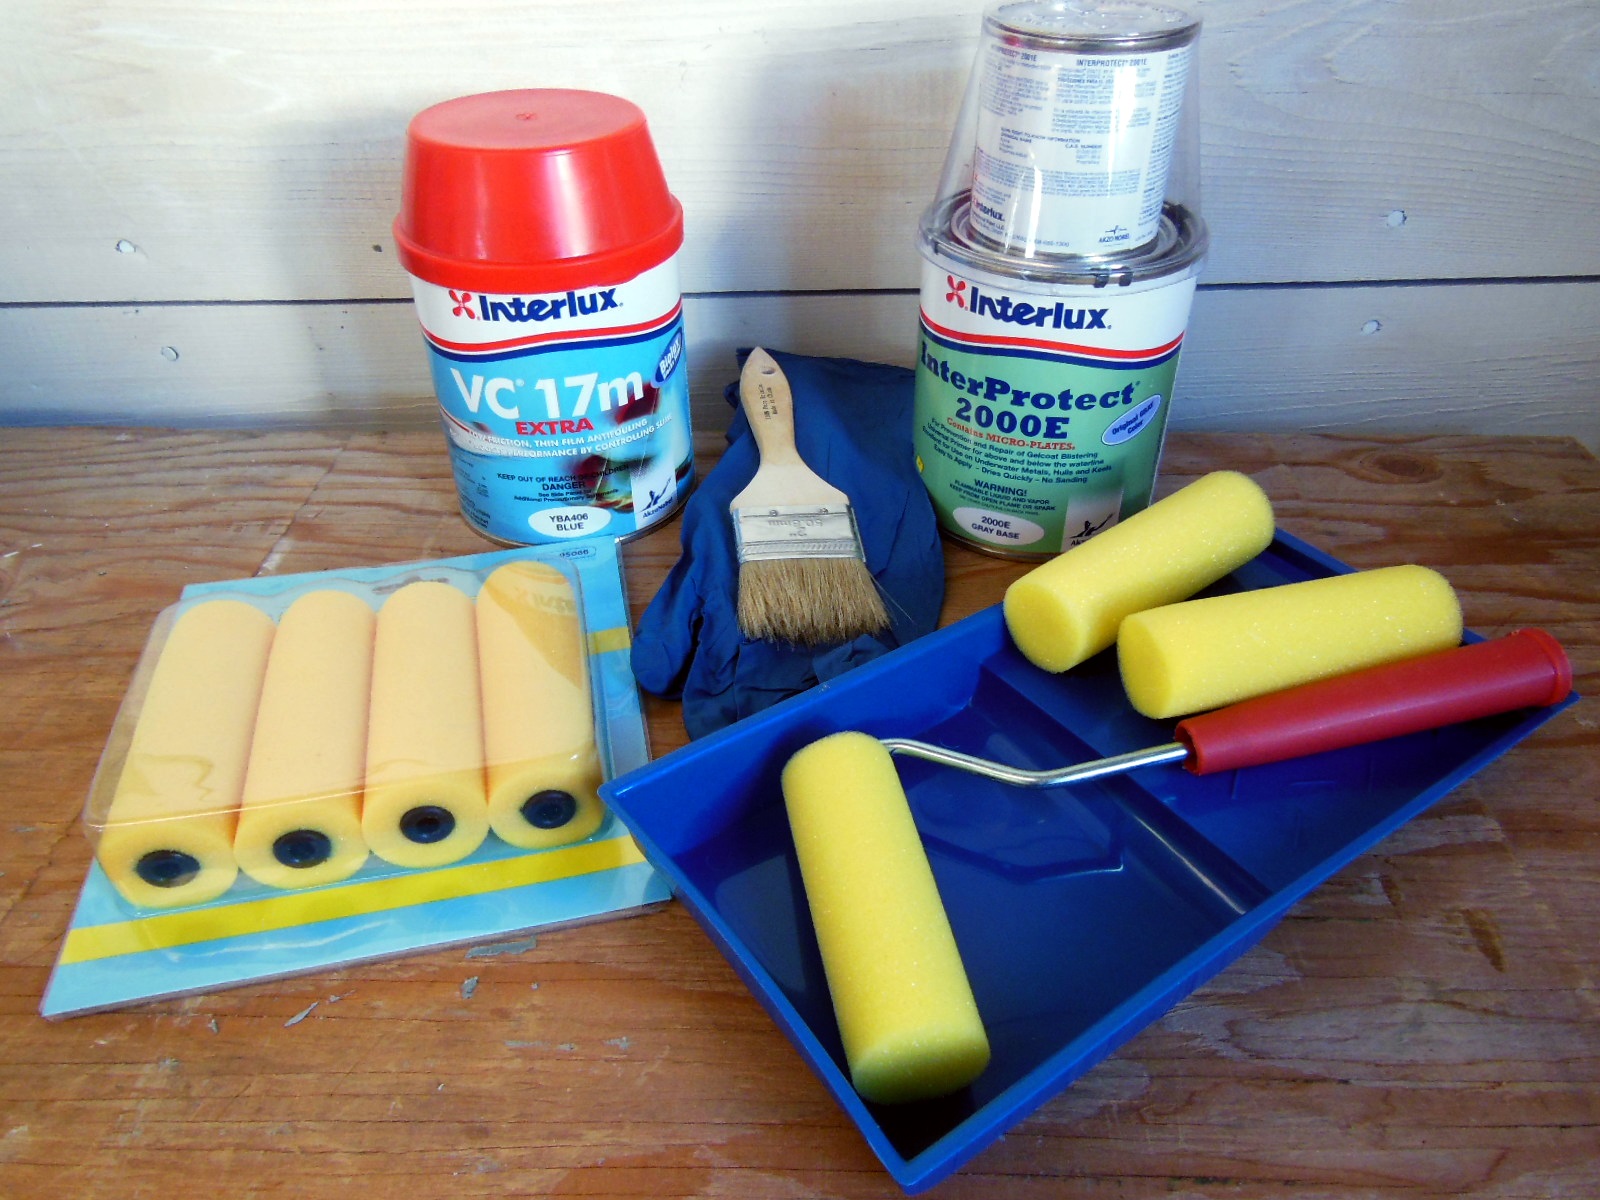
After mixing and letting the primer rest for 20 minutes according to the instructions, it went on smoothly using an inexpensive 4″ trim roller frame and foam rollers. The rollers are the perfect size for painting the keel and trunk but the primer slowly dissolves the adhesive that holds the roller parts together, so don’t take too much time applying the primer or it will be difficult to keep the roller on the frame.
The primer dries fast so I rolled the primer on about one foot of the keel at a time and tipped it with a chip brush before proceeding with the next section. I also alternated directions with each coat for even coverage and a smooth finish.
After the primer had cured, I applied the ablative bottom paint. This step went relatively fast. Interlux VC 17m Extra dries very fast and can be overcoated in 10 minutes. Since I sail primarily in fresh water, I applied two coats per the instructions with the same foam rollers as I used for the primer. After the first coat on the keel and trunk, I started over and applied the second coat immediately.

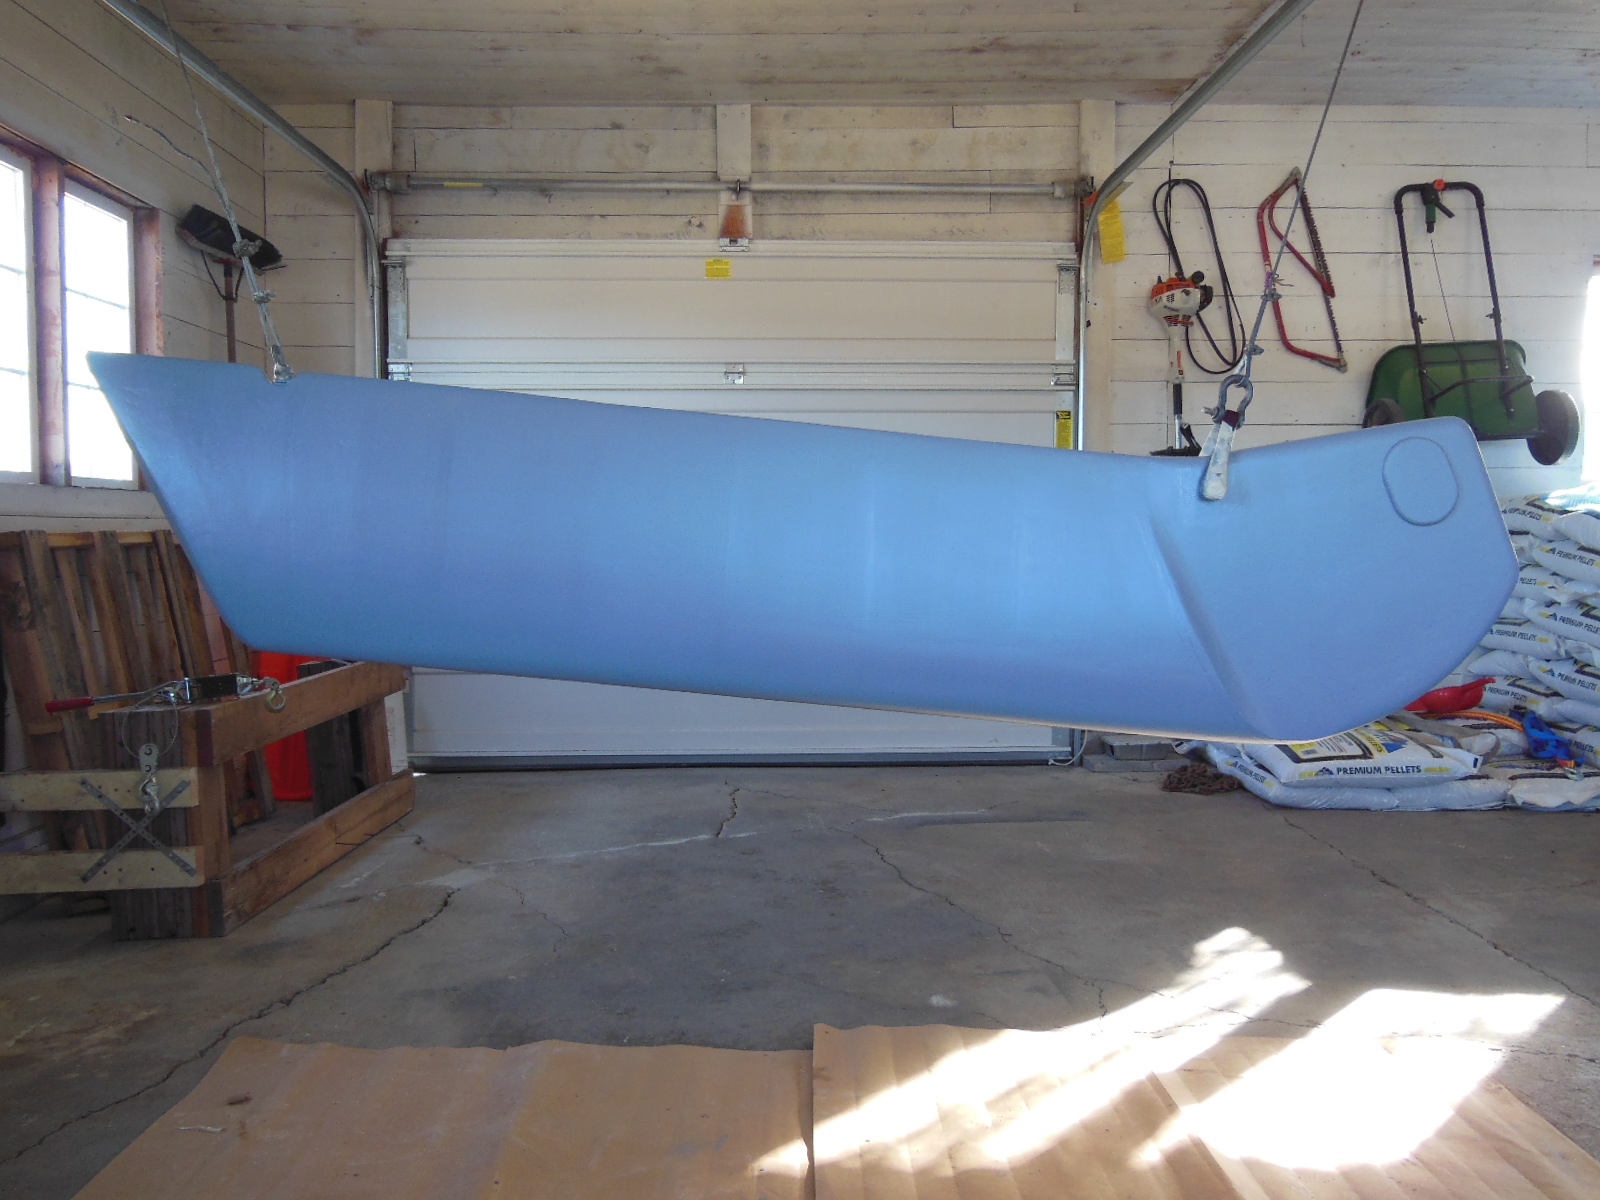
As shiny as a new penny
We were only able to cruise for a couple of days after the bottom paint was applied to the hull and before we parked Summer Dance for the winter. The hull was still a dark copper color, so the keel matched closely after it was installed. It took much longer than expected before they both turned dark blue from being in the water.
With the keel completely refinished, the final step of the project and the end of this series continues in Refinish your swing keel for best performance – Part 5: Installing. In that post, I describe: ensuring a strong and tight fit of the keel hangers with the hull, installing plastic washers to keep the keel centered between the hangers, how to install the hanger bolts tight but not overly tight, and replacing the keel cable and cable hose. The last post also includes a master materials list.
Would you like to know when I publish more posts like this? Enter your email address below to subscribe to this blog and receive notifications of new posts by email. You will also receive occasional newsletters with exclusive info and deals only for subscribers and the password to the Downloads page. It’s free and you can unsubscribe at any time but almost nobody does!

Definite keel envy going on here. That is a thing of beauty. I’m so glad I’m a procrastinator and now have this guide to follow.
I feel like I need more info on the keel shim. If its not put in the right place there can be play which is not good. If the shim applies too much pressure on the trunk, that’s bad too. Why isn’t there more info on how to do this? Am I over thinking this? I want to add one… but I want to make sure when I do, it works.
There isn’t more info because shims weren’t installed at the factory, they’re not widely used by swing keel boat owners, and the originator of the idea doesn’t share much info but would prefer you purchase their overpriced kit instead. So long as you bond it to the keel head as far away from the pin as possible without interfering with the lock bolt and you make it a close but not tight fit in the keel trunk, it should do the job. It’s not a critical part of the system but helps a little.
Really interested in your series, but it looks like Parts 2 and 3 are MIA. Could you provide a link? THANKS!
I fixed the links. You can also see all the keel articles here: Projects – Keel.
Thanks for letting me know!
$tingy
Awesome. Thanks!
What zincs and keel zinc location? I am in Florida and the boat is in the warmer year round.
Hi, Brian
Most C-22 owners drill and tap the keel to attach a round zinc in the location of the small round hole about a foot from the bottom end of the keel in this picture. https://thisoldsailboat.files.wordpress.com/2014/11/dscn1954.jpg I’m not a fan of that method because its nearly impossible to permanently seal that hole from salt water intrusion and rust like shown in other pictures in this post series. But since I sail in fresh water, I haven’t added a zinc to my keel and rust isn’t a problem for me. But if I were to do so, I’d first try a remote zinc installation electrically bonded to the keel instead.
Sorry I can’t be more help,
$tingy