

One of the many things that Catalina Yachts did right in their boats was the upholstery: tough fabrics and bomber construction. You have to forgive the colors and patterns. Fashion is, well, fashion. It comes and goes and comes again.

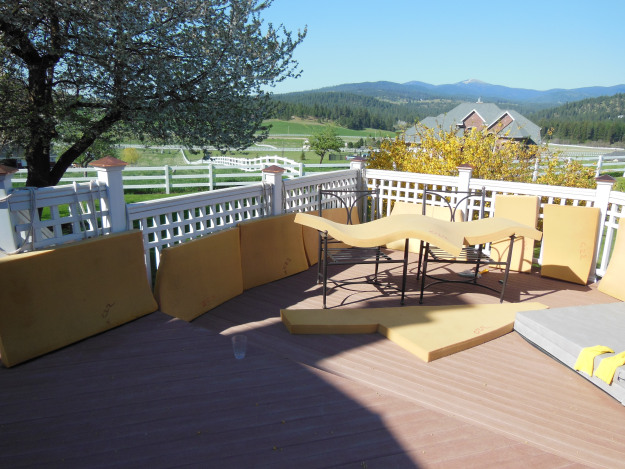
The upholstery on Summer Dance was a brown/beige/orange/yellow plaid reminiscent of something Gabe Kaplan would have worn in the 80’s sitcom Welcome Back, Kotter.

It was in pretty good condition: no obvious stains, rips, or broken seams. There was some moderate mildew, though, but mere cleaning was out of the question. Even if the fabric would have withstood machine washing, every zipper pull was corroded from salty air and crumbled in our hands. The covers would never close again without new zippers. The first mate declared that she was not about to spend one night on them, of course. Replacing the covers became priority #1 and had they had to go immediately. Truth be told, I wasn’t looking forward to it much myself.
Before I get any further, a bit of legal housekeeping. This post contains affiliate links. That means I receive a small commission if you make a purchase using these links. You can buy these products anywhere you like, of course. For a complete explanation of why I’m telling you this and how you can support this blog without paying more, please read my full disclosure.
Any color so long as it’s blue
You can purchase new C-22 cushions from Catalina Yachts for $1,650 but that’s about what most whole boats are worth. Like most first boat owners in our predicament, we hunted for a cheap fix: fabric store material, non-profit upholstery services, and online replacements, none of which were ideal. In the end, we decided to attempt making replacement covers ourselves with quality materials from sailrite.com. The folks at Sailrite just make the decision so easy: vast selection, mountains of free videos, and competitive pricing. No avid DIYer can pass that up.
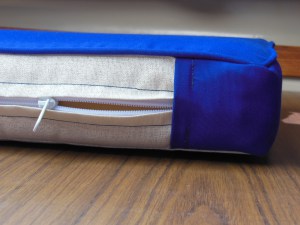
We wanted a timeless fabric color/pattern with good resale value. We opted for Sunbrella True Blue furniture grade fabric. Their furniture fabric is a little softer and more comfortable to sit and sleep on than the marine canvas.
We chose beige underlining from Sailrite for the cushion bottoms and zipper plaques. The underlining has several advantages:
- Much less expensive than Sunbrella canvas
- Very porous to promote drying
- Vinyl coated, which reduces cushions sliding around
- Color closely matches the beige interior fiberglass and it complements the teak trim.
Sunbrella Ocean Blue marine grade canvas matches the furniture fabric perfectly for the exterior/utility pieces (mainsail cover, foredeck sail bag, engine cover, crib board bag, lifeline cushions, snap-on gear bag). Sailrite also supplied the complimentary thread, fasteners, and zippers, and some other supplies. Watch their videos, you’ll learn everything you need to know.
Being the frugal sailor that I am and Sunbrella costing what it does, I wanted to buy just enough fabric for everything we needed and not a yard more. Being the computer geek that I am, I drew a cutting plan in Visio to nest all the pieces in the most efficient arrangement to reduce waste. I got it down to 8 yards of 46″ wide interior fabric (with a little to spare), 7 yards of underlining, and 5 yards of exterior canvas.

In hindsight, I didn’t need to sweat the yardage so much. I’ve since placed two other orders for more canvas. Once you get started, it’s kind of addicting. It’s so easy to make great looking, functional canvas gear for your boat that you’ll be looking for more sewing projects and having remnants leftover from earlier projects makes the new projects no-brainers.
Deconstruction
Most of the foam was still in good condition other than a little mildew, so we opted to reuse it. If we feel the need for firmer cushions in the future, we can replace the foam alone without any further sewing.
Work began by removing the foam from all the cushions and washing them in a mild bleach/detergent solution in a clean, 40 gal. garbage can. Wrestling the bigger pieces full of water in and out of the can was quite a match for the first mate but she prevailed.
When the fabric arrived, I verified my cutting plan against the actual foam pieces and drew each piece on the fabric with a soapstone pencil before cutting.
Reconstruction
We chose to use the same construction techniques (welting, zipper installation, etc.) as the original cushions.

Tips
- There are a few fine points to watch out for when laying out the cuts. Only the seat back cushions are strictly rectangular. All of the other cushions have one or more angled sides to fit the hull’s horizontal curvature. What’s more, the curved edges of the V berth cushions are also angled vertically to fit the hull’s vertical curvature. If you don’t accommodate for that in your covers, you will either get an annoying gap there or the cushions will seem too wide.
- Make the boxing panels 1″ wider (two 1/2″ seams) than the foam height, not the same height as is sometimes recommended. This also leaves enough room for adding polyester batting, if you so choose.

We found some tools and gadgets very helpful to get the best results.
From left to right and top to bottom:
- Plier type stapler
and staples
instead of straight pins (much easier and more accurate than a desk stapler. A staple gun won’t work)
- Seam ripper
(you WILL make mistakes)
- Soapstone marking pencil
(for dark fabrics). A regular pencil works fine on light fabrics. Marks from both can be erased with a damp cloth or sponge.
- 3/8″ canvas basting tape (holds pieces firmly together while you sew). I used two rolls. The Seam Stick that Sailrite sells is crazy sticky, which is a good thing, unlike others we tried.
- Universal walking presser foot
makes a home sewing machine work more like (but not equal to) a commercial machine. This helps to make longer, more consistent stitches through thick layers.
- Welting/piping foot
(invaluable for making piping and straight, tight seams next to it)
- Seriously sharp scissors
- Hot knife made from a cheap Harbor Freight soldering gun (fuses edges as it cuts, eliminating fraying)
There’s always room for improvement
I elected to make one size change to an existing cushion and that was to the cushion that sits on top of the table when the settee is made into a bed. The standard equipment cushion’s inboard edge aligns with the forward seat cushion edge. You can see this in the first picture above. This leaves part of the table showing and makes an uncomfortable edge when climbing out of the bed.
I cut new foam for ours that is several inches longer to completely cover the tabletop and to align with the aft seat cushion corner (the triangular one) and the starboard edge of the keel trunk. The new cushion covers the table entirely for a more finished appearance. It also makes a better fit together with the other cushions to make a full-width bed in the salon. You can see this in the picture below.
The other change that I made was an 11th cushion to cover the companionway step. That makes it possible to put all the cushions together like a puzzle into a queen size mattress. The locker lids can be laid together over the center aisle to form a single, flat surface for the bed.
Custom details
The solid color fabric makes the cabin interior look more spacious than before. To add a finishing touch with a bit of class, I took the seat back covers to a local printing company that does custom embroidery on sports and corporate wear. I gave them a digital file that I had made of the original Catalina logo and had them embroider it near the tops of the seat cushions in bright white thread. Below the logos, I added an arc of stitches. Together, these little touches give the seat backs a look reminiscent of the custom upholstery in muscle cars of the same era.
Pulling it all together
Before stuffing the foam into the new covers, I used 3M 21210 Super 77 Spray Adhesive to glue polyester batting to the tops of the foam. This helps to fill out wrinkles in the covers for a better fit and more comfort. I also sprayed the covers with 32 ounces of 303 High Tech Fabric Guard
. It’s recommended by Sunbrella to waterproof and protect their furniture fabric.

The results
I’m very pleased with the end product. The covers fit well, look great, and transform the cabin into a place where you want to spend time relaxing.
Following are plenty of pictures that I hope inspire you to take on this job for yourself. It took a considerable amount of time but I did it over the winter and I think it was well worth it. I’d do it again.


The bottom line

Suggested price: $1650
$tingy Sailor cost: $375
Savings: $1275
If you want to make your own cushions, you can get dimensioned drawings of all of the cushions shown in this project plus the cockpit cushions in my ebook Do-It-Yourself Small Sailboat Canvaswork. The drawings can save you a lot of time and worry about getting a good fit for your cushions and you’ll get eight more canvaswork projects as well, all for only $20 USD. Click the picture at right to order your copy for immediate download and get started today!
Would you like to be notified when I publish more posts like this? Enter your email address below to follow this blog and receive notifications of new posts by email. You will also receive occasional newsletters with exclusive info and deals only for followers and the password to the Downloads page. It’s free and you can unsubscribe at any time but almost nobody does!

That looks absolutly amazing, great job!!!!!
It was the first time I’d ever done something like that and I made more than my share of mistakes but I had all winter to take my time at it. You can do it too!
Question . When you illustrated the Catalina 22 cushions, you had three displays. One was the interior and was the other also the interior? Then the third was the outside fabric needed? I’m about to order from sailrite and I just want to get the measurements right. You have been SO HELPFUL and encouraging! Thanks!
Hi, Alice
I’m glad you found this blog helpful and thanks for your comments.
Yes, the top two diagrams (yellow and first blue) are for the cabin cushions. The yellow is underlining for the bottoms and the zipper plaques if you choose to do them in a different fabric than the rest of the cushions. If you want to use the same fabric all over, then you need enough for the first and second diagrams, 15 yards. Note that you’ll have part of a yard leftover, which you can see in the center of the second diagram. If you don’t make piping for the cushions, you’ll have a bit more leftover. But if you’re an experienced seamstress (seamster?), then you know that it doesn’t hurt to have extra in case of mistakes or to make patches, matching pillows, etc. If you have a first generation C-22 (pre ’86) then that amount should cover you. I don’t have any experience with the newer models but I’m sure they would require different amounts, probably less since there are fewer and simpler cushions.
The third diagram is for some exterior projects that I also made: mainsail cover, engine cover, crib board bag, winch covers. You don’t need to order that fabric for the cabin cushions. As an aside, most people are intimidated by bimini covers and could never imagine themselves sewing one. I just finished sewing a Sunbrella cover for my bimini using the old one as a pattern and it turned out great. I’ll probably update the bimini post on this blog with pictures of it in the near future. So, yes, you CAN do it!
Best of luck with your project! Feel free to send an update with your results when you’re done.
Thanks! Just ordered ALL from Sailrite! Beats running around and they have the BEST videos!
Sent from my iPad
>
Great job! I have a ’88 in need of cushions. I know zip about sewing machines. What level machine would I need to do a set similar to yours?
Hi, Wayne
I use my wife’s sewing machine that is similar to a Singer. It really depends on the fabric. This machine was barely up to the task of sewing through the thickest parts of the cushion project, which was with Sunbrella furniture grade fabric. I’ve done other projects (foredeck bag, mainsail cover, bimini cover) made with Sunbrella marine grade canvas and this machine tops out around four layers of canvas and that’s pushing it pretty hard. Any more layers than that and I have to turn the handwheel to force it through those sections. Short sections aren’t too bad, longer sections are a fight. This machine also doesn’t sew well with V92 size thread, which is what you want to use with the marine canvas. It’s much happier with the V69 size thread.
If you have the means to get an industrial quality walking foot machine like the ones that Sailrite sells, go for it. You’ll be a lot happier and get better results. In retrospect, I wish I would have. Older machines by Pfaff are frequently posted on craigslist for sale. They’re used to sew auto upholstery, saddles, you name it. They’re tanks! Try a small project first with fabric like you want to use for the cushions, such as pillows or a foredeck bag. You can make your mistakes as you learn while its cheaper. Then when you have the confidence, you can take on a bigger project.
Good luck, and let us know how you make out!
I love your site. I have been thinking of sewing some cockpit cushions for my 16ft day sailor although I came in on a search for topping lift solutions. I have a couple of Singer 201s (one motorised (1937), one treadle (1957)) that are apparently up to the task. I hear that the treadles can penetrate thicker layers better than a motorised machine of the same model.
Let me know how the treadle machine works out for you, Bonj. Thanks for dropping by and I hope to see you around here again!
How much would you charge for making a set for my 86? I have the built in sink in mine cat 22.
Come on! Don’t say no. You did such a great job! I can’t stitch a straight line. I have tried.
Larry
Hi, Larry
I simply don’t have enough spare time, sorry. From what I’ve seen, it seems like there’s room for a cottage business sewing replacement cushion covers for popular sailboats. Look for a friend, neighbor, or relative who knows how to sew. Local fabric stores often know customers with experience in upholstery. Maybe you just need practice first. Start with a smaller project like a mainsail cover (I’ll be posting a new article on this soon) or tiller cover. Also consider getting a magnetic seam guide. If you can hold fabric against a guide, it will make the seam straight for you.
You can do it!
I haven’t sewn my cushions yet, but I have been practising by making some satchel bags out of cotton duck canvas. The 201P treadle sews through 6 layers of canvas without flinching.
About how long did this project take?
I think atleast a month, my boyfriend thinks a weekend. What’s a decent estimate?
Unless one of you is a professional upholsterer, your guess is closer than his, I’m afraid.
I didn’t keep track because I took my time and did the project over the winter. After the first one or two smaller, easy cushions to get used to the process and techniques, making and undoing mistakes, it took an evening after dinner to make each of the others for a total of eleven cushions. A little more time for the bigger, more complicated ones and a little less for the smaller, simpler ones. So, probably somewhere between 60-80 hours altogether, I’d guess.
Hello there! I love your blog. We recently bought a Catalina 22, and have been looking to find/make cockpit cushions and maybe eventually the cabin cushions. Which cushions did you use from Walmart? The dimensions all seem to be fairly off. Can you help? Much thanks 🙂
Hi, Eden
I don’t have a record of the brand or style but they are 18″ x 44″ and they’ve worked out well for us so far. Hope that helps!
Hi~ Thanks for the tip about the embroidery on the cushions. I will be stealing that. Getting ready to recover cushions too–and came across the sailrite videos. Great info–that, in turn, led to me looking for hot knife ideas. I can’t thank you enough for this post and the DIY hot knife post. I know it will make all the difference. Did you get the universal walking foot and welting foot at sailrite? I’ve had a hard time locating. Just using a Singer machine. Of course I will now be scouring craigslist for Pfaff. Thanks for the posts and inspiration.
Hi, Christine
I’m glad this info is helpful for your project. New cushions make such a huge difference. I bought the walking foot on eBay. It’s a universal size that works with our sewing machine and probably would with your Singer too. We already had a welting/zipper foot for our machine.
Good luck on your cushions. You can do it!
Thank you for all of the information, i am doing this project right now and your information was extremely helpful !!! Here is the project i did last year on my Catalina 22
Thanks again,
Gary
Nice work, Gary! You should enter your project in the DIY contest.
Do you happen to still have your Visio file around? I’d sure love to use your pattern! I’m thinking I can use a plotter to print the images at the correct size, then just plug-and-play.
The problem is, the cushions are arranged on the drawing to fit a 54″ canvas roll, which is wider than the maximum paper size of most plotters so some of it would get cut off. But I am currently working on a new ebook dedicated to canvas projects that will contain scale drawings of the cabin cushions, the cockpit cushions and the bonus cushion for making the salon into one large berth. You could easily use those drawings to make your own patterns. I don’t yet have a publish date for the ebook but you can bet you’ll see it here!
Did you use the old cushions as a pattern for the new cushions?
Hi, Julie
Yes I did. My next ebook will include dimensioned drawings of all of the pre-1985 C-22 cushions (salon, V berth, and quarter berth), plus the cockpit cushions, and a bonus cushion for making the salon area into one large berth. It will be available soon, so stay tuned!
Hello, My boat cushions look a lot like your originals. (only yours were in better shape)! I am thinking about following your footsteps this winter but was wondering if i could get a copy of your Visio so i can have a pattern to go off of!
Great site~
Hi, Garrett
My next ebook is almost ready to be published and it will include dimensioned drawings of all of the pre-1985 C-22 cushions (salon, V berth, and quarter berth), plus the cockpit cushions, and a bonus cushion for making the salon area into one large berth. In fact, it will have drawings for every project in the book so that you can easily make your own paper patterns, so keep watching here. It’ll be worth the wait!
Thanks,
$tingy
You dirty dog…. I just bought a used machine to start to learn to sew and attempt to tackle this project. I don’t know if I should thank you or blame you. 🙂
What are the locker lids you are using in the center isle of the boat? What boards to you use to make up the center notch of the v-birth? I don’t have any boards there. Just wondering what I am missing.
Thanks,
Mike
Hehe…I guess we’ll have to wait and see how your cushions turn out. I hope you’ll thank me!
The two boards that I use to cover the center aisle to make one large berth are the boards from over the portable toilet compartment. I plan to expand on that project soon and make custom fitting boards that rest on teak cleats attached to the cabin liner, so stay tuned!
Beautiful results! Would your ebook explain how to alter the pattern for the cushions in an ’87 Catalina 22?
Hello, Theresa
Unfortunately, no. The cabin layout is quite different in the “new design” sailboats. If you have the old cushions or just the foam pieces, you can use them as patterns and add to each dimension for seam allowances. If you don’t have the old cushions, then you can make patterns with heavy paper or cardboard. If I get the chance to spend significant time around one of the newer models, I’ll update this project.
Love how these came out! I am going to undertake the same project on my C-22 this winter. I have a cheap Singer sewing machine. Should I splurge on a machine from Sailrite?
Hi, Trent
Your Singer can probably handle this project but it could be frustrating at times sewing through more than a few layers. If you like to sew and you think you’ll be doing several other large canvas projects, a heavy duty walking foot machine will definitely make them go smoother.
If you can’t afford a Sailrite Ultrafeed machine, check out the Rex machine for 1/3 the price.
Thanks! I’ll check it out. Love the site, extremely helpful!
Going to be making cushions, etc for my daughter’s sail boat. Where can you buy Sailrite fabric? I saw at Joann’s Fabric they sale Solarium fabric. Is that good fabric for use in a sailboard? Did you use netting for the bottom of your cushions? What type of zippers did you use? Thanks for your help.
Hi, Norma
Sailrite.com has many different marine fabrics to choose from including different types of Sunbrella, which is what I used. Watch for their discount and free shipping sales, particularly around the holidays. I’m not familiar with Solarium but the customer service folks at Sailrite could probably advise you. I used a fabric called underlining for the bottom of my cushions. I used YKK #5 continuous zippers with metal, non-locking sliders.
Good luck with your cushion project and let us know how it turns out!
$tingy
Thanks for your input. Did you use the underlining on all sections that you put a zipper? I noticed that on one of your cushions. Working on a template for cutting out fabric. That was a great idea, and should save fabric and money.
Yes, all cushions have underlining on the bottom or back side. Did you or your daughter purchase Do-It-Yourself Small Sailboat Canvaswork to get the cushion drawings for making your templates and download the Cabin cushions cutting diagram from the Downloads page to help you cut the pieces with minimal waste?
I’m curious about the recommendation to use underlining fabric for the zipper plaques on the salon cushions. Was that to improve breathing of the cushion, make it easier to sew, other? When my wife and I sewed the cockpit cushions for our C-22, we used sunbrella canvas for the plaque all around (but underlining for the bottom plate). The zipper plaque was a bear to manage, so maybe the underlining makes it a bit easier? Any other upsides or downsides to the materials of construction for the zipper plaque?
Hi, Scott
I chose to use the underlining material for the zipper plaques mostly to make them easier to sew. Four layers of Sunbrella (two pieces joined with welting between) is a real bear without a true walking foot sewing machine, especially sewing around corners. Using underlining for the plaques made it a little bit easier and it saved a little Sunbrella for visible panels.
Thanks for your question,
$tingy
Thanks so much for the insight! We’ll keep that in mind as my wife and I begin our cabin cushion sewing project. Your site has been a real inspiration to both of us!!
Great site, has helped me a lot. I am just wrapping up refinishing all my teak and about to start on the cushions for my 86′ 22. I love your logo idea! Any chance you still have the logo file and willing to share?
Thanks Harry
You can download the Catalina 22 logo artwork from the Catalina 22 National Sailing Association website.
Good luck with your project!
$tingy
I am loving your blog. I recently acquired a major project in the form of an 83 Catilina 25. It was on the hard for 9 years and under several large trees. You could imagine the amount of Compost and water that was in It as the Companionway was probably open for several years in upstate NY. In your Before Picture, you show the Original Upholstery which is exactly like mine an earth tone Checkered Wedgwood pattern. My problem is that Mice ate about 8 tennis ball-sized holes in the Upholstery. I washed all of the cushions with a wide spray pressure Washer And mild laundry soap and they cleaned up Very well. My question to you is Do you have any of your original cushion covers on hand Or even some cut-up scraps that you would be willing to sell? The nature of the pattern would probably be fairly easy to patch my Holes and allow me to fo focus my limited budget on Other more pressing sailing needs. If you don’t still have them do you know of anybody who may have one that is not needed.
Sorry, Sam, I don’t have my original covers or know of anyone who does and could help you. You might try asking one of the Catalina groups on Facebook.
Best of luck,
$tingy
Hi there Stingy,
What diameter piping did you use for this project?
Hi, Matthew
I used 120′ of 5/32″ cord.
$tingy
Nice job! And with the piping too. I’ve sewn cockpit and cabin cushions a couple of times. I found the piping frustrating. I would have all the material measured out exactly and once I’d sewn the piping on it would “shrink” some. Enough that it would not match the boxing strips that I’d cut out. Maybe my stitch length was too short, needle too big, too much upper thread tension, whatever.
Reusing the foam makes lots of sense. It’s a whole other skillset to cut and glue foam nicely. And foam is surprisingly expensive. In Canada anyway. One thing I did do was wrap the cushions in this “silk” wrap. It’s sort of like saran wrap and will protect somewhat against spills or a wet bathing suit soaking into the foam (which is essentially a big spong).