

It seems that every C-22 owner upgrades their cabin lighting at some point. The original dome lights are not very bright or sturdy and their incandescent bulbs use a lot of battery power. In Summer Dance, the previous owner had replaced the two salon dome lights with the combination white/red LED lights from a certain Catalina parts dealership. They don’t use much power but they also don’t put out much light either.
600 LEDs to the rescue
I happened across a thread on a SailboatOwners.com forum that was started by an owner who had installed waterproof LED strip lights in his C-22. He had installed one self-adhesive light strip on each side of the boat. There is a narrow channel in the underside of the deck where it meets the hull that is just the right size for mounting the strips so that they are mostly hidden. I liked the idea, low power consumption and widely distributed indirect light. The strips are dirt cheap on eBay so I thought I’d give them a try. But I wanted to take the idea a step further and create two lighting zones by installing two strips (one on each side) in the V berth and another two strips (one on each side) in the salon in a way that they could be independently switched.

Each 8mm wide x 5 meter long strip has 300 tiny tightly spaced 12V LEDs. The LEDs are surface-mounted on a flexible conductor strip encased in silicone and has peel-and-stick adhesive on the back. You can cut the strip at 3 LED intervals to any length you need. The strips are available with standard 3528 or 5050 type LEDs and either warm white or cool white color temperatures. The 3528 LEDs require less power and are less bright than the 5050 LEDs. I chose the 3528 type for lower power consumption, 4.8 watts per meter. That amounts to about as much current per side of the boat as one of the original incandescent dome lights. They still put out plenty of light for the inside of a sailboat. If you decide to try this project, get the warm white color. It’s the most natural color temperature. The cool white color is harsh.
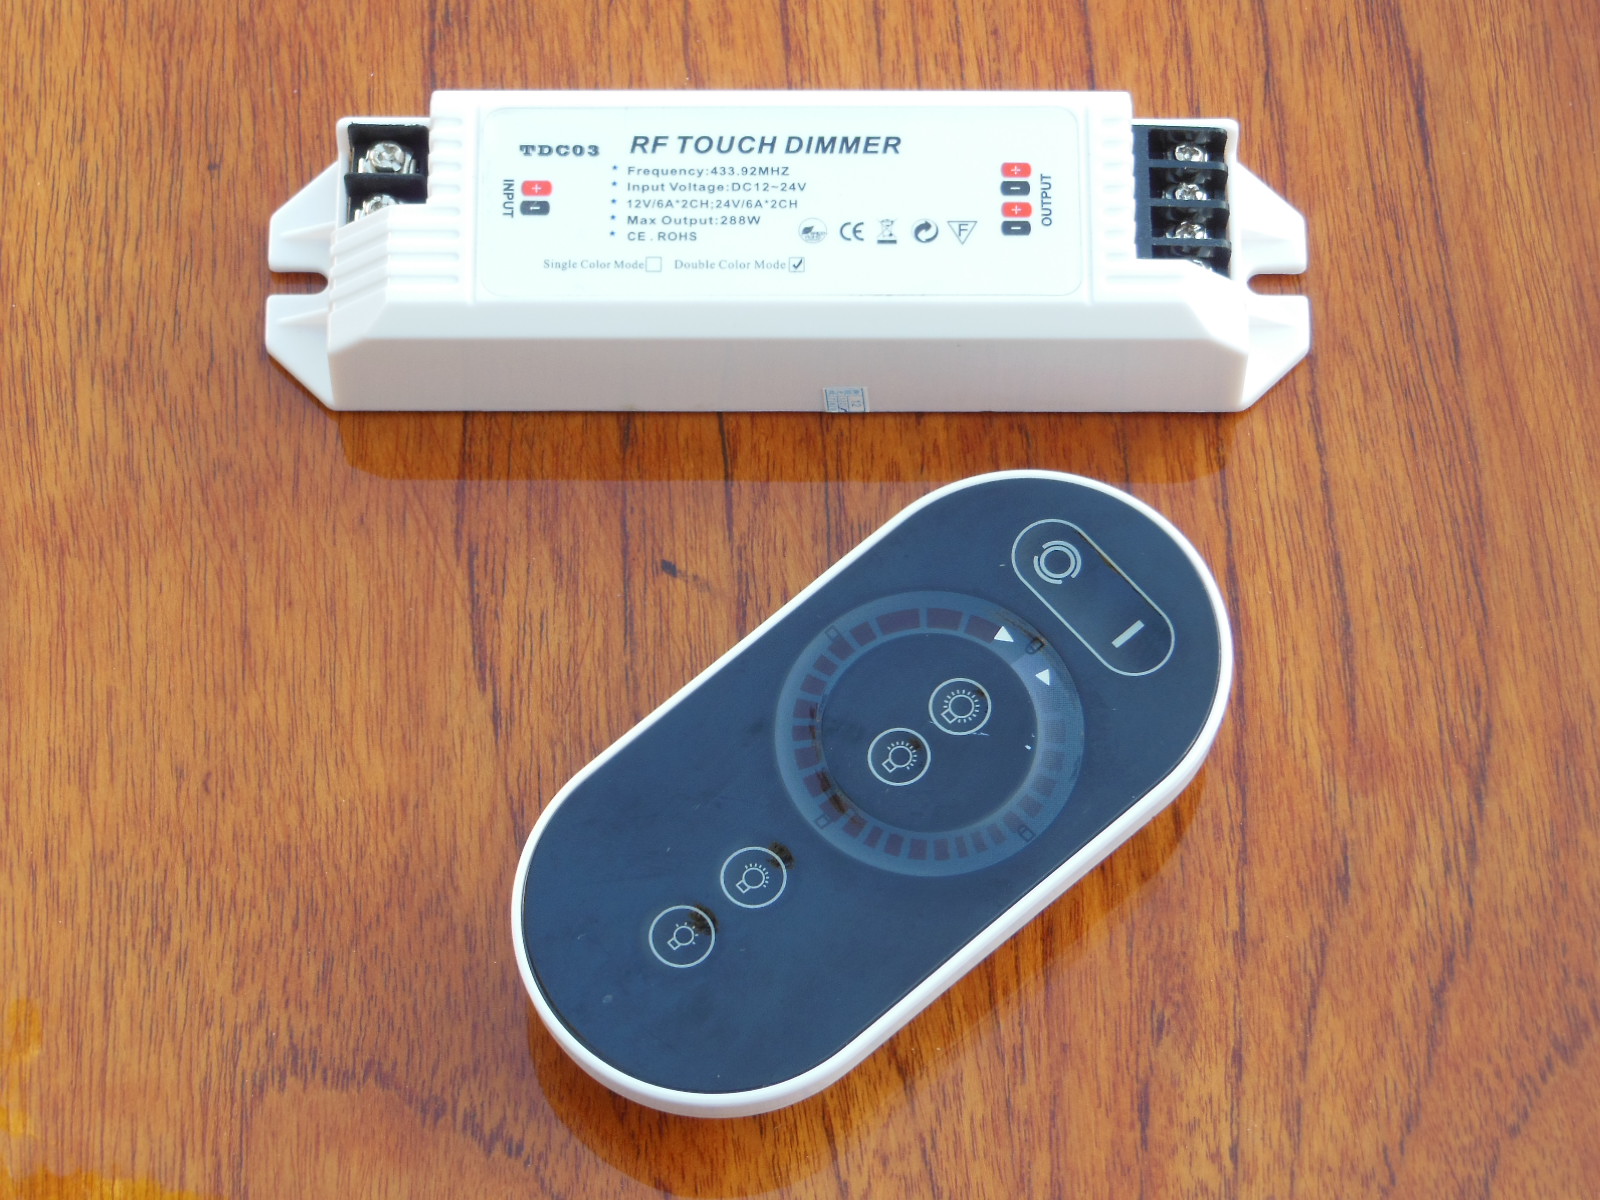
In planning the installation, I got stuck on deciding how to switch the lights on and off. I couldn’t find a surface mounted switch that was both easy to use and unobtrusive. I didn’t want to mount switch boxes or bulky teak switch plates on the bulkheads. The solution needed to be more elegant than that. Then while shopping for the right seller to buy the strips from, I found the answer, a two-channel wireless remote dimmer. No switches to mount and the lights could be controlled from anywhere on the boat. I could connect each zone to a separate channel of the dimmer and control them both with one remote.
Along with the light strips and dimmer, I also ordered some solderless connectors to connect each pair of strips in series to separate channels of the controller. The connectors help to make the connections between strips. At first, I wired the two salon strips in parallel to the controller but that didn’t work. I wound up wiring them in series by running wires from one side of the cabin to the other under the V berth.
Strip tease
I removed the teak molding at the deck/hull joint to make it easier to mount the light strips. They are flexible enough to bend around the curve of the hull. Be sure to clean the mounting surfaces thoroughly with alcohol or a similar solvent to improve adhesion. Although the lights held in place for a couple of weeks after mounting them this way, they eventually wouldn’t stick in the deck channel. The strips have excellent 3M adhesive, but the rough surface in the fiberglass deck channel doesn’t provide enough contact area, at least on Summer Dance. I later reinstalled them with one of my favorite products, 3M Scotch-Mount Super Automotive Attachment Tape, and they’re holding well now.
I connected 16 AWG positive and negative primary wires to the pre-wired leads with crimp-on heat shrink butt connectors and ran the wires to the dimmer receiver, which I mounted under the aft settee seat. I ran the V berth zone wiring on the starboard side, down through a 1/2″ hole that I drilled in the hull liner at the aft bulkhead, and then under the liner to the dimmer receiver. I also ran the salon zone wiring under the liner to the dimmer receiver. I connected power to the dimmer receiver from the nearby breaker panel and negative buss. The dimmer doesn’t work with shared negative wires. Each strip needs a dedicated negative conductor to the dimmer receiver. And when wiring the strips in series, observe the polarity or else one strip won’t work.
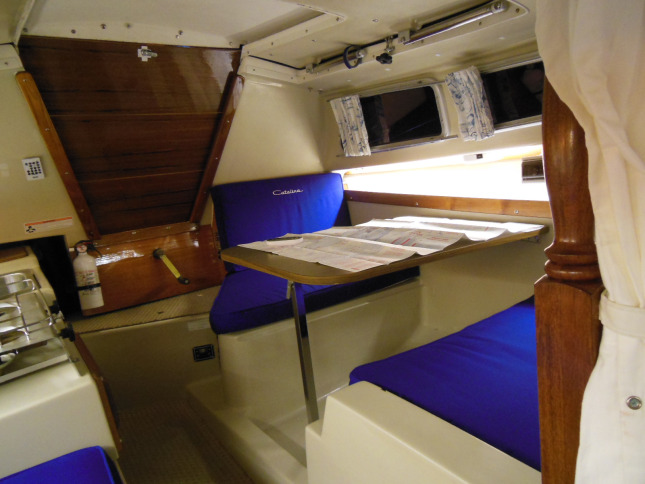
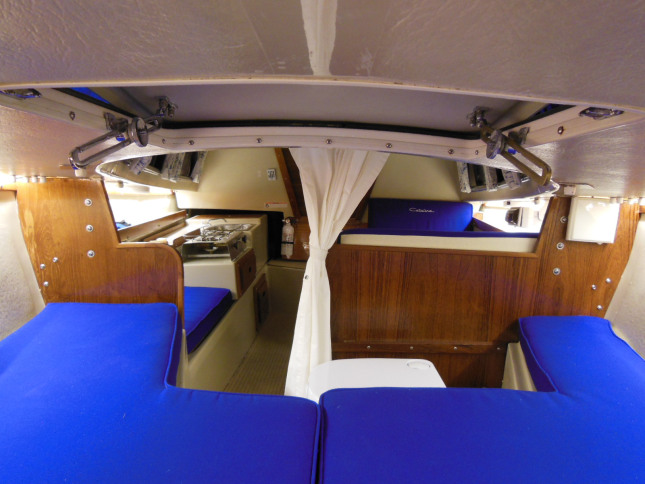
After struggling with the sparse, poorly translated instructions to pair the remote control to the receiver, I turned on the strips with one touch of the remote control and viola! The whole cabin filled with bright, warm light. (By the way, all the cabin photos in this post were shot at night without flash and only the LEDs for lighting.) Each zone can be dimmed independently until it is completely off. Both strips can be dimmed together with the soft-touch dial on the remote control. You can only see the LEDs while laying down. When we only need a little task lighting in the salon, we can turn on the LED dome lights.
Lazarette lighters
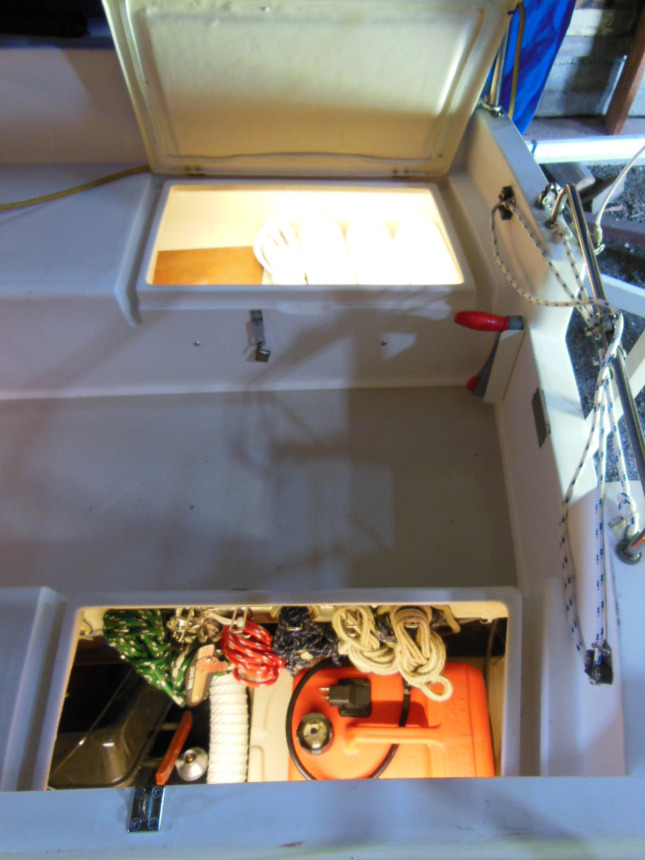
After the cabin was finished, I had about 8′ of LEDs left over so I installed one 2′ strip on the underside of the drain channel behind each lazarette lid. They are controlled by a switch in the accessory panel that I installed near the companionway.
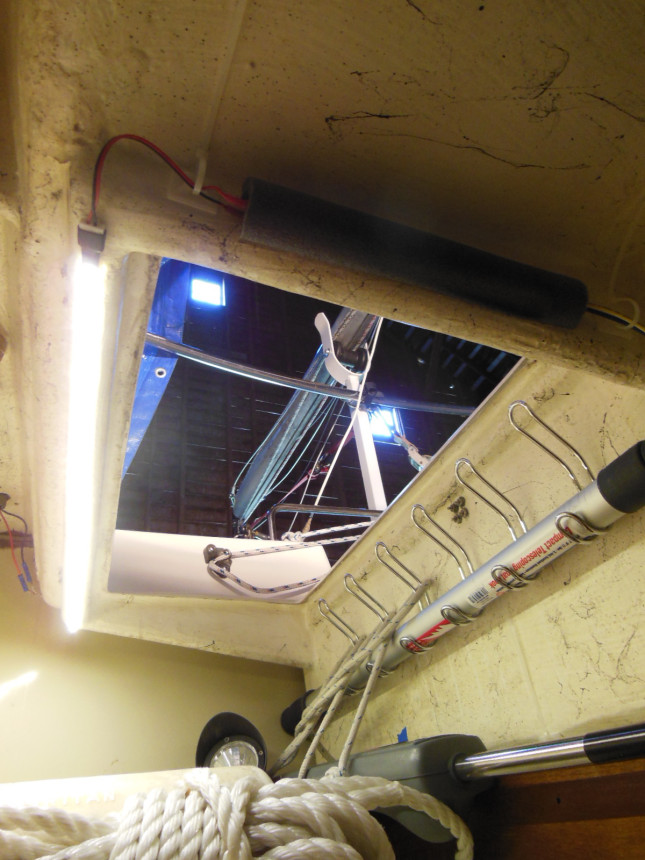
They’re really convenient for using the lazarettes or just to illuminate those storage areas from inside the cabin.
The Bottom Line
Suggested price: n/a
$tingy Sailor cost: $54.49
Savings: n/a
How have you improved the lighting in your cabin?

I thought Summer Dance was beautiful when you took us sailing last summer on our honeymoon… You’ve remade her and the upgrades are amazing! Summer Dance is more beautiful than she was on her first day! I’m looking at your blogs, this one in particular with an eye to possible applications for my RV (and trailering it as well). Keep up the good work. Thanks for sharing!
Amazing work! 🙂 Absolutely fantastic and I’m totally stealing this idea 😉 Thank you.
This was a great idea; I did the same, and it really helps livability in the cabin. A couple notes for others trying this:
1) I found I didn’t get very reliable connections with normal crimp connectors from marine wire (14-18 AWG) to the tiny wires on the eBay strips. I ended up buying a few terminal blocks from GenuineDealz, and wire terminators appropriate for tiny wires (see http://www.pbase.com/mainecruising/terminating_small_wires). With those in place, no more problems.
2) My eBay strips are rated 4.8 watts/meter. The 4 cabin strips are each about 2 meters (2 in the V berth and 2 in the main cabin), so with everything on, they’re drawing 38.4 watts, or just over 3 amps. Even LEDs draw some power, when you run that many of them. So be sure to include that in your cruising power budget.
Love it and really want to do the same on our Catalina 270 LE. A bit fuzzy on the parts list. Do you recommend these LED strips? (I’m trying to find something that is like what you described): https://smile.amazon.com/dp/B00Z5OYSQ8/ref=wl_it_dp_o_pd_S_ttl?_encoding=UTF8&colid=2IROHSQ702JUH&coliid=I1F45NZKBU5P
Hello, Behr
The strip that you linked to produces a very bright, harsh white light (6000 Kelvin) like that of an LED flashlight. That’s okay if that’s what you want. In my opinion, it’s harsh on the eyes when relaxing at night, reading, etc. I prefer a warmer color (around 3000 Kelving) like these. The choice is entirely up to you. Both will work fine. Another option is to install a dimmable controller so that you can vary the amount of light to your preference depending on what you’re doing. They are available online at Amazon and eBay as well, often by the same sellers who offer the strips.
Dimmable controller sounds like an excellent option, that way I can have anywhere from barely to blinding! Thanks for the prompt reply, I am looking forward to this project!
Hello $S,
Excellent Blog Post !
I was already planning on installing Strip LED in a Striped Out Bare Bones ’81 Evelyn 26′ that I am Completely ReWireing other then the actual Diesel Engine.
Came to the Internet looking for Information and Found Your $ite, Thank You !
¿ Question ?…
The link to the Lighting Parts you used, is now a dead end. :~(
¿ Do you still have detailed information on the Lighting Parts you used ?
I would love to know this as a starting point.
~Chris
Hi, Christine
The LED strips are pretty standard and you can find many sellers for them on eBay, just match the specs that I list in the post. Here’s a more recent link to the dimmer control.
Good luck rewiring your Evelyn,
$tingy
Hello,
I am going to tackle this job, as I very much like the effect it gives…. I may even think about using RGB lights for “mood” and “low-light” conditions. 😉 How did you mount those pole hooks in your lazarette? Do they screw into the bulkhead or did you use adhesive?
They’re screwed through the lazarette wall. More info is in Handy and Cheap Line Hangers.
Question… this is a 12v setup so did you wire the dimmer to the battery? I keep reading about power sources needed but im assuming a transformer is needed to transmit from 120 to 12 v. Thanks in advance.
No, I connected it to my switch panel on the same circuit as the dome lights so that all devices are switched and the battery can be totally isolated to prevent accidental draw down.
Thanks for the excellent post. I still can’t figure out how you can control 2 zones independently with the same remote. I see that the dimmer can accommodate 2 channels but I don’t see where on the remote you can switch from one zone to the other. Any help would be appreciated. Thanks!
Hi, Justin
The one pair of small buttons controls one zone and the other pair controls the other zone.
$tingy