

Do you have a heavy four-stroke outboard motor on your sailboat? Is it a chore to raise and lower with your current motor mount? Maybe you have a back injury that makes lifting a risky behavior. What about your first mate, can they raise and lower the motor if they need to? All these are good reasons to consider whether your current motor mount is adequate for your needs.
Before I get started, a bit of legal housekeeping. This post contains affiliate links. That means I receive a small commission if you make a purchase using these links. You can purchase the products anywhere you like, of course. For a complete explanation of why I’m telling you this and how you can support this blog without paying more, please read my full disclosure.
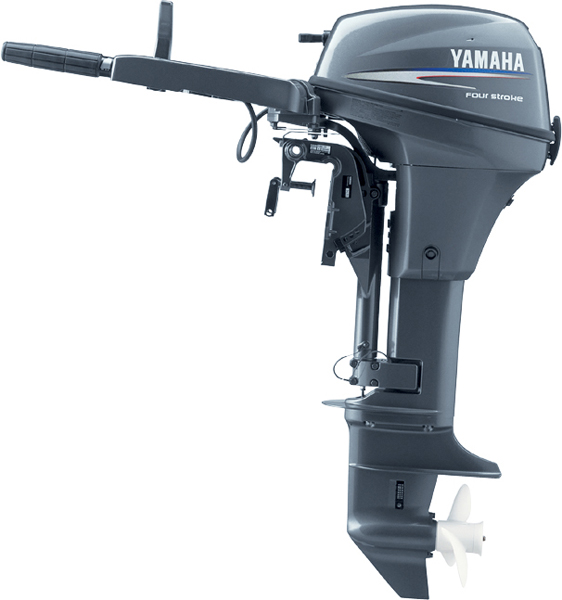
Summer Dance has a 2004 Yamaha 8 HP long shaft outboard motor (model F8MLHC) that weighs 87 pounds. When we bought her, the outboard was mounted on the original equipment Garhauer-made two-spring motor mount. (Incidentally, this motor does a great job of charging a deep cycle battery when you add a rectifier/regulator to it.)
My achy breaky back
The Garhauer mount is rated for up to 80 pounds but I think the springs have lost some of their strength over the years. Before I replaced it, hoisting the motor up out of the water wasn’t an easy task – there was way more than the 7 pound difference between the motor weight and the mount rating. Other than that, it’s a good mount and has held up well over 34 years.
It wouldn’t be so bad if the motor were closer to the top of the sternrail but in its lowered position, I had to lean way over the sternrail to grab the mount handle and hoist the motor up. With apology to Billy Ray Cyrus, I don’t recommend it if you have herniated disks and a broken vertebra like me. It was becoming such a chore that I started looking for a way to spend more time enjoying sailing and less time nursing my back.

The way these mounts are built, it’s impossible to simply add more springs to them. That would have been my first choice for a solution but the tubes that the springs are assembled on are welded together. Except for cutting and re-welding them, there’s no way to add more springs.
OMC, gone but not forgotten
Rather than replace the mount with a different model with more springs, I decided to look for an alternative design. I remembered reading on the Chip Ahoy blog how Chip added the missing gas spring to his OMC Auxiliary Motor Bracket. OMC is no longer in business and the motor bracket is no longer in production, but used ones appear regularly on eBay. It looked like a solid design and easier to use, so I started watching for a bargain. By the way, the corporate history of OMC is an interesting story in itself.

The OMC design is similar to that of most other outboard motor mounts, control arms in a sliding parallelogram arrangement that keeps the outboard motor vertical as it is raised and lowered. It works on the same principle as the front suspensions of most cars. But it’s also different from other mounts in several ways.
First, instead of stainless steel, the major parts are made of plate and cast aluminum painted white. Second, instead of a large handle that actuates the latching mechanism, there’s a small, spring-actuating lever. And last but most importantly, instead of multiple coil springs to compensate for the motor weight, it has a single gas spring. Gas springs provide more consistent force throughout their range of motion than coil springs.
To use the OMC mount, you just flip the lever to the opposite of its current position to disengage the latch. This transfers most of the weight of the motor to the gas spring so that you can easily push or pull the motor into position until the latch re-engages. A video at the end of this post shows how.
Refurbishing tips
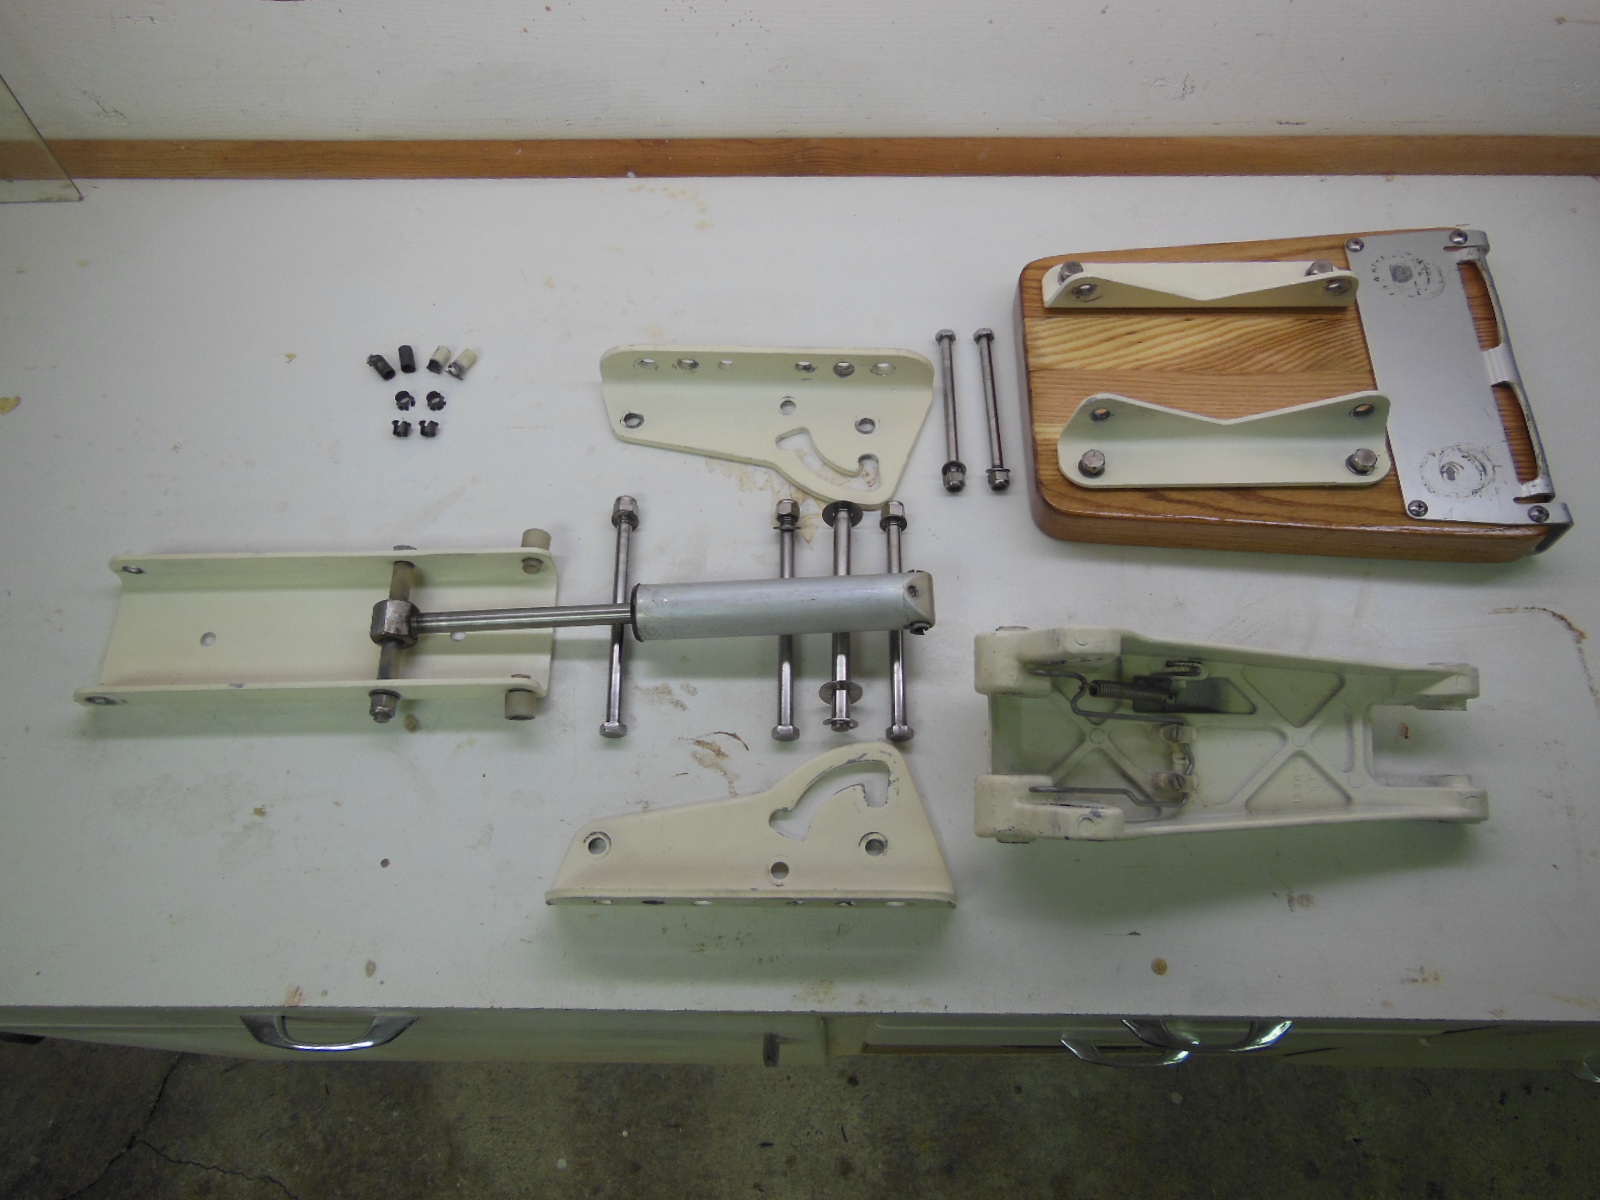
When a used OMC mount appeared on eBay at a really low price, I bought it almost immediately. It arrived in very good condition and looked like it had been used relatively little.
First, I disassembled the mount, refinished the oak board, cleaned all the parts (Mr. Clean Magic Eraser Cleaning Pads work great on oxidized paint and stubborn stains), polished the hardware (I like Flitz), and replaced half of the nylon bushings on which the parts rotate.
If you decide to refurbish one, don’t try to buy the OEM bushings (part numbers 25 and 27 in the diagram below) from a marine parts retailer. Part #25 is no longer available and for #27, marine retailers are asking $9-$10 EACH!
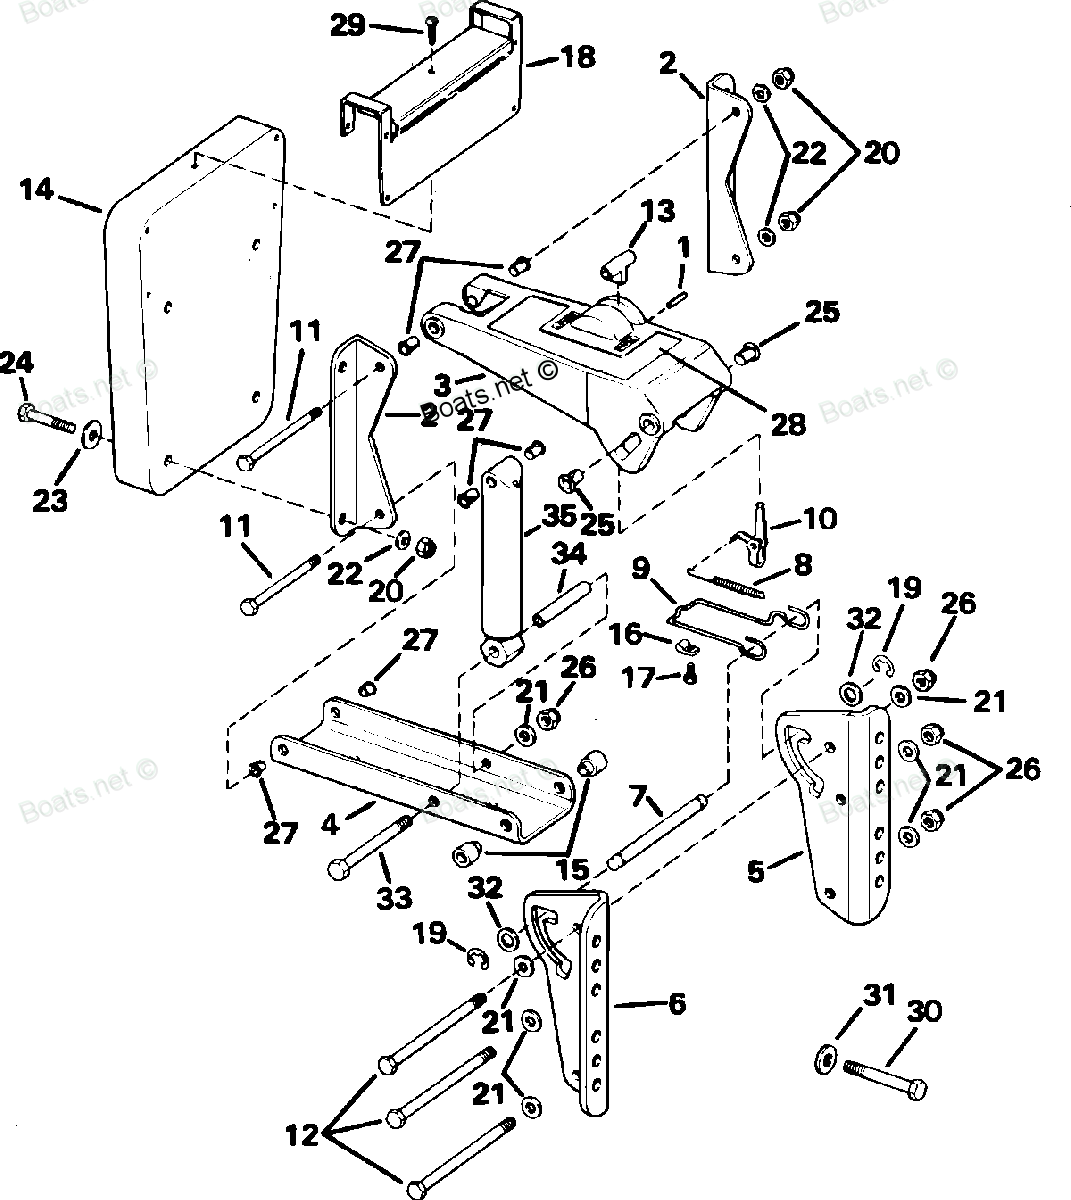
Instead, order standard 5/16″ ID flanged clip Polymer bearings (part G0242636) from an industrial supply company like Zoro.com for $1.95 per pack of 5. They will replace parts #27 (4 required). If you want to also replace the bushings at part #15 (2 required) or #25 (2 required), consider standard 3/8″ ID flanged clip Polymer bearings (part G0270837, $2.52 per pack of 5).

Transom mounting tricks
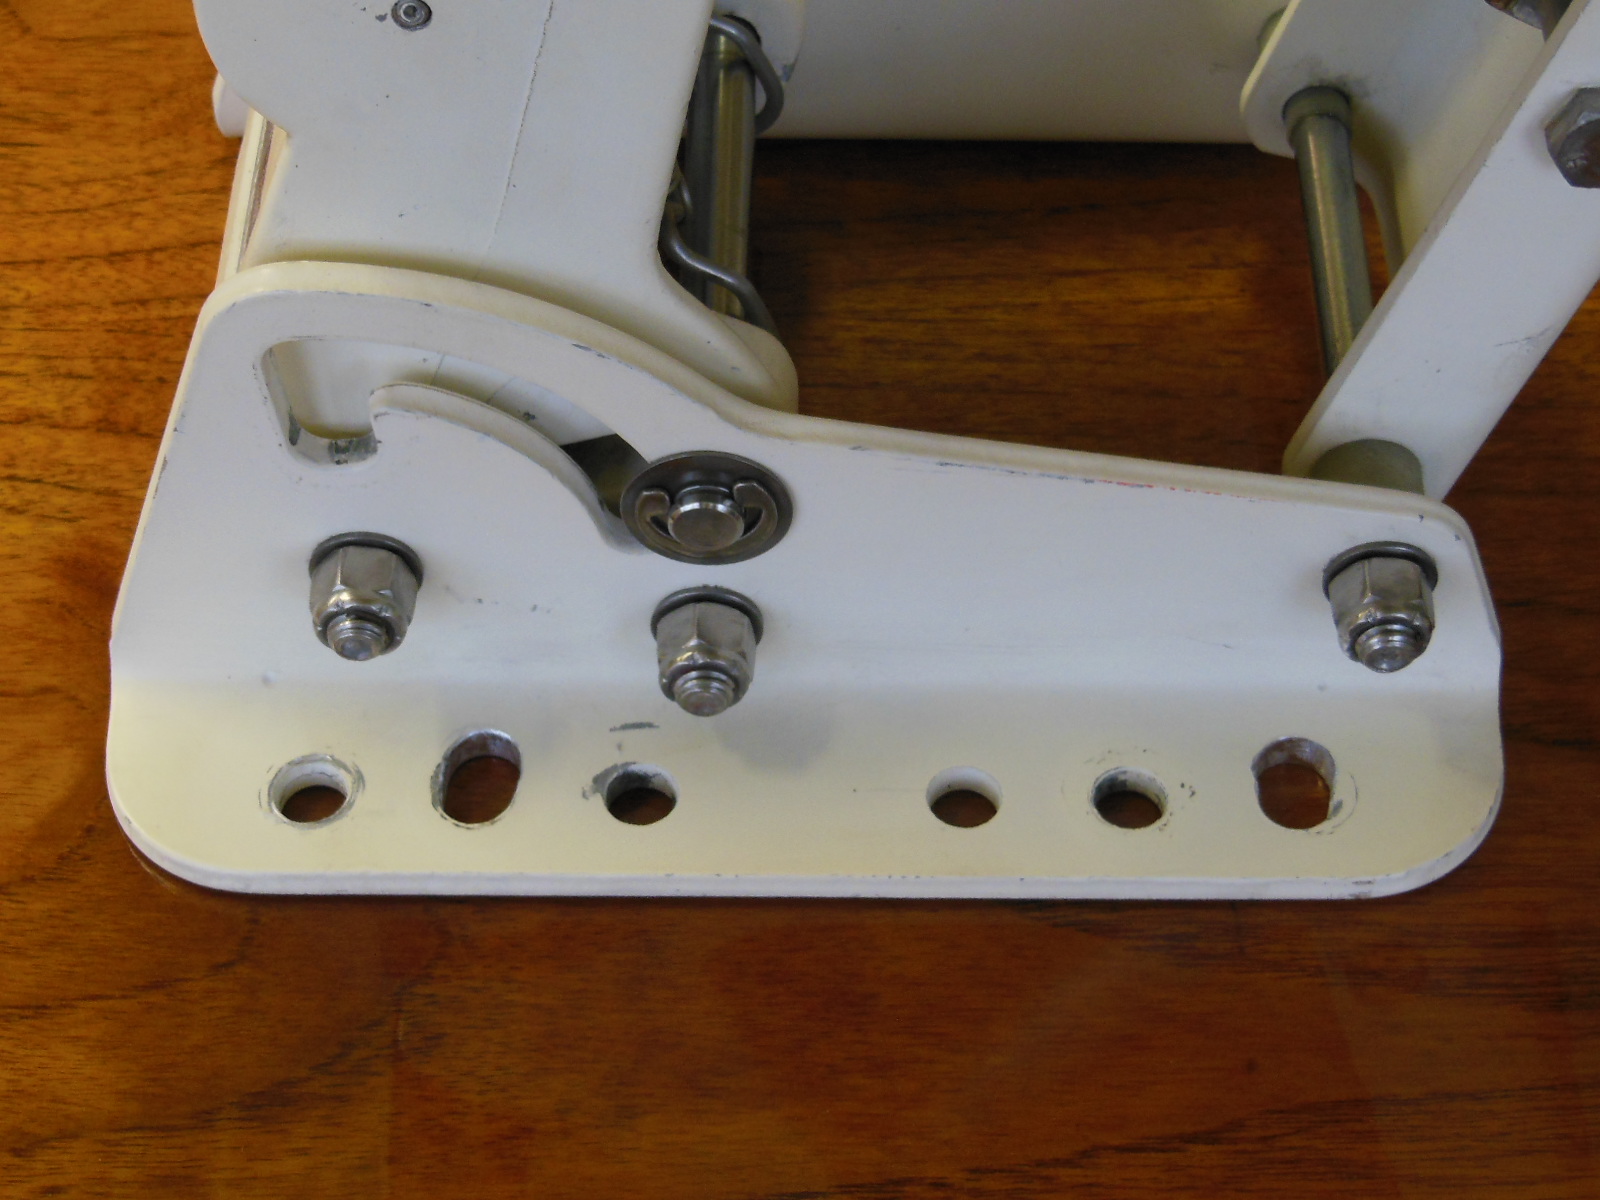
With the OMC mount reassembled, it was ready to replace the old Garhauer mount. Unfortunately, the OMC mount doesn’t have the same bolt pattern as the Garhauer mount, 6″ x 7″. The OMC mounting bolts are spaced on a 5-1/2″ x 7″ pattern. I resolved the difference by elongating the bracket holes horizontally by 1/4″ each.
The Garhauer mount on Summer Dance used six bolts through the transom because the previous owner wanted to raise the motor for some reason. Most C-22s only use four like the OMC mount. I’m not concerned about it being weak, though, because of the aluminum angle brackets that I installed on the inside of the transom to reinforce it for trailering with the outboard motor mounted. (The picture below is of the brackets installed with the old motor mount.)

After the bracket hole modification, I reused the old mounting fasteners and the angle brackets to install the OMC mount in the existing holes in the transom.
How’s it work? See for yourself in this video.
Other considerations
Here are a few other points to keep in mind with this mount.
The OMC mount has less vertical travel than the Garhauer mount so be sure your outboard motor will sit low enough in the water to prevent cavitation. If not, you might have to drill new holes in the transom to attach it lower than your old mount.
Without the outboard motor attached, the OMC mount rattles a bit in the raised position, not due to worn parts but by design. The latch rod and the slot through which it travels are not a close fit on purpose. The raised position is also where the gas cylinder does not apply any pressure. To prevent the rattling while trailering, put the mount in its lowered position to apply pressure from the gas cylinder. If you trailer like I do with your outboard mounted, the weight of the motor prevents rattling.

I couldn’t vote in your poll because my motor (a 4HP 4stroke long shaft Yamaha (less than a year old)) sits on a fixed mount. I pull it out of the water using the Yamaha’s own tilt mechanism. The 4HP is light enough to do that single handed, although I always have help to mount the motor on sailing days. It only has to push a 16ft boat, so it does a decent job.
Great information and love the site. Really inspiring. I’m using your jig method for refinishing my teak now. Saw the same bracket for 24.99 on ebay today.
OMC mount looks great but not sure if I’ll find one in Australia. To help with the lift of my Honda BF8 (40kg) I relaced the weak spring with 2 upgraded springs from the local farmers supplies. Takes all but about 10kg – great. To help with the lift when raising the motor from the cockpit i have a short rope. I also have a webbing harness that fits around the motor with a lifting ring that works quite well. Can’t find the website at present and the blurb is on the boat. I’ll try and add that in the future.
I’ve got this same motor mount with a 9.9 merc. My gas shock went south on me. Do you have any idea’s where I might find one, or can these be rebuilt .? I’m at a dead end
Sorry, Bill, I don’t know of any replacement or repair solutions.
$tingy
Old thread etc… but i just rebuilt mine. New o rings from plumbing supply. # 10 #18 and #32 were the sizes. The cap is a pain to get off, but it can be done. Fill half the tube with atf fluid, pop in 10 grams of dry ice, and put her all back together quickly. Wait 30 mins, should be good.
This past spring I needed a new outboard motor. I opted for a 9.8 Tohatsu model with power tilt. I too had to lean over the stern rail, unlock the button and hoist up my old Yamaha horizontally on the bracket. Now, I just push a button and the engine tilts up out of the water….so much easier! I can still opt to pull the bracket up vertically to change height positions of the motor, but it’s the horizontal power tilt with a push of a button that sold me!!
It doesn’t get any easier than that!
At my current stage of Venture 21 restoration work, I am not yet sure how my mount will work with my 6 HP Yamaha. It is a standard shaft, as was my old 7.5 HP Sears Gamefisher, used when Simran was last afloat. I have no stern railing, so that made access and use easier. That brings me to my questions:
1) Access to my mount bolts requires a challenging crawl beneath the cockpit seats and some shuffling of foam blocks. I’d love to add a locker on one or both sides. Do you have any posts or experience on adding such? I have seen to creative use of screw in/out inspection ports that would be another somewhat limited solution (no locker funtion).
2) I was out in rough water once (not intended – long story) where cavitation raised the old engine out of the water. I am sure the racing when the propeller was out of the water, not to mention inability to suck in cooling water, was not great for the motor. Have you seen folks convert a regular shaft to a long one and would that gain enough to keep it in the water in most conditions? (I’d not be out sailing if the waves are large with foaming whitecaps!)
Thanks for the great posts and resources!
Hi, Ed
Gig Harbor is one of the beautiful places I’m looking forward to visiting someday.
1) It’s a claustrophobic crawl in a C-22 too, so I know what you mean. I too have seen where other owners have used inspection ports to get at those spots but I’m not keen on them if there’s another way that doesn’t require cutting holes. If I didn’t already have lockers in my C-22 but wanted to add them, I’d first consider vertical water-tight hatches and leave the seat surfaces intact. You might find somebody online that has made the kind of modification before.
2) Sorry, I haven’t come across any conversions from short shaft to long shaft. Most guys just replace the outboard entirely or lower the mount to keep the prop in the water under more conditions. This is one scenario where I’d opt for making new mounting holes in the hull. That, in turn, places the motor lower on the transom, which makes it more of a grunt to raise, hence the reason for this article.
I hope that helps a little,
$tingy
Thanks, $tingy. I, too, am a bit concerned about water getting in via a ‘custom’ locker or inspection port, and about structural rigidity. Doing it on a vertical surface does make sense, especially for a port.
Yes, the ‘Harbor’ is pictuesque and there are many opportunities for additional exploration in the South Puget Sound (San Juans is what you hear about most often)…lots of ramps for trailer-sailors, too! If you head this way, give me a shout!
Cheers, Ed
I just bought a little 15 foot cat boat which has this mount on it. I’m pretty sure the gas shock is shot, it will not lift the bracket with no motor on it. Is that gas strut available?
Thanks,
Neil
Hello, Neil
Apparently, the strut is still available for around $200. If the mount still rotates freely, you might try adding compressed air through the Shrader valve on the end. I’ve heard of other owners that worked for. Or you can try finding another used mount on eBay or craigslist like I did. Just be sure it works correctly before you buy.
I just bought an OEM bracket on Craigslist and mine also has a bad gas shock too. There must be a gas shock company out there that is close enough to work. You indicated that they are available out there but where is out there? $200 seems a lot for this spring.
The price I cited was from Boats.net but they’ve since changed their site navigation and their search engine is pitiful so I wasn’t able to find you the part number. You might have better luck. Have you tried adding compressed air through the Shrader valve?
Thanks for the try Stingy. I’m going to try the dry ice and ATF fluid method. Would be nice to find out who OMC bought their shock from. Like you said I found another parts supplier who wanted $300. For one. I’m also looking at some off the shelf gas shock makers.
I’m trying to find a shock too. Mine is missing. Would appreciate someone able to give me measurements of fully extended and retracted.
Any ideas on how I can acquire another one of those OMC kicker brackets?
They come up for auction on eBay regularly but I don’t see one there right now. Just be sure you get one in good working condition and the cylinder has a good charge. Recharging the cylinder isn’t simple.
Just saw your video and thanks. Could you tell me what the travel distance is on the OMC
Hi, Larry
Vertical travel distance is 11″
$tingy
I have the same motor mount on my Ranger 20 but the spring is so strong I have to literally sit on the motor cover and bounce up and down to get the motor to drop into the catch in the lowered position, which is ridiculous but I’m sure is entertaining to onlookers. I haven’t yet fallen into the lake. The motor is a 6hp Johnson 2 stroke the weighs about 55 lbs. I weigh about 165-170 so it takes at least 200 lbs. to drop the motor into the lower position. What’s the solution?
Hi, Mike
It sounds like you’ve got a pretty fresh cylinder there. I believe OMC made a lighter rated version of the mount that might work better for your lighter motor. Maybe you could trade yours with somebody who needs more lift for their heavier motor. Are all the plastic bushings in good shape and have your tried lubricating all the hinge points to reduce any friction?
We have this mount on our 18’ catboat and we were having problems moving in and out of both locking positions without physically maneuvering the pin. Initially, we thought it was the cylinder, but after seeing your pictures, noticed the inner washers were missing. Also noticed the wire piece that the spring is hooked onto underneath, is free. Screws are still there. Hoping to get something like a cable clamp to hold it in place. Any tips on replacing the washers or what clamps might work?
Thanks,
Sharon
Hi, Sharon
What part number from the diagram in the article are the washers that you’re referring to? Try clamps like these:
https://www.amazon.com/LOKMAN-Stainless-Cushioned-Insulated-Installation/dp/B01IT43WVM?crid=2Q6DMBJWZ4KCW&keywords=heavy+duty+P+clips+1%2F4%22+stainless&qid=1654715961&sprefix=heavy+duty+p+clips+1%2F4+stainles%2Caps%2C141&sr=8-28&linkCode=ll1&tag=thetinsai-20&linkId=761b91d3ba05442e81d5b026957fd393&language=en_US&ref_=as_li_ss_tl
Let me know how they work out for you!
$tingy
Wow, thanks for your quick response! They were parts 16 and 32. Yesterday, we headed to the hardware store but never found a small enough clamp, so picked up an extra wide zip tie to cut up and drill holes. If that doesn’t work, we’ll order your clamp. Also got 2 1/2” washers that should work. Spring is looking pretty rusty- may need to replace that next. Hope it holds and we’ll take care of it next year.
Thanks again for your help.
Hi there!
Back again- any idea where I can get the circled parts from your diagram of the OMC hydraulic Outboard motor bracket? The part numbers are 19, 32 and the rod is 7. The rod is is the piece that moves up and down in the track and snaps in place when motor is raised or lowered. See diagram below. We tried a 1/2 rod but it didn’t work. Any idea of the length of that rod?
Thanks!Sharon
Sent from my iPad
I do not, sorry. The rod is 7/16″ in diameter and 5.5″ long with e clips in both ends though cotter pins would work too.